Configure system categories
Assets can be grouped into systems and systems have their own categories and subcategories. These categories allow you to easily find, track and sort systems on your project.
To use systems effectively, project administrators can begin by setting up system categories and subcategories.
Create system categories and subcategories
Click the Settings icon
 at the top-right.
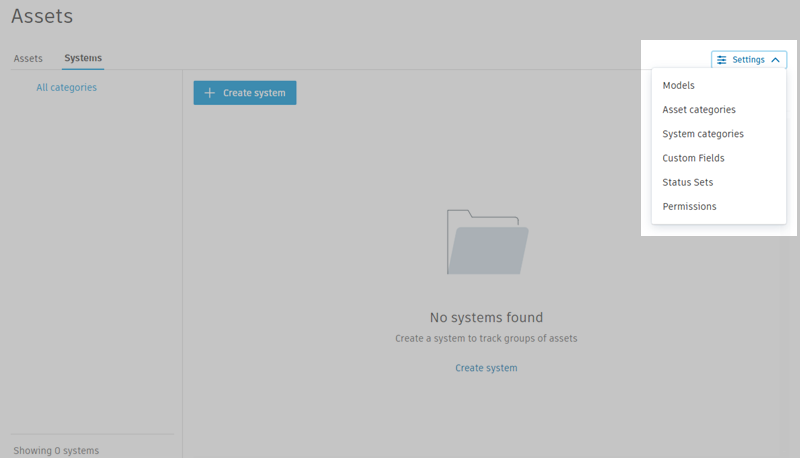
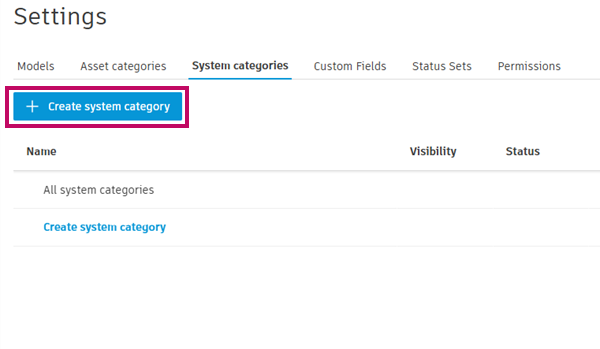
Click System categories.
Click Create system category.
Name your category and select a status set.
Note:- The Default status set contains a generic list of statuses that work in many situations. If needed, you can create your own status sets. See Configure Custom Fields and Status Sets for details.
- Top-level system category names must be unique.
Click Create and your asset category will now appear in the list of categories.
To create subcategories, click > next to the category you'd like to use as a top-level category, and then click Create system subcategory.
Note:- You cannot have subcategories with the same name under a top-level category. However, you can have multiple subcategories with the same name existing under different top-level categories.
- You can have up to nine subcategories under a category.
Next, you can select the category to edit its settings further.
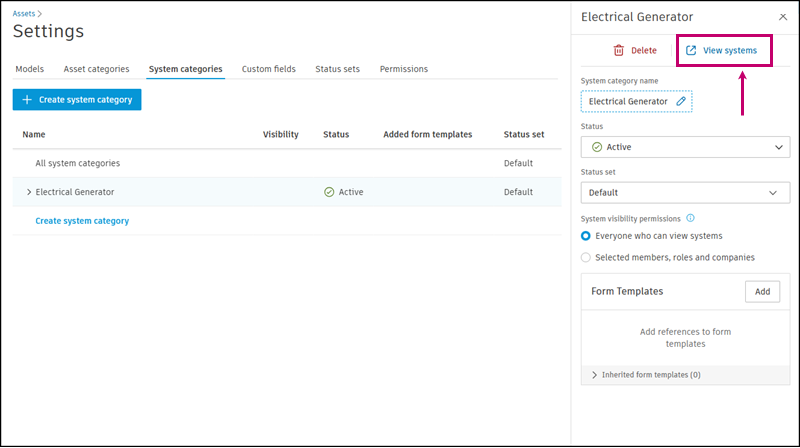
Edit system categories and subcategories
To edit a system category, navigate to the Assets Settings and click your category or subcategory in the System Categories tab.
In the right panel that appears, you can:
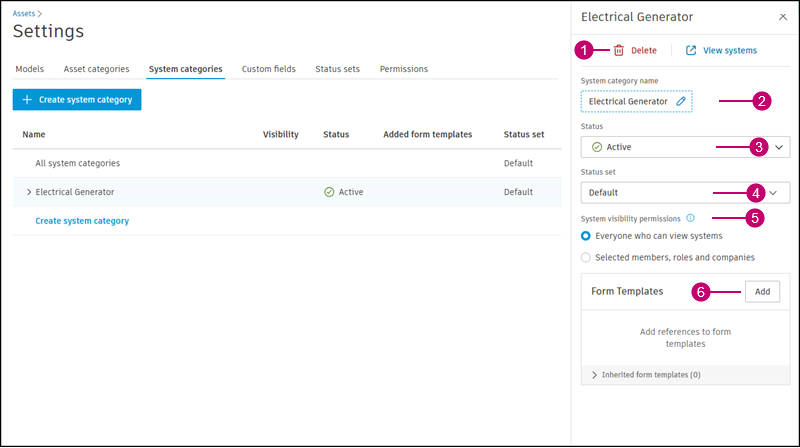
Click the Delete icon
 to delete the system category.
 Click the pencil icon
 to edit the name of the system category.
Select whether a system is Active or Inactive. When a system category is active, it is available for your project members to assign to a system, but you can make it inactive to hide it temporarily.
Change the status set associated with the system category.
Set system visibility permissions. By default, systems will inherit any visibility permissions on the assets and subsystems within them.
To add an extra layer of permissions, select Selected members, roles and companies and select from the drop-down menu which members, roles and companies can see the systems in this category.
Note: An icon appears next to any categories in the list that have modified permissions.Add form templates to system categories. When a member adds a form reference to a system of this category, this template will appear first. This allows you to direct your team to create the specific forms that are relevant to this system.
- Next to Form Templates, click Add.
- Select form templates to add.
- Click Submit.