Issues references and attachments
This topic discusses the concept of issue references and attachments and explains how to work with the two features on web.
Learn how to work with attachments and references on your Android and iOS mobile device.
In this topic:
Issues references and attachments
[Add References to Various Autodesk Forma Tools](#add-references-to-various-Autodesk Forma-tools)
About issue references
Issue references are links to files or items that exist in various Autodesk Forma tools and products. Adding a reference in an issue creates a two-way relationship between the issue and reference. For example, you can click on a reference to an RFI within an issue. It will direct you to that RFI within the RFI tool. Click on an issue reference within an RFI to be directed to the relevant issue.
Issue creators and project members with View, edit and assign permission or above can add references to photos, files, sheets, RFIs and other items from issues, on web and mobile. These members can also remove references from issues.
See Issue Permissions for more information about members' capabilities and limitations regarding references.
References are also controlled by each member’s subscription package. If a reference points to a tool that is not included in the member’s current package, the reference remains listed in the issue, but the member can't open it or view its details.
Learn how to work with references on your Android and iOS mobile device.
Add references to issues
Click the relevant issue in the Issues Log.
Navigate to the References section in the flyout panel.
Click Add references and select the relevant reference type from the references drop-down list.
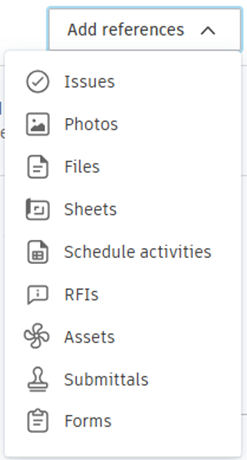 Note: If a hub administrator has turned off a tool it is hidden in the selectable references. See Products and Tools for more information.Note: PCOs are from the Cost Management module of Forma Data Management. If you do not have access and permission to access Cost Management, this option will be unavailable.Note: If a reference is associated with a tool outside your subscription package (for example, Submittals for some Build Essentials users), the reference appears in the list as unavailable. You cannot open the reference or view its details.
Add a desired reference as prompted.
When you add an issue as a reference on another issue, the referenced issue automatically has the original issue referenced on it as well. However, only the original issue shows the activity for this in the Activity Log.
Example of cross-referencing behaviour between issues:
- Open Issue #1 and add Issue #2 as a reference.
- Open the Activity Log to view the record for Issue #1. The Activity Log lists the activity of adding Issue #2 as a reference.
- Navigate to Issue #2 to view Issue #1 listed as a reference.
- Review the Activity Log to view the record for Issue #2. Note that there is no record of adding Issue #1.
Add References to Various Autodesk Forma Tools
Add references to photos
Select Photos.
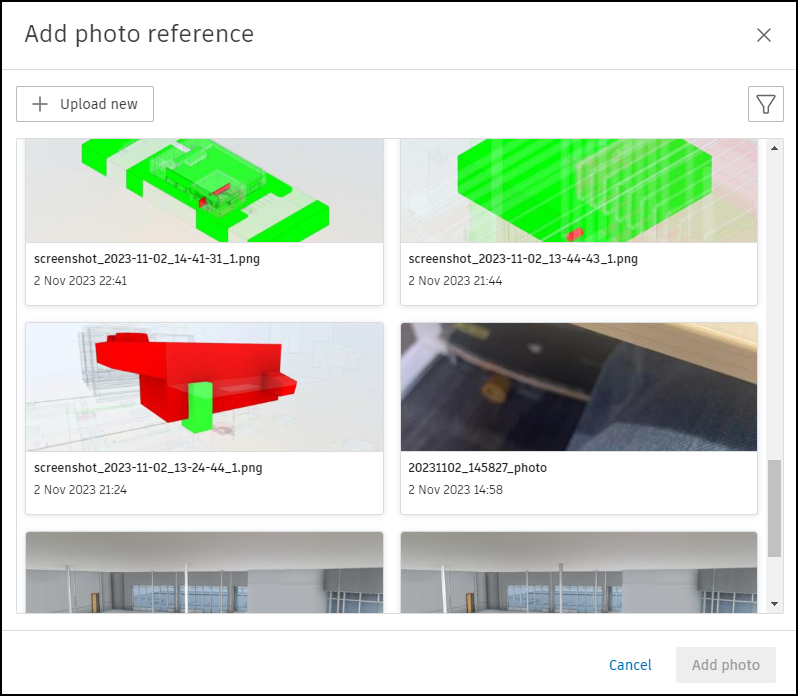
Click the relevant photos that you want to add.
Click Add photo. If you have selected multiple photos, for example 4, click Add 4 photos.
Learn about Photos here.
Filter photos
Click the filter icon
 .
.Select any of the following options to refine your selection:
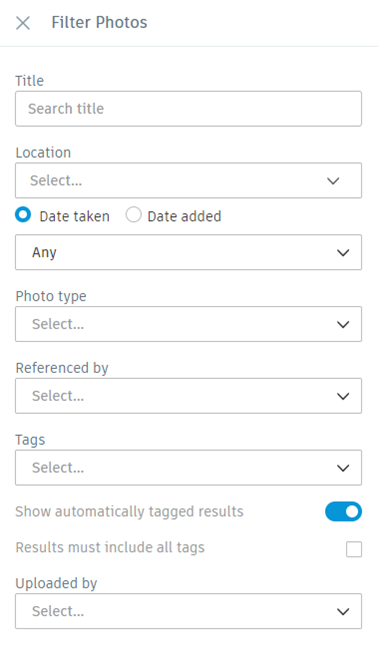 Note: Hide all filters by clicking the filter icon or clicking X in the Filter Photos panel. You can clear all filters by clicking the X next to the filter icon.
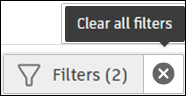
Upload new photos
- Click Upload new.
- Either drag a photo to the upload area or choose a file from your local drive.
- Click Upload.
A reference to the uploaded photo is now added.
Add reference to files
- Select Files.
- Select a file from the For the Site or Project Files folder.
- Click Add file.
To add a reference to a new file, you can first upload the document to the Files tool. Once uploaded, return to the issue to add it as a reference.
Learn about Files here.
Add references to Sheets
Click Sheets.
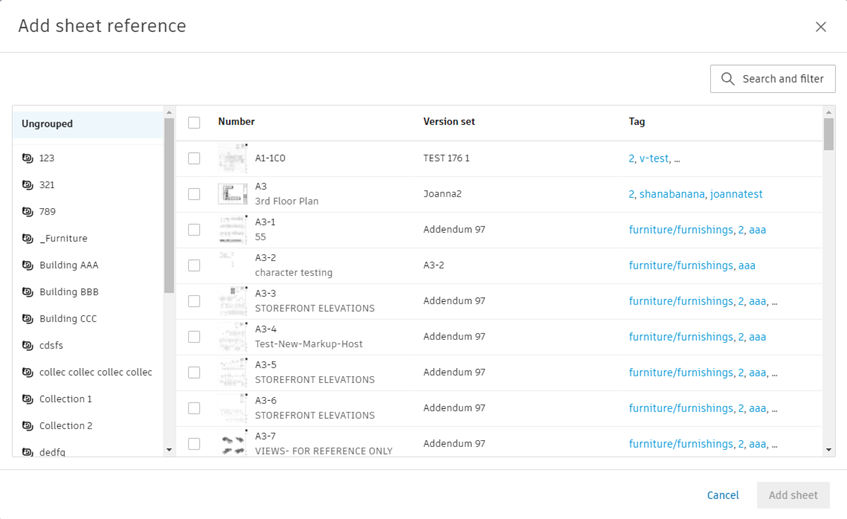
Click the relevant files or use Search and filter to find desired files by name.
Click Add sheets.
Learn about Sheets here.
Add reference to RFIs
You can add references to existing RFIs or create RFIs that you want to reference from an issue.
Reference existing RFIs
- Select RFIs.
- Select the relevant RFIs from the list or use the search box to find RFIs by name.
- Click Add RFIs.
Create and Reference New RFIs Administrators and RFI managers can create an RFI from an issue. Administrators, RFI managers, and members with View, edit and assign permission or above can create an RFI from an issue.
- Select RFIs.
- Click Create new.
- Create the RFI by completing the fields.
- Click Create RFI.
Learn about RFIs here.
Add reference to assets
- Select Assets.
- Select the relevant asset from the list or use the search box to find assets by name.
- Click Add asset.
To add a reference to a new asset, you can first create the asset in the Assets tool. Once created, return to the issue to add it as a reference.
Learn about Assets here.
Add Reference to Correspondence
- Select Correspondence.
- Select the relevant correspondence from the list, or use the search box to find correspondence by name.
- Click Add correspondence.
To add a reference to new correspondence, you can first create the correspondence in the Correspondence tool. Once created, return to the issue to add it as a reference.
Learn more about Correspondence here.
Add Reference to Forms
- Select Forms.
- Select one or more forms.
- Click Add forms.
You can also create a form by clicking Create form and selecting a template to use. Fill in the form details and click Add reference.
Learn about Forms here.
Add reference to submittals
- Select Submittals.
- Select one or more submittals.
- Click Add items.
To add a reference to a new submittal, you can first create the submittal in the Submittals tool. Once created, return to the issue to add it as a reference.
Learn about Submittals here.
Add Reference to Reviews
- Select Reviews.
- Select one or more reviews.
- Click Add reviews.
To add a reference to a new review, you can first create the review in the Reviews tool. Once created, return to the issue to add it as a reference.
Learn more about Reviews here.
Add references to PCOs
- Select PCO.
- Select one or more PCOs.
- Click Add PCO.
You can also create a PCO by clicking Create PCO. Fill in the PCO name and description and click Create.
Learn about PCOs here.
Add references to Schedule Activities
Select Schedule activities.
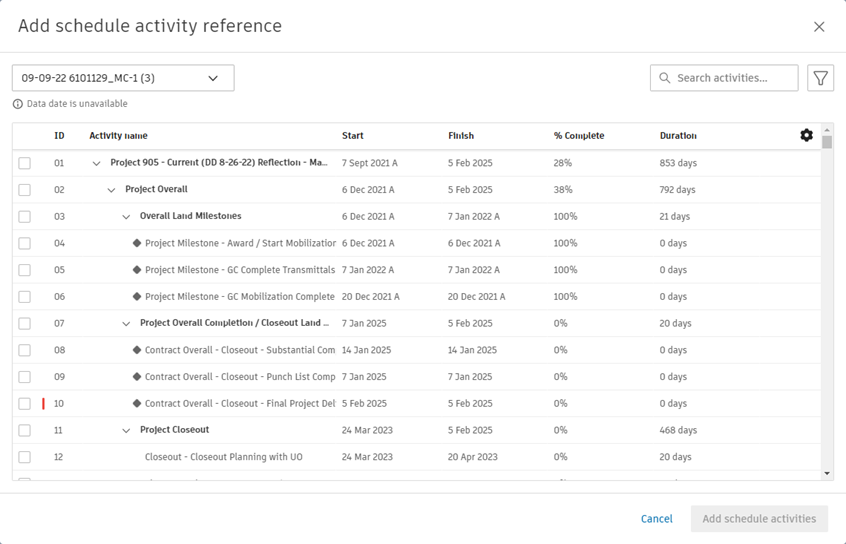
Select one or more scheduled activities.
Click Add schedule activities.
Learn more about Schedule here.
Reference Visibility by Licence
Reference visibility is determined by a member’s current subscription package and assigned product access.
- If the tool is included in the member’s package, and their role permissions allow it, the member can open the reference and view its details
- If the tool is not included in the member’s package, the member can't see that a reference exists, and can't access its details or destination
- If a member’s licence changes, reference visibility is automatically updated to reflect the new package
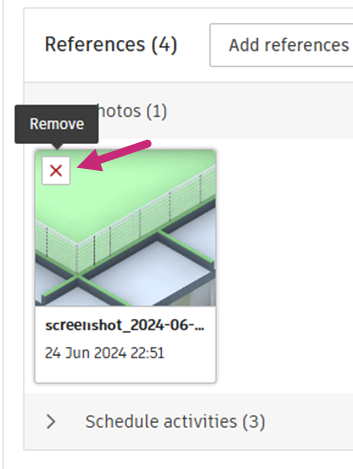
Remove References from Issues
You can easily remove any reference by following this process:
Navigate to the References section in the flyout panel of the relevant issue.
Hover over the reference that you want to delete.
Click the
 icon.
icon.Click Remove.
About issue attachments
Issue attachments are different types of files that are associated only with a specific issue, and are not visible across other Autodesk Forma tools. Attachments are included in exported issue reports.
Project members with the permission to view a specific issue can view attachments associated with that issue. Issue creators and project members with Manage issues permission or above can delete issue attachments.
See Issue Permissions for more information about members' capabilities and limitations regarding attachments.
Learn how to work with attachments on your Android and iOS mobile device.
The video below shows how to work with issue attachments.
Add attachments to issues
You can add attachments to existing issues or at issue creation.
Click the relevant issue in the Issues Log.
Navigate to the Attachments section in the flyout panel.
Add relevant attachments:
- Drag and drop desired files into the upload area
- Browse your computer to select single or multiple files
- Copy or grab a screenshot and paste it into the Attachments area
- Use a camera (only on mobile)
See Supported Files Web for information about the supported file types on web.
Download attachments
Navigate to the Attachments section in the flyout panel of the relevant issue.
Follow these steps:
In the thumbnail view
 :
:- Click the More menu
 in the bottom right corner of the attachment that you want to download, and then click Download.
- Click the More menu
In the list view
 :
:- Click the Download icon
 on the right of the image.
- Click the Download icon
Tip: You can also download an attachment by clicking it and then clicking the Download icon in the top right of the page that opens.
Delete attachments
You can delete any attachment by following these steps:
Navigate to the Attachments section in the flyout panel of the relevant issue.
Follow these steps:
In the thumbnail view
:Click the More menu
in the bottom right corner of the attachment that you want to delete, and then click Delete.
In the list view
:Click the More menu
on the right of the image, and then click Delete.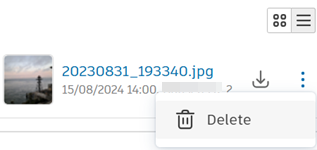
Key differences between issue attachments and references
| Action | Attachments | References |
|---|---|---|
| Available on mobile | ||
| Included in exported reports | ||
| Visible across Autodesk Forma tools and products |