Quick AI Issue Creation on iOS BETA
Use Quick AI Issue Creation to create issues faster on site. This feature lets you capture issues by taking a photo and adding a short description. AI enriches your issue by automatically filling in fields like title, description, root cause and custom fields.
Open the Autodesk Construction Cloud mobile app.
Tap the project you want to open.
Do one of these:
Tap Issues from the bottom menu. If you don't see Issues, tap More
 and find Issues. Tap the Quick Create Issue button in the bottom left of the issues list.
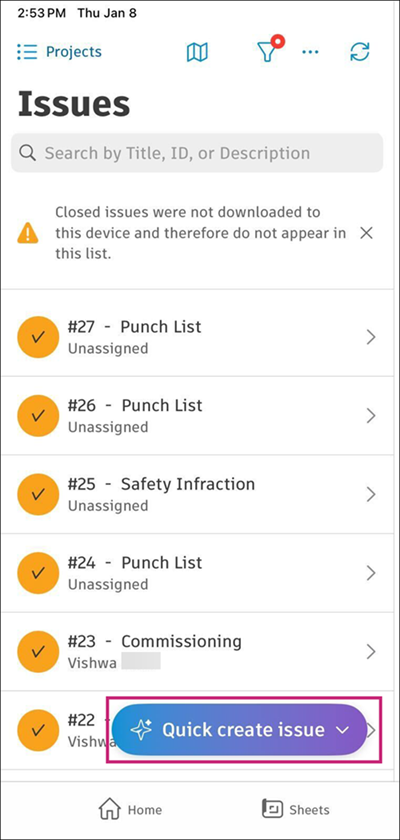
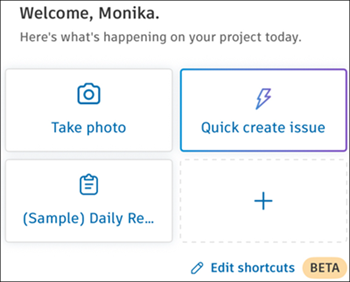
From the Project home page, tap the Quick AI Issue shortcut.
The camera opens automatically. Take a photo of the issue. You can also select images from your device library by tapping
 in the bottom left of the screen.Note: The issue is created when you take or select the first photo. You can add up to five photos for AI processing.
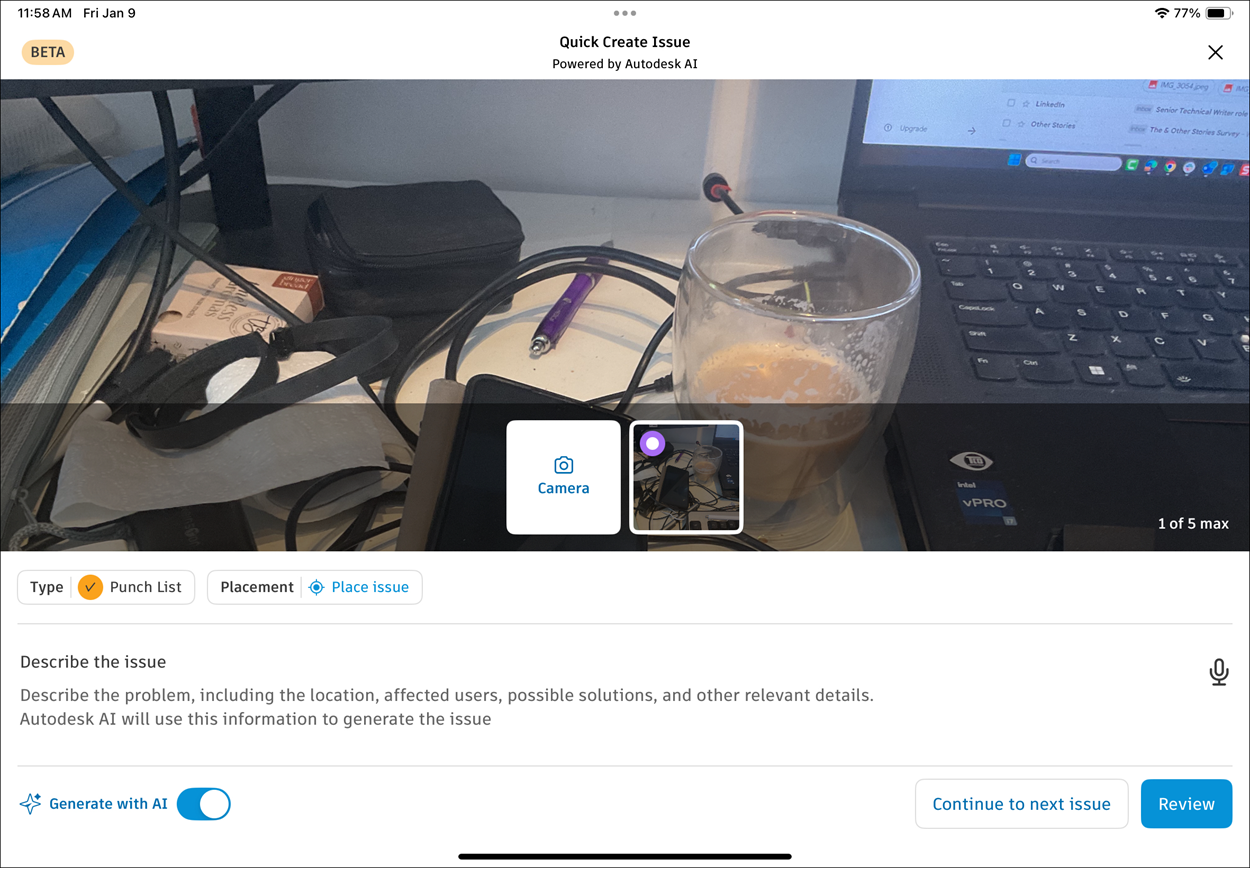
In the Quick Create Issue view, add the following details about the issue:
- Photos: Tap the camera icon to add more photos. Tap any attached photo to view or delete it. You must keep at least one photo.
- Describe the issue: Enter a short description. You can type or use speech-to-text. This description helps AI understand the issue context.
- Type: Select the issue type. The default is Snag List. Your selection stays the same for the next issue you create.
- Placement: Add a placement on a sheet or file. The last sheet or file you opened appears by default.
- Markup: Add markups to your photos if needed.
Do one of these:
- Tap Continue to next issue to quickly create more issues, one after the other.
- Tap Review to finalise and return to the Issues list.
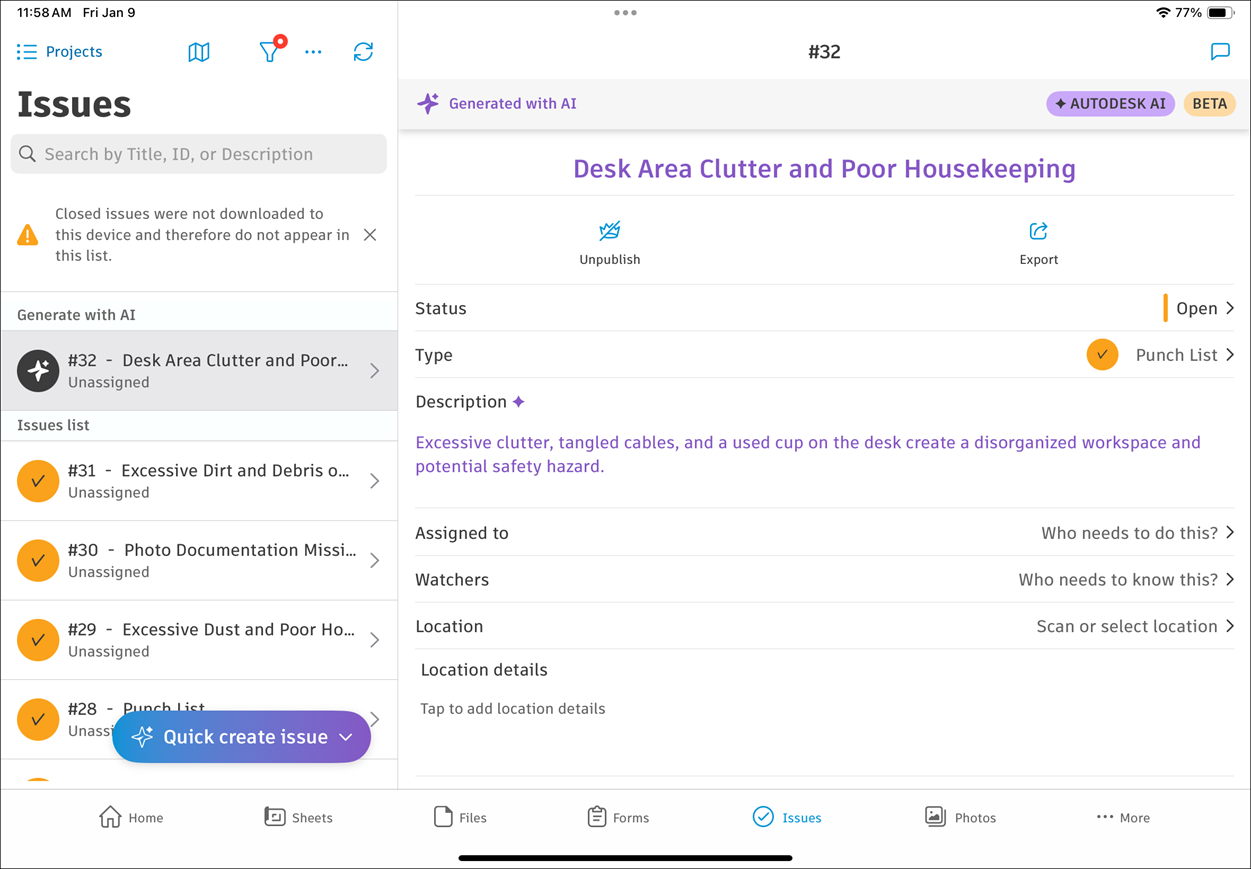
AI enrichment process
After you have created an issue with Quick AI Issue Creation, AI analyses your photo and description to fill in issue fields automatically.
AI enriches the following fields, which appear marked in purple:
Title
Description
Root cause
Custom fields (text, paragraph and drop-down types)
Note: Issues being enriched by AI always appear at the top of the Issues list.AI enrichment takes less than 20 seconds. You can continue working while AI processes your issues.
If you close the app during AI enrichment, the process stops. You'll see an error message on the issue.
Review and approve AI suggestions
After AI enriches an issue, review the suggestions before finalising the issue.
In the Issues list, tap an issue that shows Ready to review.
Review the AI-generated content. Fields filled by AI are marked with a special indicator.
You can edit any field that AI filled in. When you edit a field, the AI indicator disappears.
Generate with AI toggle
You can turn off AI enrichment while still using the quick create flow.
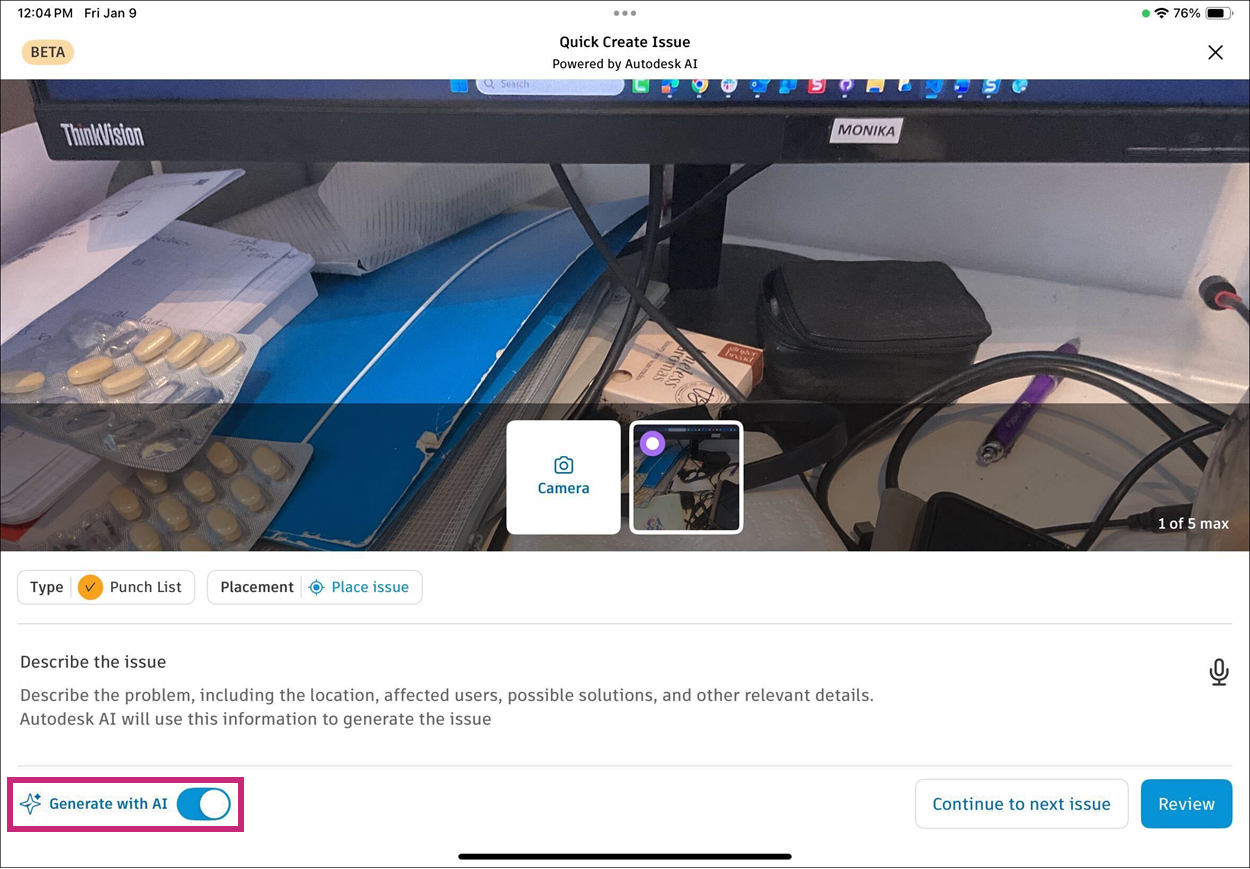
In the Quick Create Issue view, find the Generate with AI toggle.
Turn off the toggle. The quick create flow continues without AI enrichment:
- The Describe the issue field becomes a standard Description field.
- You can add unlimited photos.
- When you tap Review, the issue is added to the Issues list immediately.
The toggle state stays the same for your next issue.