Create Progress Tracking Mark-ups
Once you've configured object types and activities, you can create mark-ups to track installation directly on your project sheets.
Enter Progress Tracking Mode
To begin creating mark-ups, navigate to the Sheets tool in Autodesk Build.
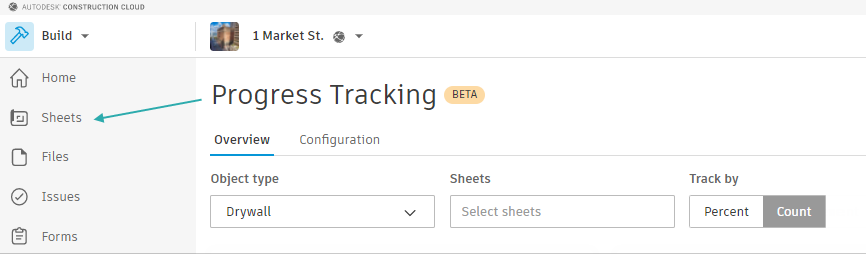
Next, select a sheet that you want to create mark-ups on and open it. Then, click on the Progress Tracking icon to open the Progress Tracking panel.
![]()
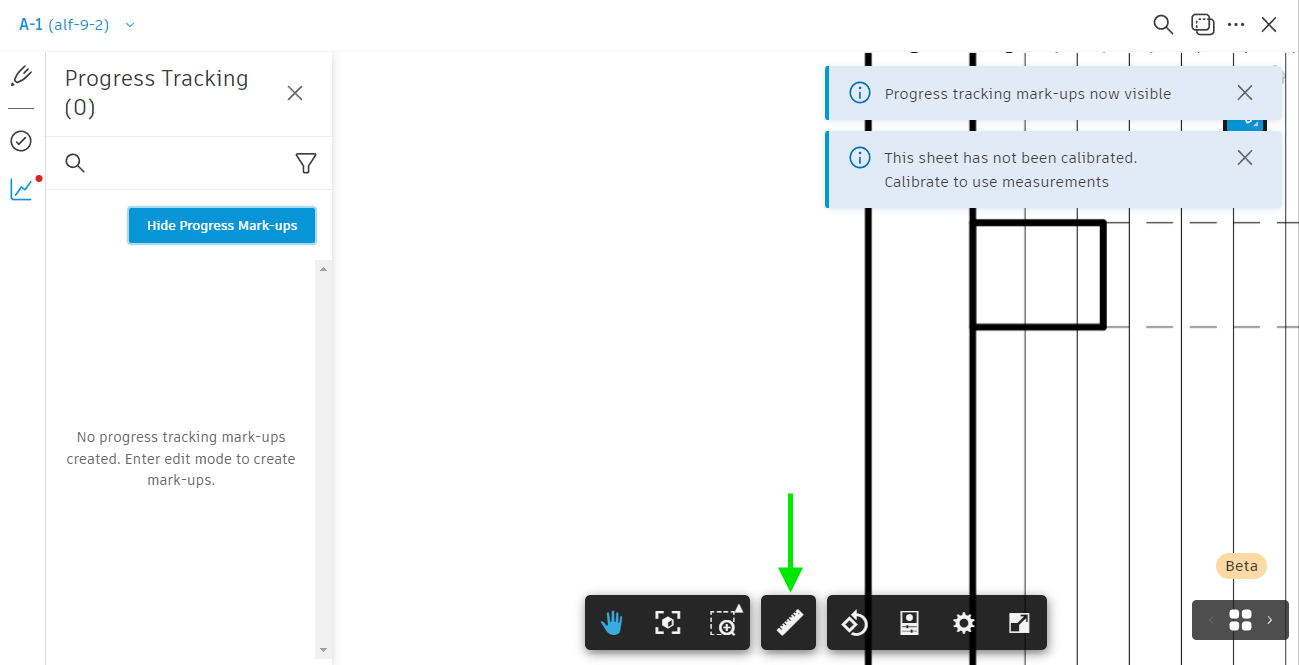
Finally, click Show Progress Mark-ups to enable progress tracking mode.
![]()
When you show progress tracking mark-ups, all other mark-ups on the sheet will be hidden.
The number in parentheses indicates how many progress tracking mark-ups exist on the sheet.
Calibrate Sheet for Progress Tracking
To see measurement data for progress tracking object types, you must calibrate the sheet you are working on.
- While in progress tracking mode, click on the ruler icon in the bottom toolbar.
- Click on the calibrate icon in the toolbar.

- Click Continue. You will be directed to set the calibration for this sheet.
- On the next page, select Set scale or make a 2-point calibration from the drawer on the right. Calibrate the sheet accordingly. Further instructions can be found here.
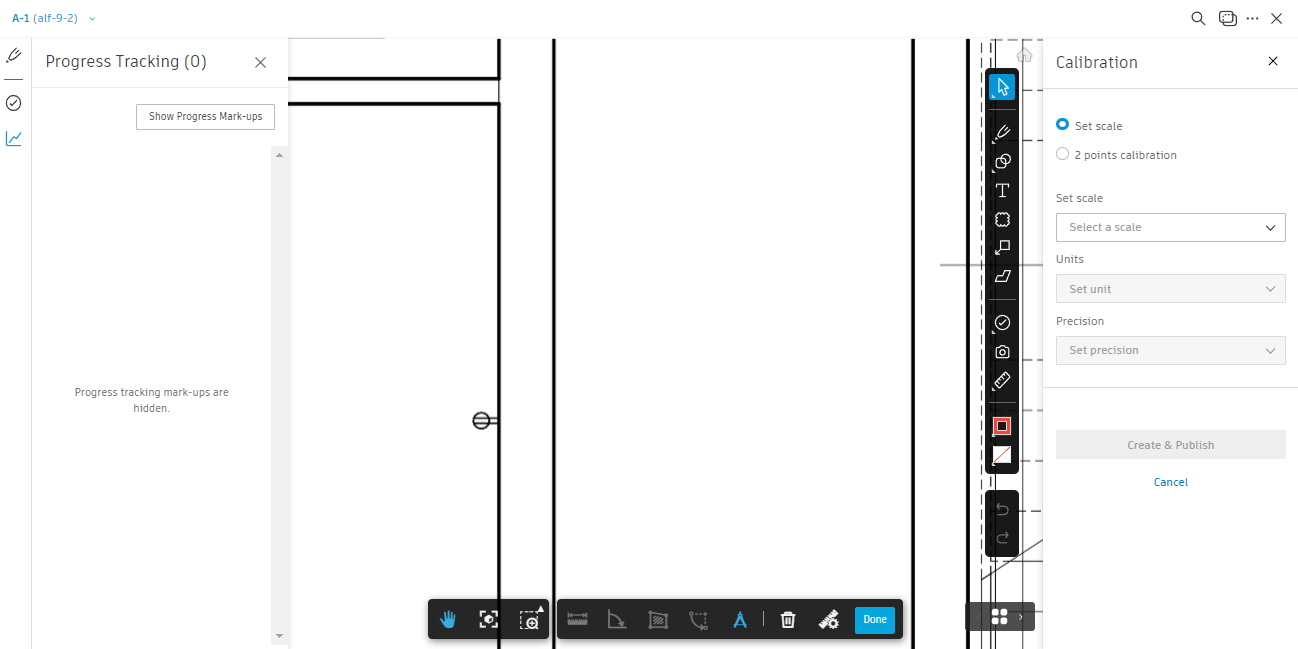
- Click Create & Publish.
- Click Done in the bottom toolbar.
- Click Show Progress Mark-ups to continue working in progress tracking mode.
All sheets with progress tracking mark-ups of that object type must be calibrated to populate data into the progress tracking dashboard.
Create a Progress Tracking Mark-up
- In progress tracking mode, click the mark-ups icon on the right-hand side of the screen. Select the object type to track and the mark-up tool you want to use to track it.
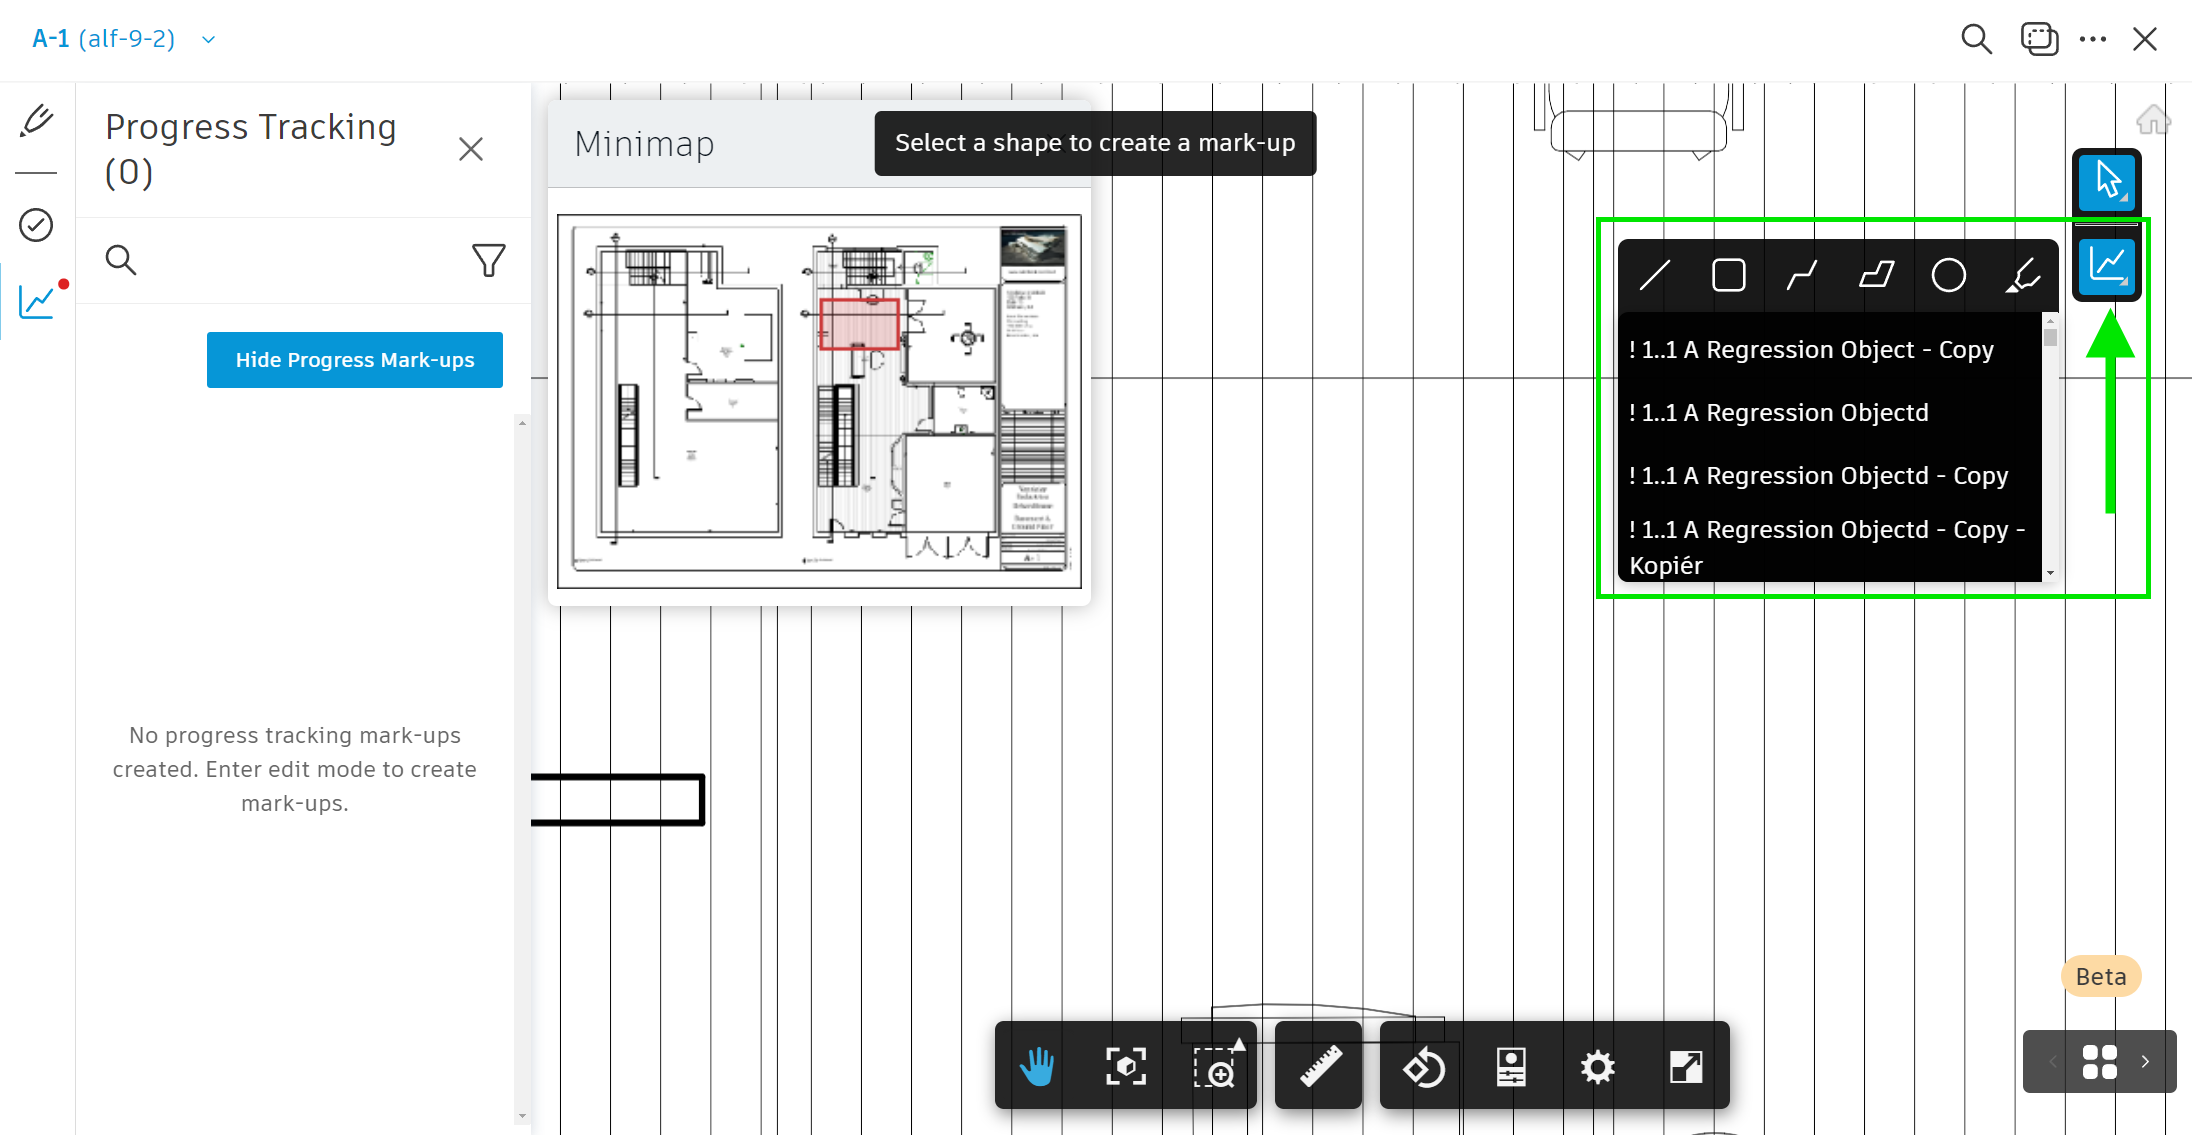
- You can create mark-ups using a line, a rectangle, a polyline, a custom polygon, an ellipse or a highlighter. Different mark-up types provide different measurement data for calibrated sheets in the dashboard and the spreadsheet export.
- Linear types of mark-ups (linear feet or metres): line, polyline, highlighter
- Area types of mark-ups (square feet or metres): rectangle, polygon, ellipse
- With the object type and mark-up tool selected, find the appropriate area on the sheet and create the mark-up. A new object will be added to your progress tracking panel.
You can double-click the mark-up type icon to lock the creation tool to create multiple progress mark-ups in a row. You can hold SPACEBAR to pan and click ESC to exit.
The new markup will appear in grey until you update the status of the progress tracking object.