Review and Respond to Issues
When something is marked as an issue to indicate that a design needs investigation, it is assigned to the relevant project member and moved to the Issues tool. The assignee, owner and other project members can view the issue details and track the changes being made to resolve the issue.
Issues created in Model Coordination are also displayed in the Issues tool in Forma Data Management. The assignee receives an email notification when issues are created in Model Coordination which links to open the issue in Forma Data Management by default.
Respond to Issues in Model Co-ordination
Issue assignee
In Model Coordination, click the Issues tool.
You can respond to issues by accessing the Details tab in the issue panel, in either the issues log or the viewer:
- Issues log: Click the relevant issue to review and edit entries in the Details tab directly in the Issues tool.
- Viewer: Click the relevant issue in the Issues tool, and scroll to the Placement section of the Details tab. Click the file name to open the issue in the viewer, where you can see the full context of the models that were open when the issue was created.
If you are using the viewer, use the viewer toolbar to take measurements and inspect model properties to help you understand the issue and how to resolve it.
Note: All issues related to the models open in the viewer are displayed in the Issues tab , including issues not created in Model Coordination. If you select an issue not created in Model Coordination, the pushpin is shown in the viewer. Model highlighting is available for Navisworks clash issues created with the Navisworks Coordination Issues Add-In version 5.1.0 or later, when all referenced files in a clash have stable IDs. Other non-Model Coordination issues are shown without clash highlighting.
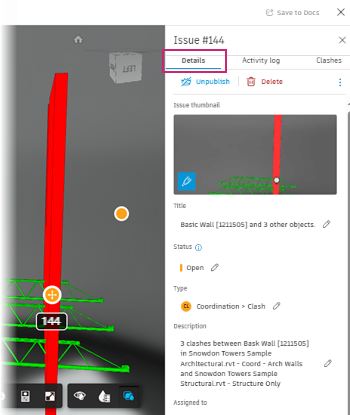
Use the Details tab in the issue panel to review the issue details, including any references and comments.
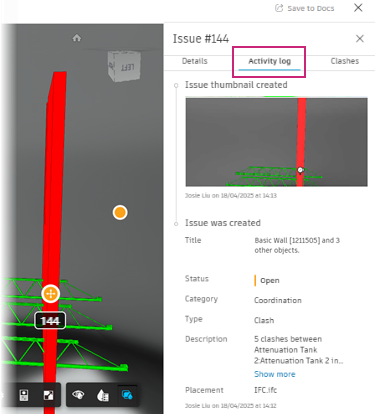
You can also use the Activity Log tab to view previous activity on the issue:
When working with issues created from clashes or clash groups, or issues that are specified as Clash type issues, you can use the Clashes tab to see the name of the placement model (the model on which the issue drawing pin was placed) and the number of clashes that are involved in the issue:
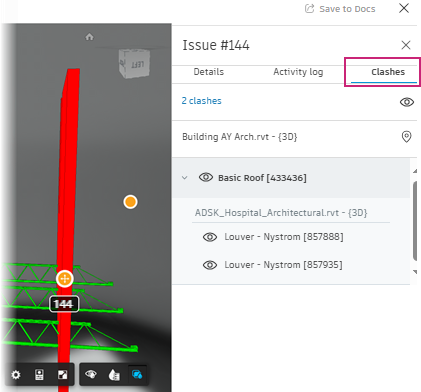 .
You can click on each clash in the list to isolate them in the viewer, and use the
 icons to hide or show all or individual clashes.Note: The Clashes tab is only available when viewing clash issues in the Model Coordination viewer. It is not available from the Issues tool, or anywhere in Forma Data Management or Forma Build.
When you have decided what action is required to resolve the issue, you can:
Make changes to the affected models and upload updated versions to the coordination folder.
Use the Details tab in the issues panel to attach references such as photos, or add attachments to demonstrate the changes made or required.
Use the Details tab in the issues panel to add comments. The issue assignee can see all comments.
Tip: You can use @ to tag other project members or the issue creator and ask a question or prompt them to take action. They receive an email notification.Optionally, click the More
 menu to export an issue report.
Use the Status drop-down list to change the issue status to reflect the progress.
Issue creator
When an issue has been closed, the issue creator may want to verify that the issue has been resolved. To do so:
Follow the Issue assignee steps 1–4 above.
If further action is required, you can:
Change the status of the issue back to Open.
Change the assignee.
Attach references such as photos with markups, or add attachments to demonstrate the changes required.
Add comments.
Tip: You can use @ to tag another project member and ask a question or prompt them to take action. They will receive an email notification.Optionally, click the More
menu to export an issue report.
When you are satisfied that the required changes have been made and there is no longer a clash, change the issue status to Closed.