About Reports
A report is a customisable and formatted document that summarises items such as issues, RFIs, forms, assets or submittals.
A report can be scheduled to run automatically on a regular cadence, exported and shared with relevant stakeholders to help construction teams maintain transparency and ensure that all aspects of a project are tracked, documented and communicated.
You can generate reports in various tools in your Autodesk Forma™ products. For example, you can export issue reports while working on projects created within Forma Data Management, or RFI reports when using Forma Build.
Reports can also be created in the Reports tool. The tool provides a central location for Superintendents, Foremen, Architects and other project members to view, create, schedule and share reports. With Reports, project members can communicate important project data and distribute this data among the people who need it most.
In this topic, you can learn how to:
Access the Reports Tool
Sign in to the Autodesk Forma using your credentials.
Click the product picker and select one of the following products:
Click the Reports tool.
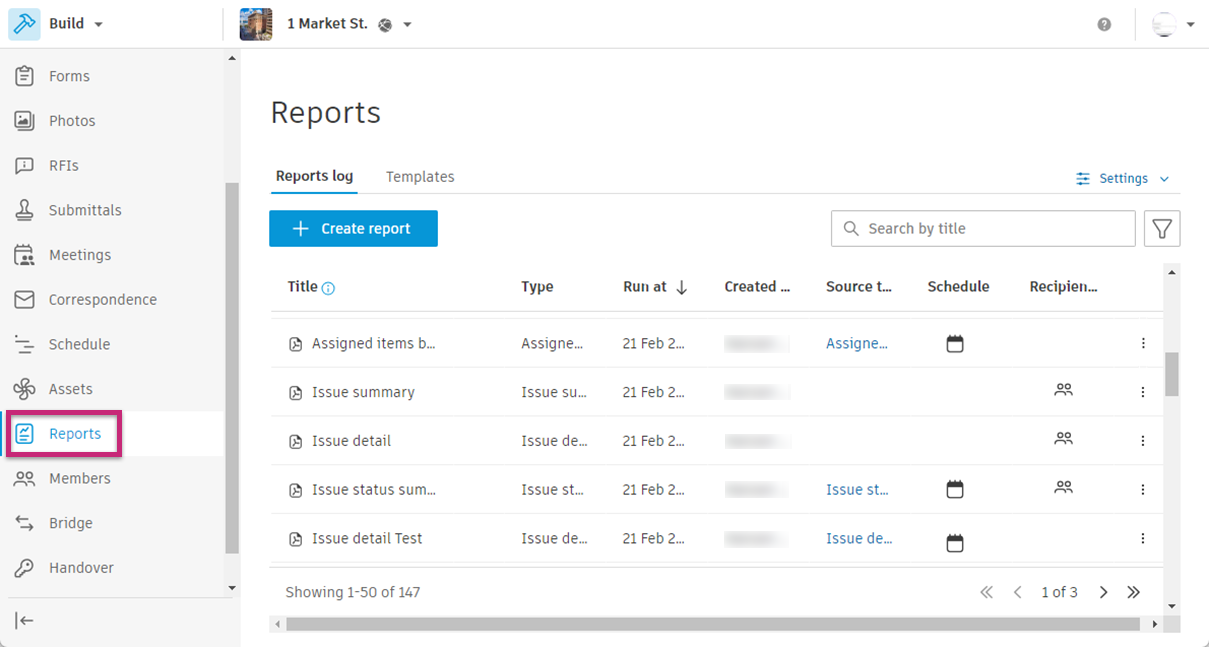 Note: The Reports Log lists reports that have been created in the tools relevant to the product you are in. For example, if you are in Build, you can see Submittal reports but you can't see those in Forma Data Management. See Report Types for more information.
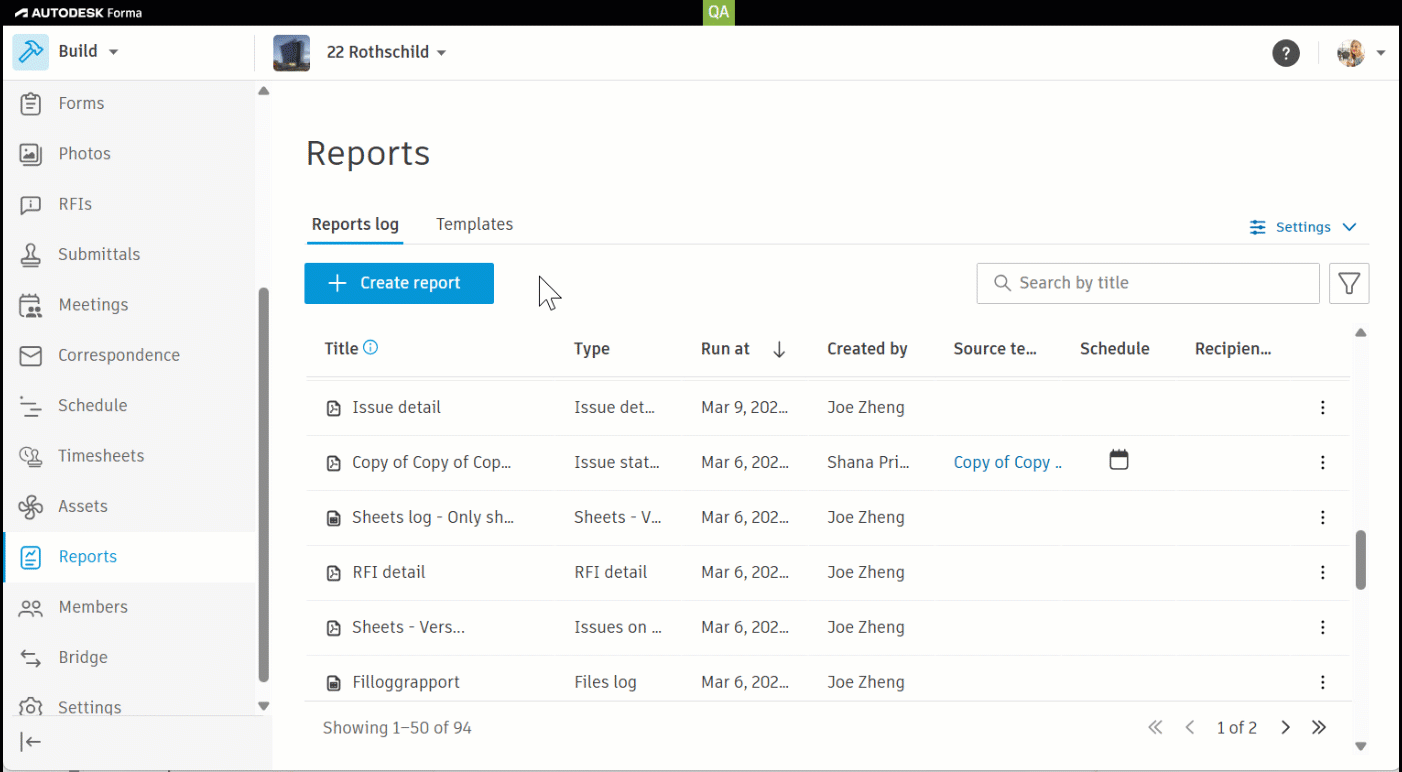
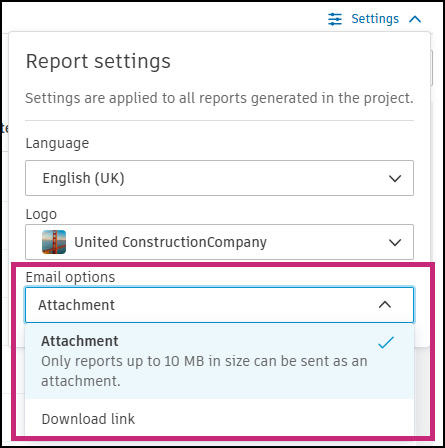
Project Administrator Settings in Reports
Project administrators can configure the language and logo for all reports through the Settings icon ![]() .
.
The settings are applied to all reports generated in the project.
![]()
You can configure the following settings:
Supported Languages in Reports
The following languages are supported by the Reports tool:
- Chinese (Simplified)
- Chinese (Traditional)
- Czech
- Danish
- Dutch
- English (UK)
- English (US)
- French
- German
- Japanese
- Norwegian
- Polish
- Portuguese
- Spanish
- Swedish
See Create and Schedule Reports to learn how to create customised reports containing data relevant to your project needs and how to schedule reports to run them automatically.
Uploading Hub Logo in Reports
You can choose a logo for the hub. To upload a custom logo:
Click the Logo drop-down menu.
Click Upload custom logo.
Add a file from your computer.
Note: All uploaded logos must meet the following requirements:Image type: Images must be either a JPEG, GIF, PNG or BMP file.
File size: Image files can't be larger than 4 MB.
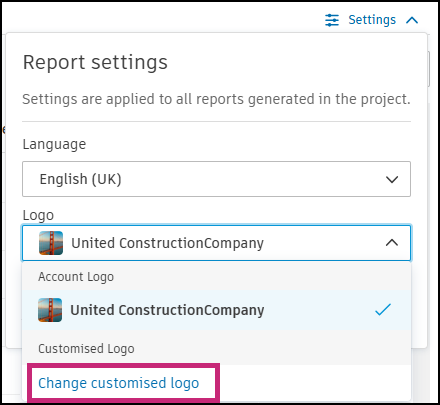
To change a logo, click Change custom logo, and then add another file from your computer.
Email Options in Reports
You can choose whether members should receive an email with a link do download a generated report, or with an attachment containing the report.
Attachment: When you choose this option, you'll receive an email with an attachment containing the generated report.
Note: Only reports up to 10 MB can be sent as an attachment.Download link: When you choose this option, you'll receive an email with a link to download the generated report.
Want to learn more about this topic?
Take a look at our video courses to learn how to access all reported data relevant to your project role across all workflows and features of Forma Data Management.