Lego Product Visualization

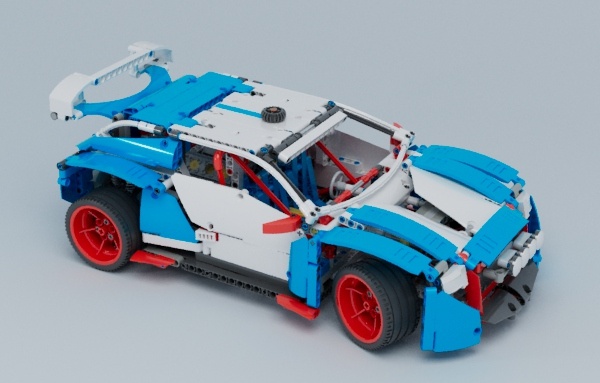
This tutorial will cover how to light, shade, and render a CAD model of a Lego technic rally car. It will show you how to light the car model using Arnold area lights (quad_light). It covers how to realistically shade the Lego model using the standard_surface with round_corners and how to use the clip_geo shader to create a cross-section animation effect. Once shading and lighting of the scene are complete we will cover how to create a stylized look using the Arnold toon shader that could be used in an instruction booklet. Finally, we will tweak some of the Arnold render settings to improve the quality of the final render. More examples of Lego renders using Arnold can be found here.
The clip_geo and toon shaders do not currently work with GPU rendering. This is planned to be fixed in a future release.
Importing the CAD Data
- Start off by downloading the CAD model (link above).
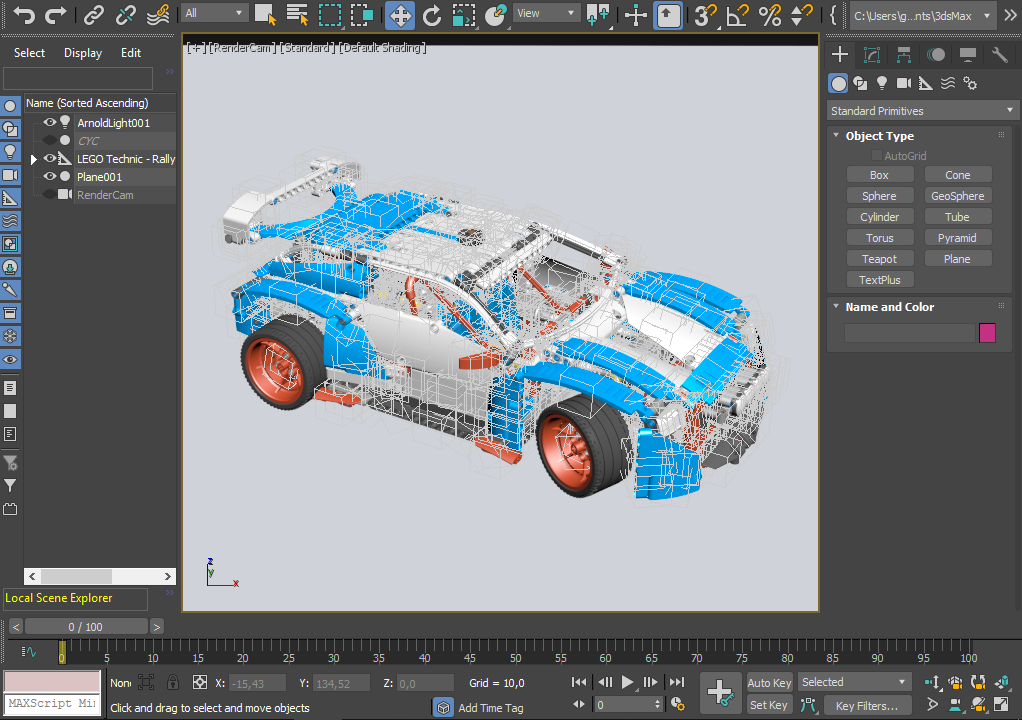
- Extract the contents and import this step file: LEGO Technic - Rally Car (42077).stp
- Position and rotate the car so that it sits flat on the grid as in the above animation.
- Create a floor plane (or use the cyclorama from the studio lighting scene in the above link).
- Assign a standard_surface shader (from the Slate Editor) to it. Reduce the specular_weight to 0 (we don't want any distracting specular reflections from the cyclorama to distract from the car model).
Lighting
We will add an Arnold quad_light to the scene. This light will mimic a softbox studio lighting setup as can be seen in this tutorial. Alternatively, you can download a pre-made lighting studio from the link at the top of the page.
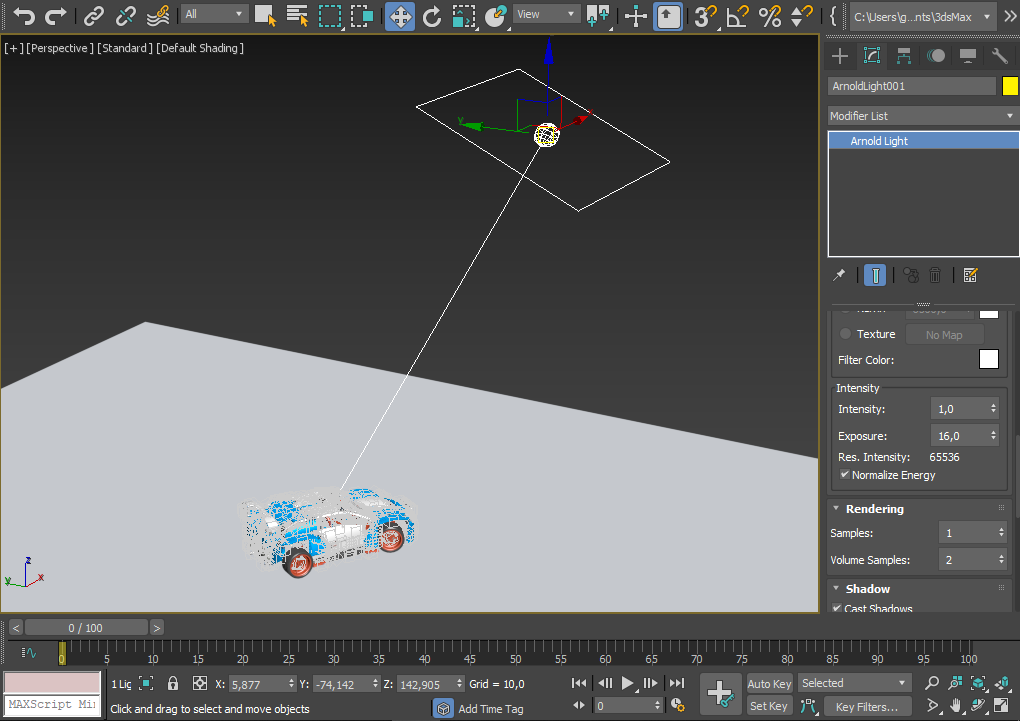
- Go to lights in the Create tab (Command Panel) and choose Arnold from the menu. Select Arnold Light (quad_light by default) and click in the viewport to create it. Position, orient and scale it so that it is slightly larger than the car as in the image below.
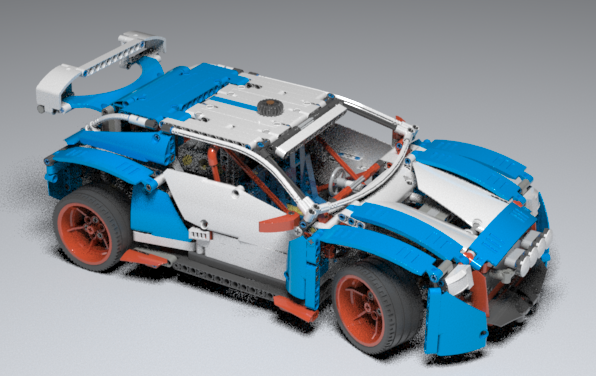
Scene lit with quad_light (exposure: 16)
- If you render the scene, it will appear black using the default light exposure. Increase the exposure to around 16. You should see something like the image below. Don't worry about the noise at this stage. It is because the default light samples are set to 1 and the default Camera (AA) samples are set to 3 for fast interactive rendering. We will adjust these settings later on when we are ready for final rendering.
Exposure is an f-stop value that multiplies the intensity by 2 to the power of the f-stop. Increasing the exposure by 1 results in double the amount of light.
Note that the Physical Scale value in the Exposure Control (Environment and Effects) has an influence over how your 3ds Max and Arnold lights render. You may need to disable or adjust the Physical Scale to get the intensity that you expect.
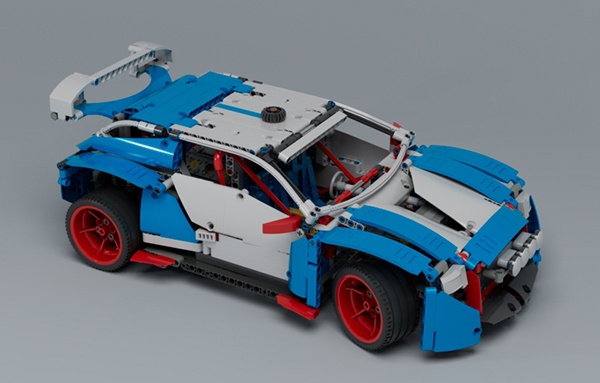
Realistic Shading using Standard Surface
Scene Converter
We will use the Scene Converter (Rendering -> Scene Converter...) to convert the in-built Physical materials to Arnold standard_surface shaders.
- Under Current Preset, choose Arnold.
- Under Materials (Conversion rules), choose Physical Material to Arnold Standard Surface [No Displacement].
- Select Convert Scene. It should then proceed to convert the materials.

- Once it has completed, go to the Slate Material Editor window. You should see that all of the Scene Materials are now standard_surface.
Standard Surface
We now want to create a set of realistic plastic shader parameters that can be replicated across all of the standard_surface shaders. Change the following parameters for each standard_surface shader so that the bricks appear more like plastic:
- specular_ior : 1.55 (plastic).
- specular_roughness : 0.2.
- coat_weight : 1. This will provide a shiny clear coat layer on top of the specular layer.
- coat_roughness : 0.1.
- coat_ior : 1.55 (plastic).
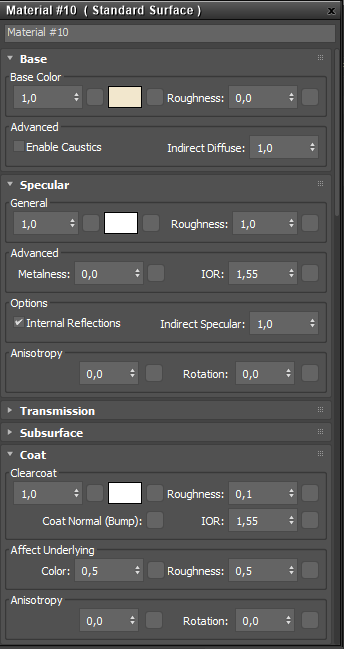
Lego plastic shader settings
Round Corners
This shader modifies the shading normals near edges to give the appearance of a round corner. It can be used with hard surface models where bevels have not been modeled to simulate a round beveled edge, thus saving valuable modeling time.
- A simple way to use this shader is to connect its output normal to the standard_surface.normal.
- Increase the radius to around 0.1 to see the effect. You may need to increase the number of samples for final frame rendering.
 |
 |
| without round_corners | with round_corners |
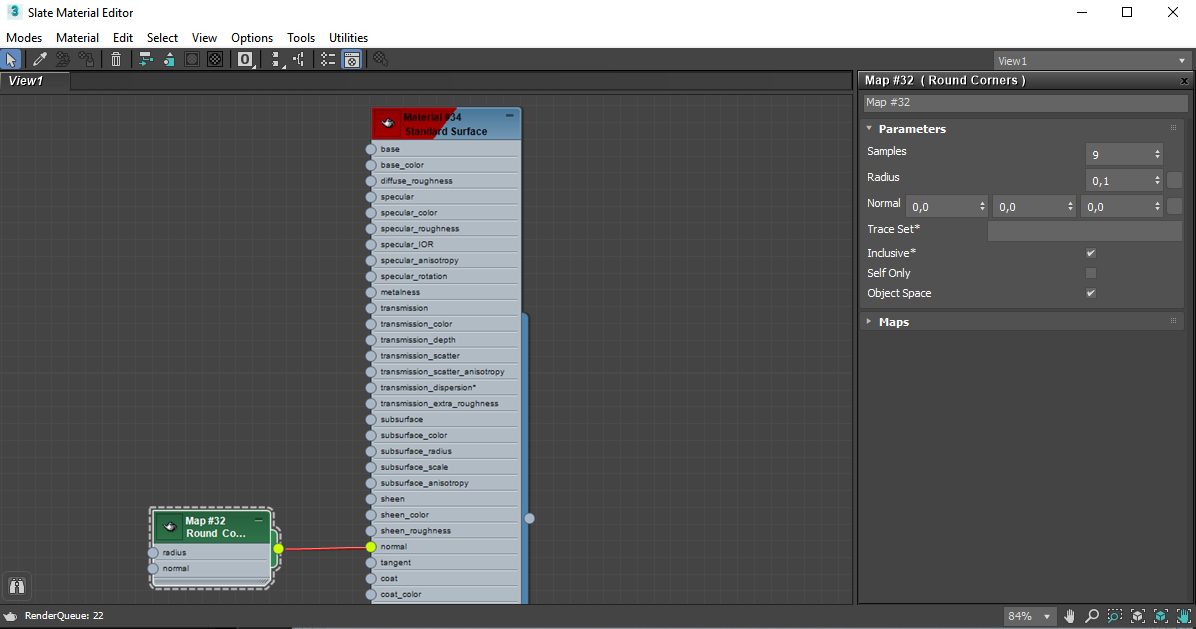
round_corners -> standard_surface.normal
Clip Geo shader
clip_geo does not currently work with GPU.
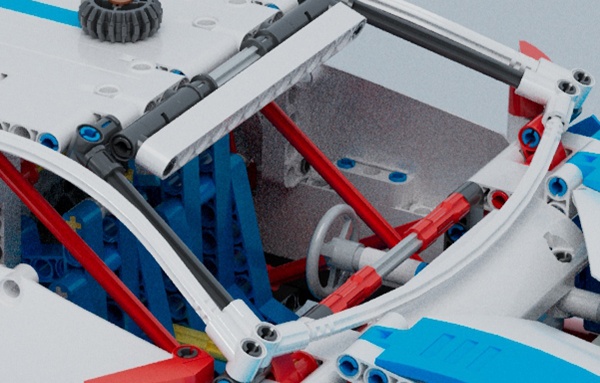
We can use the clip_geo shader to create a cut-away shading effect in the camera model.
- Create a Box (geometry to be used for clipping) and position it where you want to clip the geometry.
- Assign a clip_geo shader to the box. Position the cube so that it penetrates the car. When you render the scene, you should notice that it is cutting (clipping) into the car geometry (see title image at top). However, it may also clip the floor plane which we don't want.
To avoid clipping the floor plane:
- Add an Arnold Properties modifier to the plane.
- Create a trace set for the plane by entering a name in the shader Trace Sets text box (for example, "objects_not_to_clip").
- Disable the Inclusive checkbox of the clip_geo shader.
- Put the objects in that trace set (by entering the same trace set name for those shapes: "objects_not_to_clip").
- All objects not in that trace set will be clipped (the car model).

Cube with clip_geo assigned to it. The plane is not clipped because it has a Trace Set (Arnold Properties modifier) that matches the clip_geo Trace Set . Inclusive is disabled.
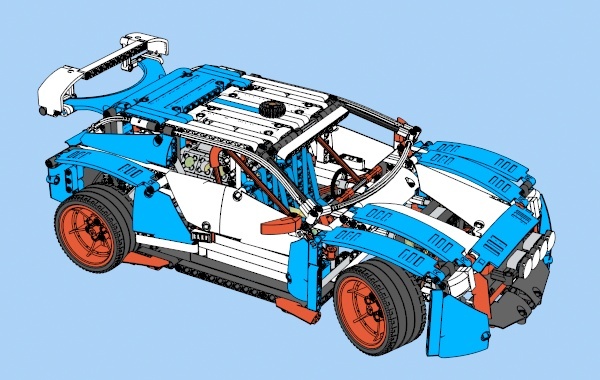
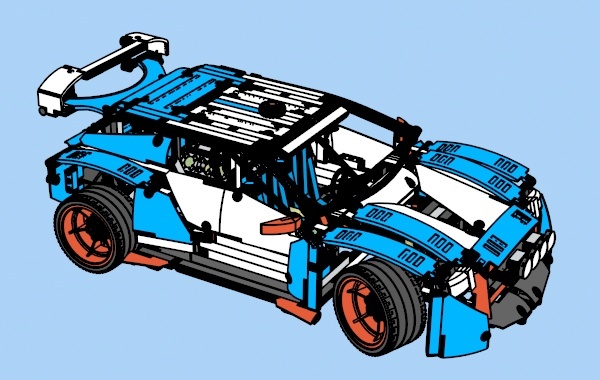
Stylized Shading using Toon
- Replace the standard_surface shaders with toon shaders. Change the following parameters:
- Reduce the angle_threshold to around 10. This will give more detailed edges around the geometry.
- Reduce the base_weight to 0. We want a flat color using emission only.
- Ensure that specular_weight is 0.
- Increase the emission_weight to 1.
- Hide the floor plane/CYC geo and render the scene.
To view the toon.edge, you must change the filter_type (sampling settings) to contour. Note that increasing the contour_filter_width (sampling settings) value will increase render times.
- You may notice that the contour filter_width appears too large (depending on your image size resolution). If it appears too thick, try reducing it to around 1.
 |
 |
| contour_filter_width: 1 | contour_filter_width: 2 |
To change the background color go to Environment and Effects (8) -> Background: Color:

toon -> Map to Material (assigned to geometry) with toon shader parameters
Final Render Settings
Ray Depth
When rendering with the CYC background geometry (scene link at top of page) the scene appears quite dark with the default diffuse_ray_depth of 1. Increasing this value will allow more light to bounce around the CYC and car geometry (at the expense of increased render time).
 |
 |
| diffuse_ray_depth: 1 (default) | diffuse_ray_depth: 4 |
Reducing Noise
For final frame rendering, we will need to increase some of the sampling settings.
Quad Light Samples
- Select the quad_light light and increase the number of samples to 3 or 4. This should clean up a lot of the noise in the shadows.
 |
 |
| 1 | 4 |
Diffuse Samples (Interior Noise)
There is some noise apparent in the interior and underneath the car. Increasing the number of diffuse_samples should clean this up.
Remember to check your AOVs if you are unsure where the noise is coming from. e.g. shadow (light_samples) or indirect light (diffuse_samples).
 |
 |
| 2 (default) | 10 |
Camera (AA) Samples
- Finally, increase the number of Camera (AA) to around 5. The higher the number of samples, the better the anti-aliasing quality, and the longer the render times.
 |
 |
| 3 (default) | 5 |
That's it. You have reached the end of the tutorial. Well done! We encourage you to spend some more time with the MAXtoA user guide where you can find other tutorials such as this.