This 'making of' tutorial covers some lighting, shading, and rendering tips for replicating an automobile studio-style shot. The key to successful automotive rendering is with realistic 'real world' lighting. A lot of work and 'fine-tuning' goes into lighting an automobile correctly in a studio. Achieving the right lighting is key to creating interesting specular reflections that will help accentuate the aesthetics of the automobile. The tips provided here aim to make this process easier.
An example of lighting an automobile in the real world can be found here.
This tutorial has been broken up into the following chapters:
Lighting - Reflector - Shading
Quad Area Lighting
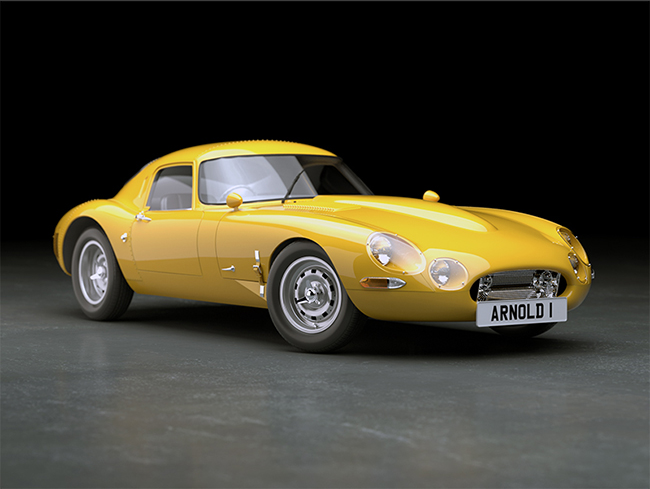
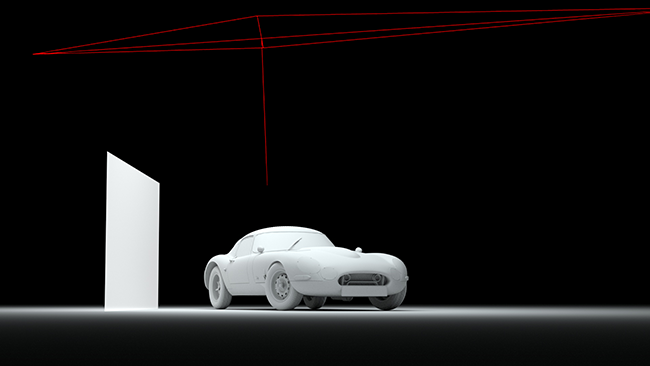
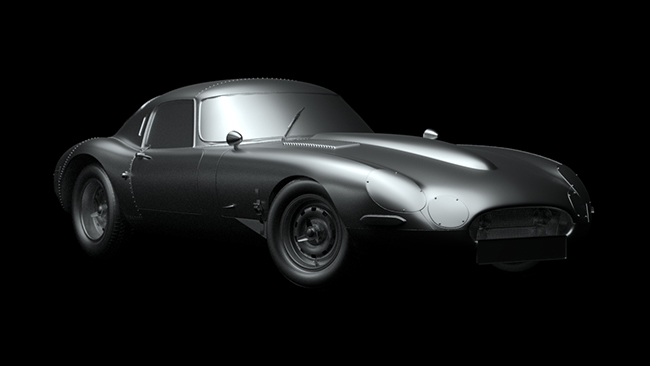
The scene is simply lit with a Quad area light representing large studio softbox lighting. A reflector has also been added to show reflections in the side of the car body.
Color Texture
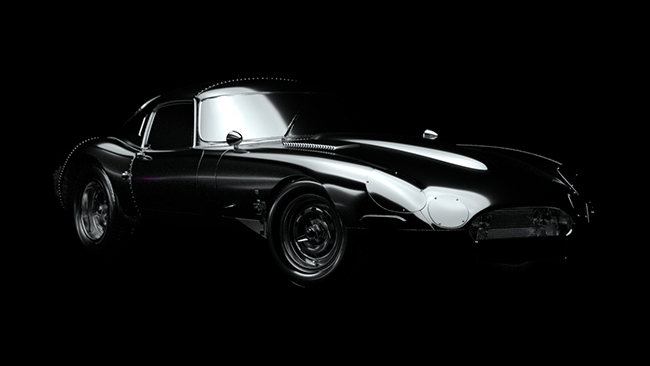
To get realistic, real-world color and specular reflections in the car paint and windscreen glass, it is best to add an HDR map to the color of the light. You can download the sample HDR map used in this scene here (Flat_2.hdr).
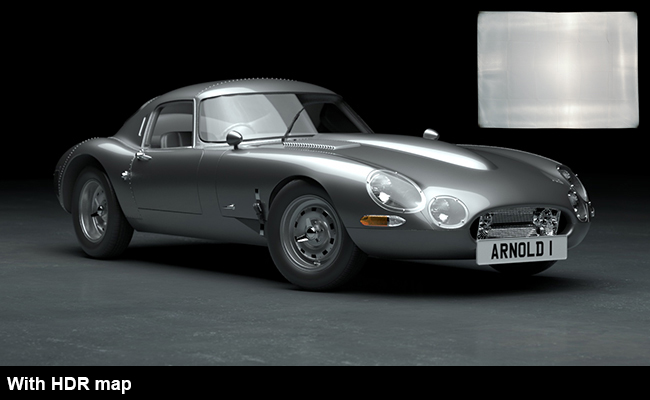

Note that the reflection (and color) of the light lacks interest without the HDR map.
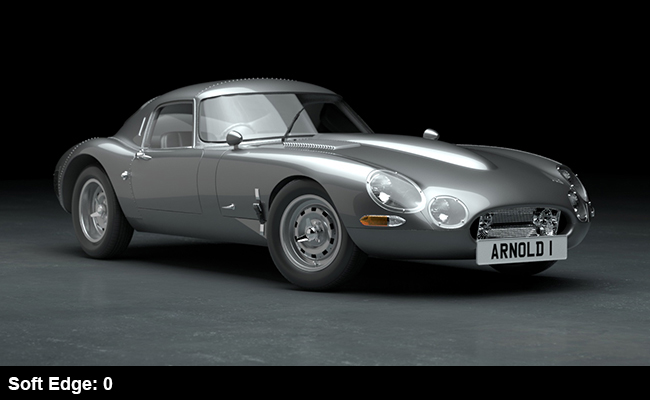
Soft Edge
We can specify a smooth falloff for the edge of the light by using soft_edge in the quad_light . This creates a softer look to the specular reflections of the light in the car paint and windscreen.


Here we can see the effect when we increase soft_edge to 0.5 using the render camera:

Specular Contribution
We are getting some blown highlights on the hood of the car. Reducing the exposure of the light would help with this. However, it would also reduce the overall illumination in the scene, which is not what we want. A simpler and more effective method is to reduce the specular contribution of the quad_light .


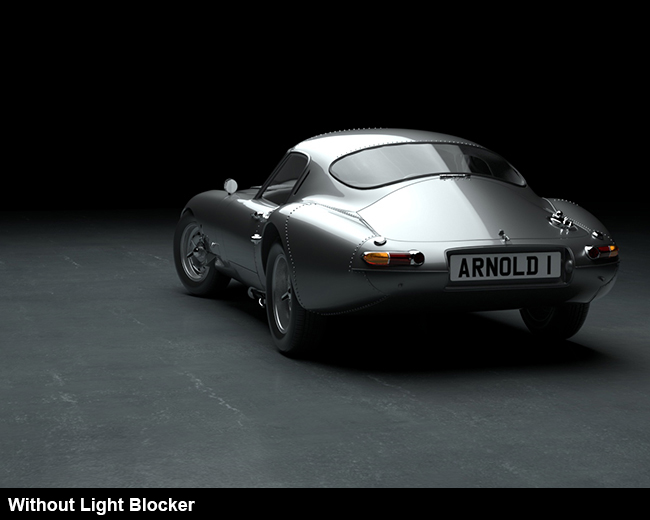
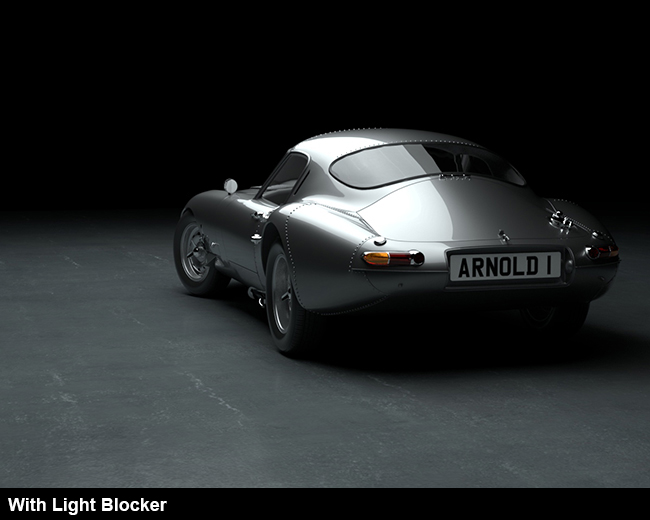
Adding a light_blocker to the quad_light can give you more artistic control over where and how the light is reflected in the car. Notice the effect it has on the lighting and reflections on the right side of the car.
Emissive Plane
A reflective white plane has been placed to add reflection and illumination to the side of the car. This is because, typically car photographers do not normally shine lights directly onto the car, but rather shine lights onto surfaces which are reflected in the car paint. In this case, emission_weight is 0.5. You can, of course, also map a texture to the emission_color. However, in this case, a white emission_color works fine.
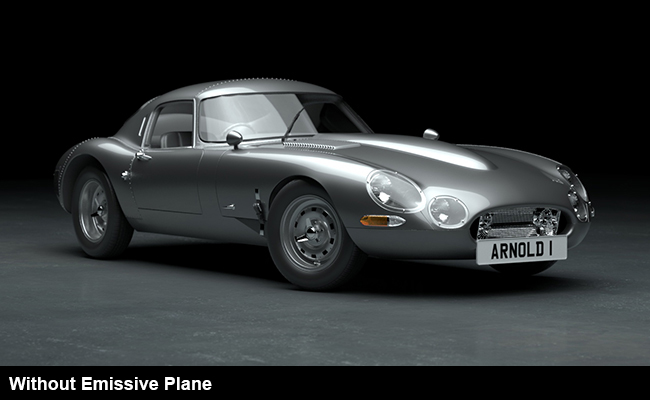
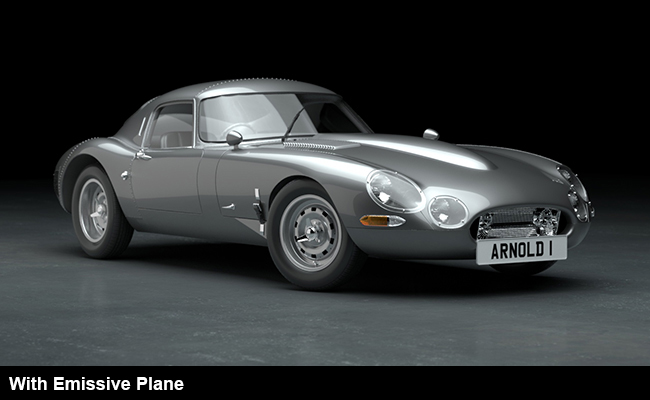
Notice the effect on lighting in body and wheels.
We can see exactly the effect that the emissive plane is having in the reflection of the car if we enable 'Ignore Lights', found under Diagnostics-> Feature Overrides.

Effect of emissive plane is more clearly visible when 'Ignore Lights' is enabled (under Feature Overrides)
Shading
Facing Ratio Shader
The facing_ratio can be useful for creating a pearlescent color coating to the car paint. In the example below a coat_color has been added to a standard_surface shader. In this case, the facing_ratio shader has been connected to the coat_weight and used to exaggerate the coat_color effect.
 |
 |
 |
 |
| base_color | metalness | coat_color | facing_ratio -> coat_weight |
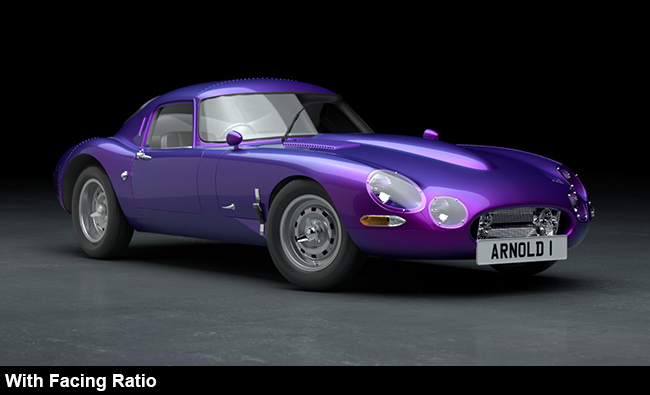
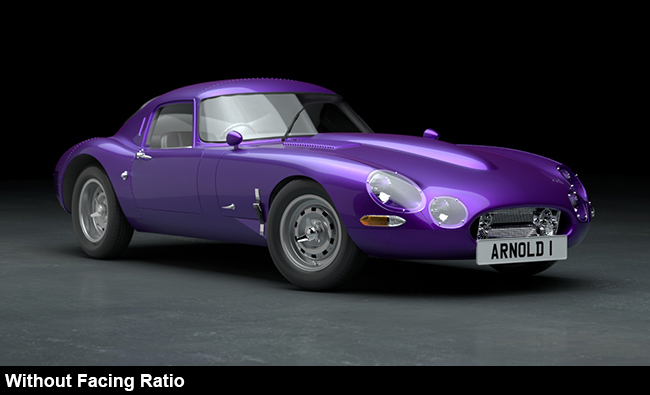
The effect is more visible in areas that are facing the camera such as the front light.
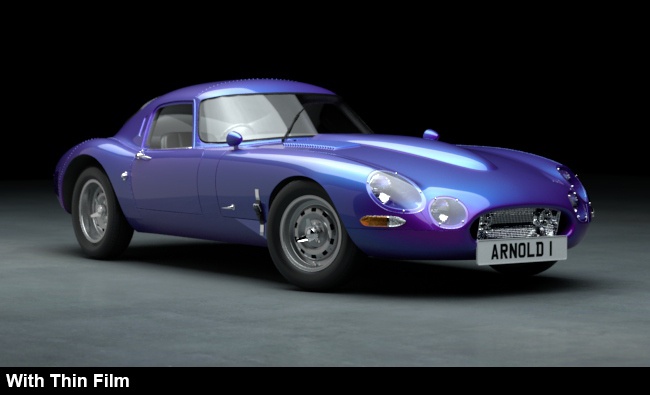
Thin Film
thin_film in the standard_surface shader can also be used to create a multi-tone car paint material ( Thickness : 400, IOR : 1.43).

Utility Shaders
There are some shaders that can be useful for rendering car models. The Utility and Wireframe shaders can be used to diagnose contour lines and spot continuity problems when evaluating models. The Reflection Lines mode in the Utility shader can also give you an idea of how real-life reflections would behave. This sort of shading is especially useful when modeling cars where surface evaluation is critical.
 |
 |
| reflection_lines (utility shader) | wireframe shader |
The utility shader also has a metal shade_mode. This can be used as a simple shading method for testing and checking reflection highlights in the car.
 |
 |
The light's specular reflections are more easily viewed with the utility shader (shade_mode set to 'Metal').
That concludes this tutorial on automotive studio rendering. Why not try replicating a studio photo of a car using some of the techniques presented here.