Using AOVs to Identify Noise

A useful technique for identifying where noise is coming from in a scene is to render to AOVs. Viewing the AOVs enables you to see exactly what samples need to be adjusted. This saves render time because you are not increasing the wrong sampling values unnecessarily.
Another way to identify where noise is coming from is to set all samples to 1 and increase specific samples one at a time.
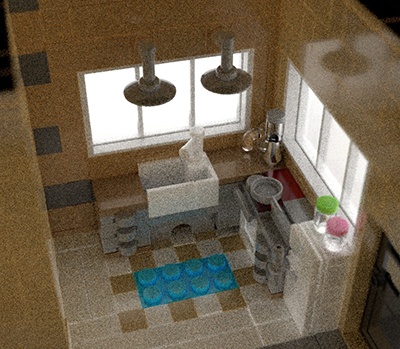
Beauty AOV (Camera (AA) Samples)
Increasing this value helps to improve the overall quality of the image, however, there is still noise caused by insufficient samples elsewhere. It is better to look at specific AOVs because noise in the beauty (RGBA) could be from direct, indirect, diffuse or specular.
 |
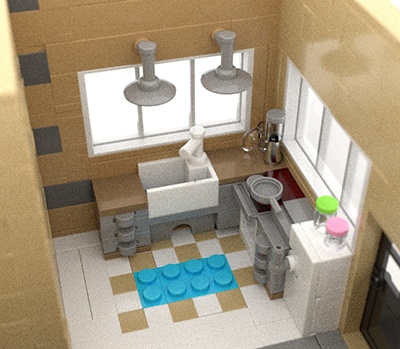 |
| Camera (AA) samples: 3 (default) | Camera (AA) samples: 5 |
Increasing Camera (AA) also helps with motion blur and with depth of field too, in other words, if you see noise in the alpha channel increasing Camera (AA) will help.
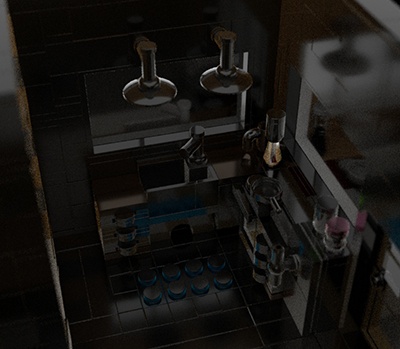
Indirect AOV (Diffuse Samples)
As can be seen in the indirect AOV, a large amount of noise in this scene is caused by indirect_diffuse (GI) noise.
 |
 |
| diffuse_samples: 2 (default) | diffuse_samples: 10 |
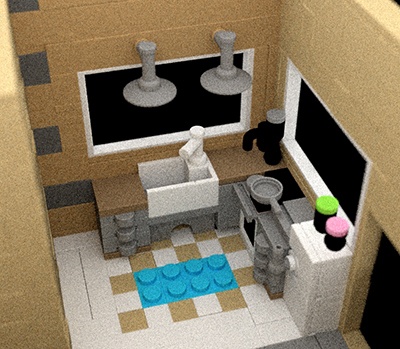
Specular AOV (Specular Samples)
Notice there is a small amount of noise on the glass shader and bricks where specular_roughness has been used.
 |
 |
| specular_samples: 2 (default) | specular_samples: 3 |
Transmission AOV (Transmission Samples)
Notice the effect on the glass shader where roughness has been used.
| transmission_samples: 2 (default) | transmission_samples: 5 |
SSS AOV (SSS Samples)
A large amount of noise in this scene is caused by a low number of SSS samples (all of the bricks have SSS ). Increasing SSS samples reduces a lot of the noise in this particular scene.
 |
 |
| sss_samples: 2 (default) | sss_samples: 6 |