Remap an Image Using UV Coords
 |
 |
This simple tutorial shows how to remap an image using the uv_coords attribute of the image shader to produce an abstract patterned distortion effect.
A scene file can be downloaded here. Further examples can be found here.
- Start by assigning a standard_surface shader to a poly plane.
- Increase the emission of the standard_surface to 1. Decrease the base_weight and specular_weight to 0.
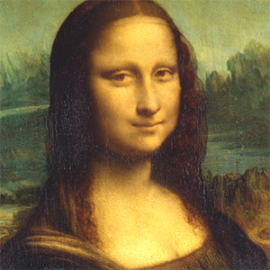
- Connect an image shader to the emission_color and add a file texture to the image_name. In this case, we have used the beautiful Mona Lisa.
- Connect a utility shader with shade_mode.flat and color_mode.uv (via an add shader) connected to the image shaders uv_coords.
- Add a noise shader as an offset to the input 2 of the add shader.
You can also add a uv_transform shader after the image for extra controls. You could also add a range shader to further control the distortion effect.

Final shading network
Image: UV Coordinates
In the uv_coordinates of the image shader, there are controls for further changing the position of the texture map. When animated, this can produce some interesting results:
 |
 |
| offset_u | offset_v |
- Animating the exposure (using a color_correct) connected to the texture used to distort the image shader will produce the final result.

exposure (-10 to 0)