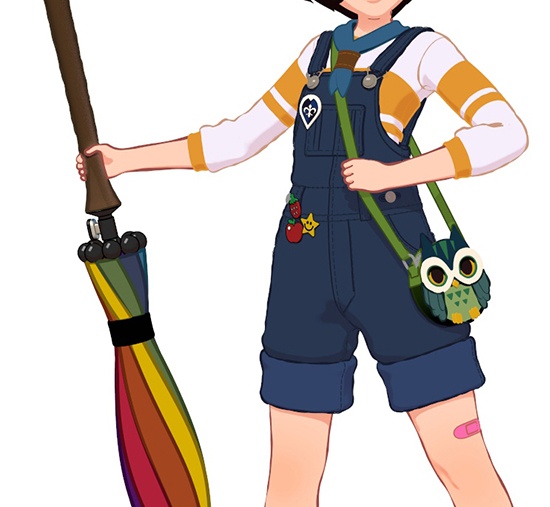
Making of Sophie toon tutorial
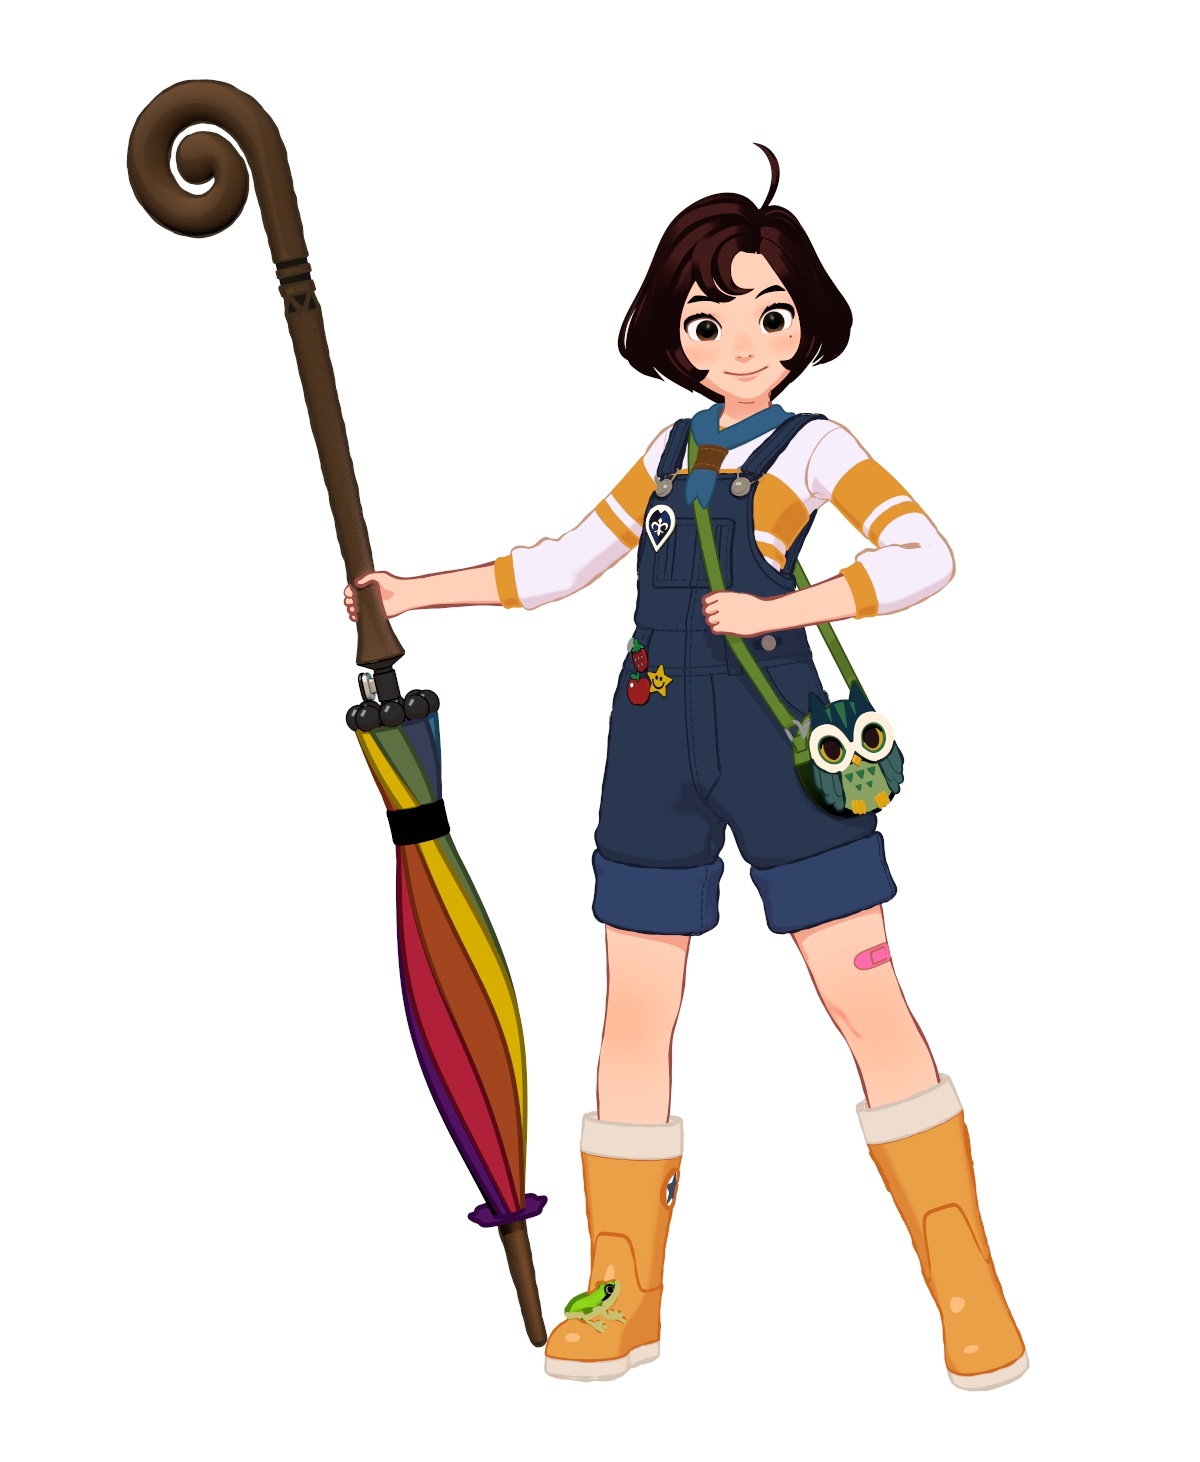
In this 'making of' tutorial, we will break down the steps used to render the image above using the toon shader. We will cover how to use the rim_lighting, base_tonemap, specular_tonemap, and stylized_highlight attributes of the toon shader. We will also cover how to add variation in the edge_width to create a more illustrative style.
The model has been kindly provided by Jaeyeon Nam. The original concept is by Hong SoonSang.
Ensure that the filter_type (render settings) is set to contour when rendering the toon edge.
A scene file is available to download here.
Lighting
Create a skydome_light and connect a physical_sky shader to its color attribute. Increase the exposure to around 2. Change the elevation of the physical_sky to around 30. This will act as the main lighting, however, we will also add a distant_light (directional) later to create stylized highlights on her boots, buttons, etc.
The tutorial is broken down into the various parts of Sophie that require specific shading attention. We will start at the top and work our way down.
Hair
- Assign a toon shader to the hair geo.
- Disable edge as it is not necessary.
- Change the base_color to a dark brown.
- To get the highlight on the hair we will need to connect a ramp to the specular_tonemap. Change the ramp so that it looks like the ramp below, where white is the highlighted area of the hair. Ensure that there is no interpolation in the ramp as we want a strong glossy-looking highlight in the hair.
 |
 |
| without base_tonemap (default) | ramp_rgb -> base_tonemap |

Skin
- Assign a toon shader to the head and body geo and rename it Skin.
- Connect the map test_diffuse.
.tif to the base_color. - Connect a ramp like the one below to the base_tonemap. Ensure it has a darker skin tone for the base_tonemap to be visible.
 |
 |
| without base_tonemap (default) | ramp_rgb -> base_tonemap |

- Change the edge color to a brown colorc.
- Lower the angle_threshold to around 80. This will give a pleasing amount of edge detail around the mouth, nose, and chin.
 |
 |
| angle_threshold: 180 (default) |
Eyes
Eyeball
- Assign a toon shader to the eyeball geometry. Decrease the base_weight to 0 and increase the emission_weight to 1. This will give us a pure white color.
Iris
- Assign a standard_surface shader to the iris polygon faces of the eye. We don't need a toon_edge shader here so a standard_surface shader should be sufficient.
- Connect a brown gradient ramp to the base_color and reduce the specular_weight to 0 (we will add specularity to the cornea shader).

Cornea
- Assign a toon shader to the cornea geometry.
- Disable edge as there is already an edge from where the skin meets the eye.
- Reduce base_weight to 0. Change the specular_color to a dark gray and increase the specular_roughness to around 0.3.
- Increase the transmission_weight to around 0.9 (making it fully transparent would mean there would be no specular highlight).
- Reduce indirect_diffuse and indirect_specular (Advanced) to 0 (we do not want any indirect shading to occur inside the eyeball).
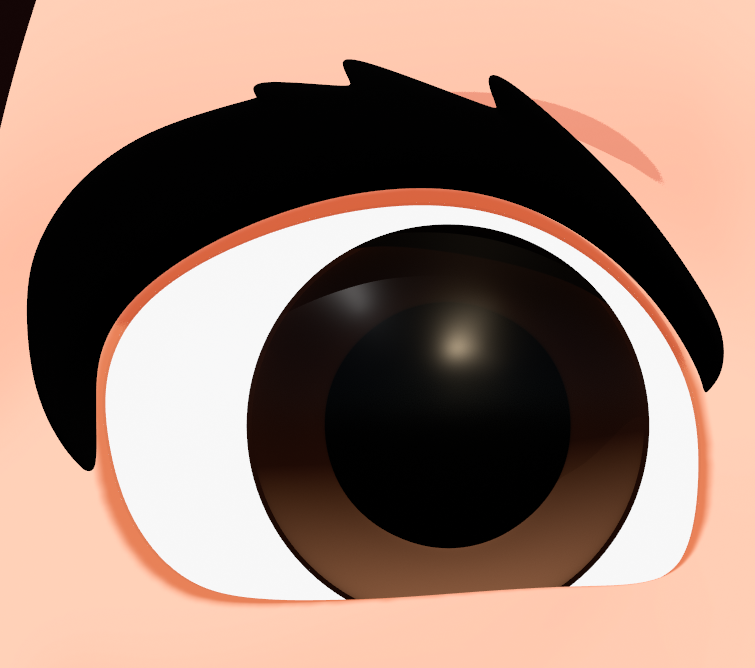
Eyeball, iris, and pupil geometry
Jumper
- Assign two toon shaders to the jumper (one white and one for the orange stripes).
- Add a light lilac hue to the Jumper's base_color and an orange color to the stripes base_color.
- Connect a ramp to the base_tonemap (use the same ramp for both shaders).

- Change the priority (Advanced Edge Control) of the orange jumper shader to 1. We want it to be greater than that of her skin, otherwise, we will get edges where the jumper meets the skin.
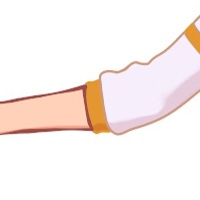 |
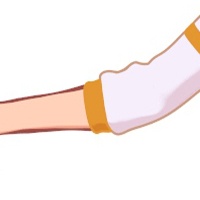 |
| Jumper priority: 0 (unwanted skin edge) | Jumper priority: 1 |
Boots
- Assign a toon shader to the plastic orange boot.
- Connect a ramp to the base_tonemap.

To get a glossy highlight on Sophie's boots we can use stylized_highlight.
- Create a directional (distant) light and angle it in a similar position to the physical_sky (you will need to do this by eye).
- Under stylized_highlight enter the name of the directional light (this may vary according to which Arnold plugin you are using.) Check the toon documentation for the correct naming convention. For example, in MtoA it would be
directionalLightShape1 - Increase the size of the stylized_highlight to around 0.2.
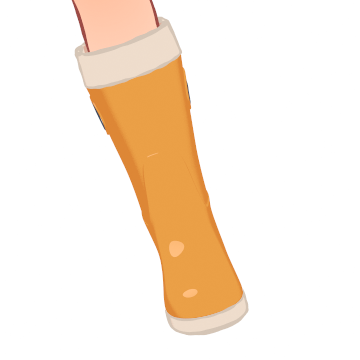
stylized_highlight on boot
Silhouette
Now we are almost there. However, the toon edge looks too clean and perfect. We need to break up the edge_silhouette to give the impression that it has been hand-drawn.
- Enable silhouette for the dominant shaders such as jeans, boots, stick etc.
- Match the silhouette_color to that of the edge_color for each shader.
- Create a cell_noise shader and connect it to edge-> silhouette-> width_scale. Change the pattern to worley1. In this case, the scale has been changed to 0.2. You may want to experiment with different pattern and scale settings depending on the look you are going for. You can also use offset to change the position of the noise along the edge. Attributes such as randomness can have a big impact on the appearance of the edge thickness.
 |
 |
| cell_noise -> silhouette_edge | only silhouette_edge |