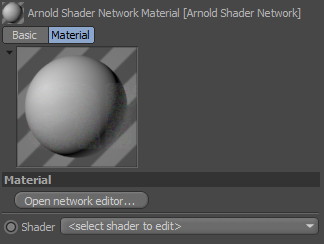
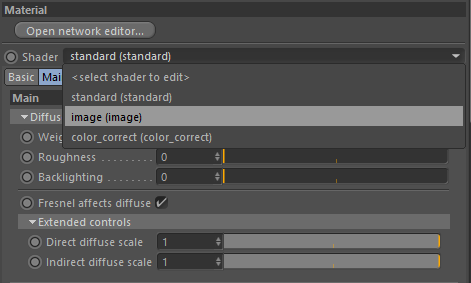
Arnold Material (legacy)
The Arnold Shader Network Editor allows you to view, modify and create shader node connections in an easy to use editable schematic window. The Arnold Shader Network material (or Arnold Material for short) can be found under Create > Shader > Arnold Shader Network in the Material Manager or you can press Alt+W and N. You can also create shaders directly from the Create > Arnold menu. In this case, an Arnold Shader Network is created with the selected shader as the root.
Info: A video that demonstrates working with the Arnold Shader Network editor can be found here.
The Arnold Shader Network Editor shares similar functionality with the Cinema 4D Xpresso Editor , however, it is limited to work only with Arnold shaders. Note that there is an Arnold group in the standard XPresso Editor, however, these nodes are not valid and have no effect. There's a technical reason these nodes cannot be hidden.
To open the Arnold Shader Network Editor, click on the Open network editor... button under the Material tab. You can also use the middle mouse button or press Alt + W and O in the Material Manager on the selected material.
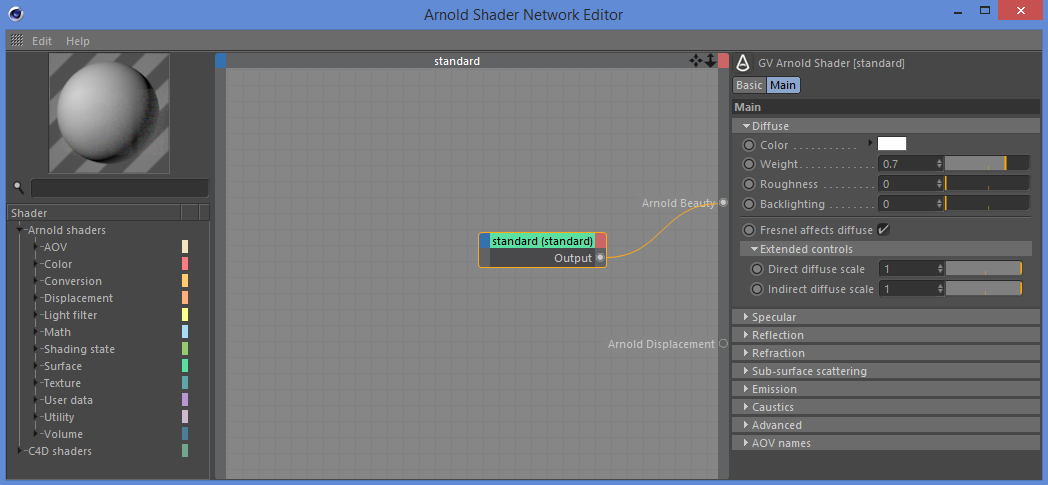
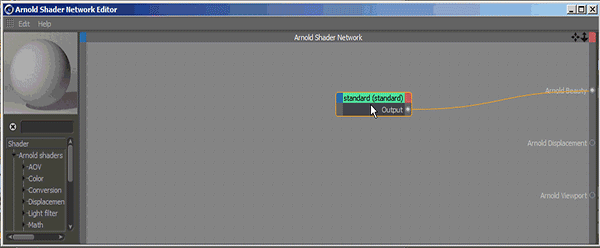
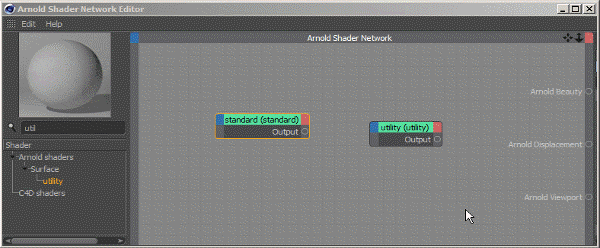
Arnold Shader Network Editor window. Standard shader's output connected to Arnold shader port.
The editor has three sections:
You can see the preview of the whole network on the left and a tree of available shaders. Arnold shader nodes and supported Cinema 4D shaders are listed in the tree and are grouped by functionality. All groups have a color assigned to them so that you can quickly identify the shader type in the editor. These colors are hardcoded and cannot be changed, however, you can set your own title color for any shader nodes in the network.
The tree has a filter field for quickly navigating through the various shaders. When you start typing, shader nodes containing the given substring will only be displayed. You can also use arrow keys to navigate in the tree. To create a new shader just press the 'Enter' key.The work area is in the center of the dialog. This is a graph view editor where you can connect shader nodes together via linkable attributes (called ports). You can drag & drop any shader from the left tree to the work area. To connect shaders you have to click on the Output port and drag the mouse to the blue corner of the other shader. A menu will appear listing the available parameters that you can connect to.

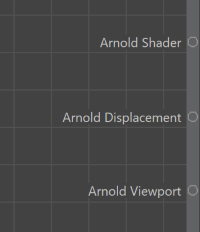
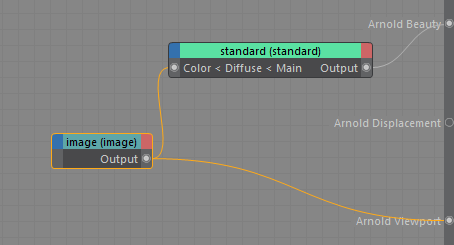
The root of the network has to be connected to the Arnold Shader port of the main group. There are multiple outputs available (such as Arnold Displacement, Arnold Viewport, etc.).
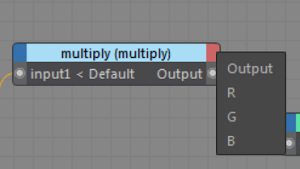
If the shader has a color or vector output then its components (e.g. R, G, B or X, Y, Z) can be connected separately. Open the output port menu of the shader to access these components. Note that a component cannot be connected to the Arnold Shader or Arnold Displacement ports.
Parameters of the selected node are displayed on the right side. You can change any values here. Note that if a parameter is linked then it's not visible here. You have to disconnect it first to edit the constant value of the parameter.
If you just need to quickly change some parameters of your shader you don't have to open the network editor. The Arnold Shader Network Material allows you to select any shaders of your network and displays its parameters as they are displayed natively in the Attribute Manager.
The edit mode is available only to change parameter values. If you want to change connections or add/remove shaders you must open the network editor window.
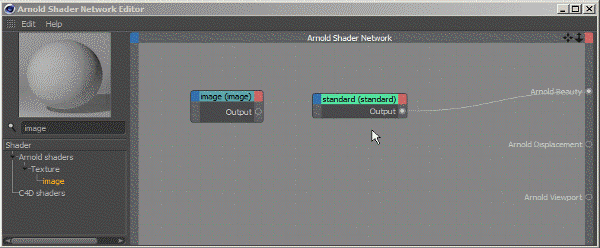
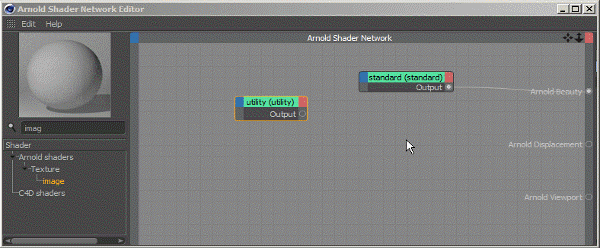
Info: You can drag & drop image file textures from an external file explorer directly onto the editor window and it will automatically generate an image shader.
You can also drag & drop a Vertex Map Tag from the object tree onto the editor window and it will automatically generate a vertex map shader.
Example Workflows
Menu
The menu bar of the editor window contains useful commands and settings.
File
- Import... : import shaders from the selected ASS or MaterialX file and adds them to the current network. The new shaders are not connected to the Arnold Shader or Displacement port or any pre-existing shader.
- Export to ASS... : exports all shaders from the network to the selected ASS file.
- Export selected to ASS... : exports only the selected shaders from the network to the selected ASS file.
- Export to MaterialX... : exports all shaders from the network to the selected MaterialX file.
- Export selected to MaterialX... : exports only the selected shaders from the network to the selected MaterialX file.
Edit
- Optimize nodes : sets all nodes displayed in the editor to their optimal size.
- Align nodes : updates the layout and align nodes based on their connections.
- Delete unused shaders : removes all shaders from the network which are not connected to any output port (e.g. Arnold Shader , Arnold Displacement , etc.).
- Create reference : moves the selected shaders to a new Arnold Material and replaces them with a reference of that material. The shaders must be connected.
- Automatic node optimization : when enabled the shader automatically expands if a connection is added or removed. When you remove an existing connection, the port is automatically removed.
- Auto connect after delete : when enabled the first input of a shader is automatically connected to its outputs when the shader if removed, keeping the network together.
- Auto file browser when creating an image shader : when enabled the file browser pops up automatically when a new image shader is added to the network.
View
- Show attributes : when enabled (default) the attributes of the selected shaders are displayed on the right of the editor. When disabled the Attribute Manager is used instead. This is useful to save space for the editor area for example when the editor is docked.
- Show shader list : controls the visibility of the shader tree on the left pane. You can use the Ctrl + TAB keys to add a shader when the shader tree is hidden.
- Detach material preview : opens the material thumbnail in a separate dialog which you can dock anywhere in the UI. See the Material preview section for more details about the preview.
Texture
Load textures... : loads all textures from a folder and adds them to the network editor as image shaders.
Write texture... : allows you to write out the modifications of a texture (e.g. UV transform, color correction, mix, etc.). This feature is to prevent duplicating the network in photoshop when you want to further edit a texture . Just simply select the shader which you want to write out and execute the Write Texture ... command. A dialog opens to set up the output path, format and resolution.
Note:This feature is valid only for textures, you can not write out surface shaders (e.g. standard, curvature, etc.) or procedural textures (e.g. noise).
Show histogram : opens a histogram view in the right pane. See the Histogram section for more details.
Help
- Info... : opens a small dialog which describes the available commands in the network editor.
- User Guide : opens this manual in the browser.
Shortcuts
The following commands are available in the shader network editor by a shortcut. To see all the commands just press Alt + W .
- Set as surface shader: Connects the selected shader to the Arnold Shader port. This is useful when you want to quickly visualize a part of the network in the IPR.
- shortcut: Alt + W and 1
- Set as displacement shader: Connects the selected shader to the Arnold Displacement port.
- shortcut: Alt + W and 2
- Set viewport root shader: Connects the selected shader to the viewport port. This is useful when you want to visualize a part of the network (e.g. textures) in the viewport.
- shortcut: Alt + W and 3
- Connect shader: Allows you to easily connect the selected shader to another shader in the network. Useful when the shaders are are far away and it's difficult to drag the output with the mouse. If multiple shaders are selected the command tries to connect the first selected shader to the others.
- shortcut: Alt + W and C
- Delete unused shaders: Removes all shaders from the network which is not connected to any output port (e.g. Arnold Shader, Arnold Displacement, etc.).
- shortcut: Alt + W and D
- Show/hide histogram: Enables or disables the histogram view.
- shortcut: Alt + W and G
- Create reference: Moves the selected shaders to a new Arnold Material and replaces them with a reference of that material. The shaders must be connected.
- shortcut: Alt + W and I
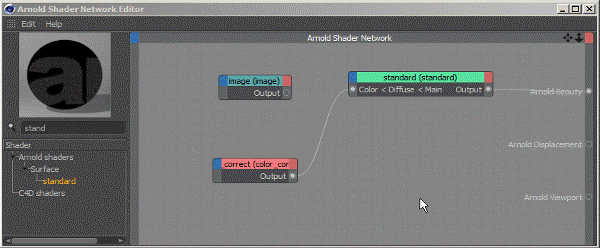
- Assign texture: This command creates an image shader with your texture connected to a selected parameter. It shows a menu where you can select a parameter of the selected shader. It then opens a file browser to select your texture. If multiple shaders are selected you must select one of them from the menu first. When no shader is selected you must select one from the network first.
- shortcut: Alt + W and T
- shader context menu: Operator > Assign Texture
- Load textures...: Loads all textures from a folder and adds them to the network editor as image shaders.
- shortcut: Alt + W and L
- Write texture...: Allows you to write out the modifications of a texture.
- shortcut: Alt + W and W
- Optimize nodes: Sets all nodes displayed in the editor to their optimal size.
- shortcut: Alt + W and O
- Align nodes: Updates the layout and align nodes based on their connections.
- shortcut: Alt + W and A
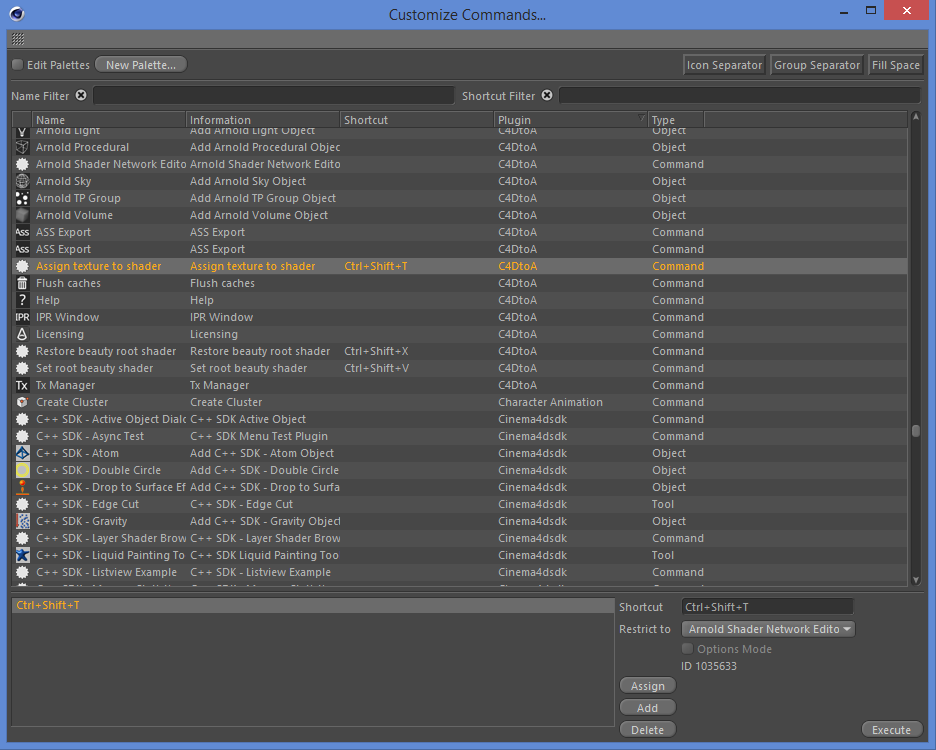
Info: You can change the above shortcuts in the Window > Customization > Customize Commands... dialog. You can search by name or shortcut or sort by Plugin and find the C4DtoA commands.
Editing
You can use the following actions to quickly edit the network.
Add new shader
- Press Ctrl + TAB (make sure the Arnold Shader Network Editor window is active).
- Start typing the name of the shader you want to create or select from the list by the up/down arrow keys.
- Press Enter to select the shader. The shader is added to the network at the mouse cursor or at the center of the window.
- If a shader is selected when you press Ctrl + TAB then the new shader will be automatically inserted after or before the selected shader (depends on the shader type).
- Select the parameter from the popup to connect the new shader to/from by the up/down arrow keys.
- Press Enter . The new shader is inserted after/before the selected one.
- You can press Esc if you don't want to insert the shader.
Insert after
- Select the shader which you want to insert after another shader.
- Drag & drop the shader onto the other shader.
- Select an input parameter to connect to from the menu.
- Select where to insert when the other shader has more connection s. You can select 'all' which will insert the shader into all connections.
Insert before
- Select the shader which you want to insert before another shader.
- Drag & drop the shader onto the other shader and hold the Alt key.
- Select 'insert before ' from the menu.
- Select an input parameter to connect to from the menu.Actually, this feature is the same as connecting the output to the other shader, however in some cases (e.g. when we zoom out and the ports are small in the view) it's easier to drag & drop the whole node.
Hold ALT before dragging to reveal menu
Replace
- Select the shader which you want to replace another shader with.
- Drag & drop the shader onto the other shader and hold the Alt key.
- Select 'replace ' from the menu.
Hold ALT before dragging to reveal menu
Move connections
- Select the shader which you want to move the connections from.
- Drag & drop the shader onto another shader and hold the Alt key.
- Select 'move outputs ' from the menu.
Hold ALT before dragging to reveal menu
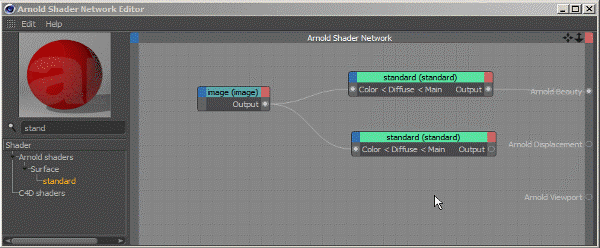
Connect/disconnect to/from multiple shaders.
- Select the shaders you want to connect/disconnect to/from. They must be of the same type .
- Add/remove a connection to/from one of the selected shaders and hold the Shift key.
Hold SHIFT when clicking on connection
Duplicate
- Press Ctrl and drag the selected shader(s).
- To duplicate the input connections of a shader press Ctrl+Alt and drag the shader.
Drag with children
- Select the root shades of the hierarchy you want to move.
- Press Shift and drag the shaders with the mouse.
Drag with parents
- Select the leaf shades of the hierarchy you want to move.
- Press Shift + Alt and drag the shaders with the mouse.
Add a port by drag & drop
- Select a parameter from a shader in the Attribute Editor.
- Drag & drop it to the shader node.
Shader selection
- Press Page Up to select the next shader in the network. Order is defined by the connections. If nothing is selected then selects the last shader from the root.
- Press Page Down to select the previous shader in the network. Order is defined by the connections. If nothing is selected then selects the root shader.
Info: You can use the Help > Info... menu in the network editor to get information on the available editing actions.
Info: A video that demonstrates editing shaders with the Arnold Shader Network editor can be found here.
Reference Other Shader Networks
You can drag & drop an Arnold Shader Network Material to the editor creating a reference. This feature allows you to use a network (e.g. a noise setup) in other networks, modifying the referenced network results an update in all parent networks. A reference can be used as an input only.
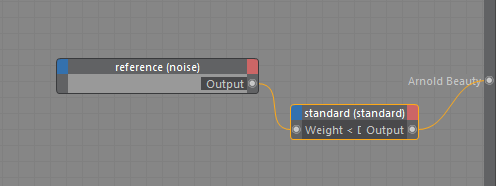
A network reference is displayed with a light gray background and has 'reference' in the title.
Cycles are not permitted which means you cannot reference network A in network B if network A already has a direct or indirect reference for network B.
Viewport
To display a shader in the viewport you have to connect it to the Arnold Viewport port.
Viewport display is limited and gives only a hint on the look, it does not necessarily match the final render in all cases. There are also a lot of unsupported shaders.
Histogram
The histogram feature allows you to see how the pixels of an image are distributed. To enable the histogram click on the Texture > Show/hide histogram menu or press Alt+W ~ G . The histogram is displayed in the right panel above the attributes of the selected shader.
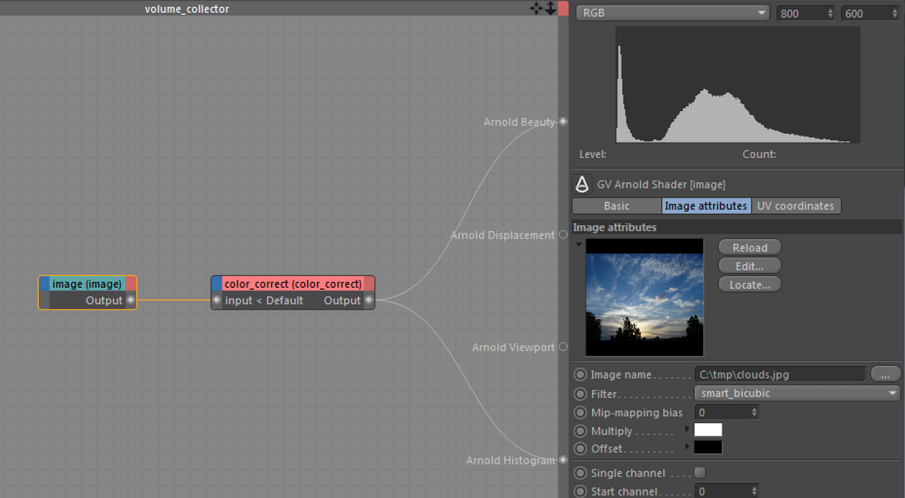
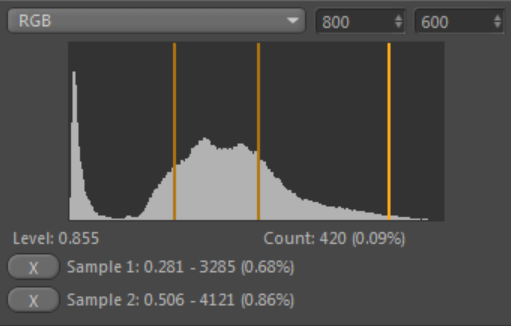
To display the output of a shader in the viewport you have to connect it to the Arnold Histogram port. The graph shows the pixels distributed by the selected property which could be:
- RGB : relative luminance in colorimetric spaces.
- R : the red channel of the pixel.
- G : the green channel of the pixel.
- B : the blue channel of the pixel.
- Luminance : brightness (luma).
Because the input of the histogram could be any shader from the network the sample resolution has to be defined manually. The default is 800x600 which gives a proper result in most cases. Higher resolution needs more time to process.
Samples
When the mouse is moved over the histogram the number of pixels at the level under the mouse pointer is displayed under the graph. By Ctrl + click you can add a fix sample point to the histogram to follow how the pixels of a given level changes after modifying the shaders.
Third-party shaders are not supported by the histogram.
Material Stacking
The native material stacking workflow is supported by C4DtoA even with the Arnold Material . You can specify the blending on the Alpha tab, similar to the native C4D material. You can select a texture, a shader from the given network or use the output of another Arnold Material which gives you more freedom and flexibility.

The plugin translates the material stacking as a layer_rgba shader with the materials as the layers in order and the alpha textures/shaders as the mix. For more complex scenarios you have to manually build your network.
The Alpha channel is only used for stacking. It has no effect on the shader network.
Maximum 8 materials are supported by stacking at the moment. If you need more you have to built the network manually using multiple layer_rgba shaders.
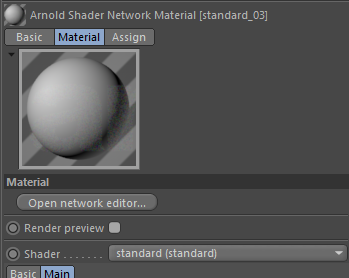
Material Preview
Arnold materials are displayed using custom preview scenes which you can select by right clicking on the preview image. Scenes that are defined by C4DtoA start with an Arnold prefix. The default preview scene is the Arnold Sphere .
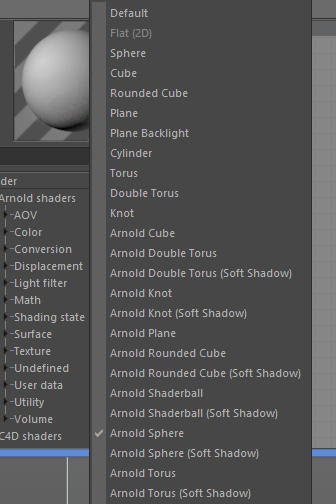
Available Arnold material preview scenes
The preview render can be disabled using the Render preview checkbox in the material interface. A disabled preview shows the last rendered preview with a small gray frame.
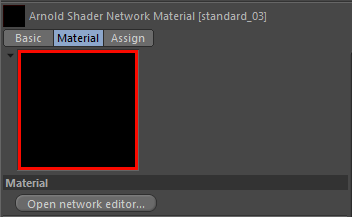
When a preview cannot be rendered because of an error (e.g. a texture is missing), it is displayed black with a small red frame around it.
User-defined preview scenes
You can also create any custom preview scene you like. Just create a new scene or open and edit an existing one from [C4D INSTALL]/library/materialpreview. In the scene, set the renderer to Arnold Renderer and specify your settings. You can use any setup like you do in a normal scene, however, there are some special rules:
- Add an empty Texture Tag to your main object (which can be a Null object with child objects).
- Set the name of your front light to Light_Front , your back light to Light_Back . (Used when previewing a light filter.)
- Change the name of your background plane to Background . (Used when previewing an atmosphere or environment type material.)
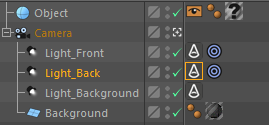
Setup of the Arnold Sphere preview scene
You have to save your scene to the [C4D INSTALL]/library/materialpreview folder with an Arnold prefix (like the built-in Arnold preview scenes, e.g. Arnold Sphere). After restarting Cinema 4D it should appear in the preview context menu along with the other preview scenes.