Turbulence FD Example
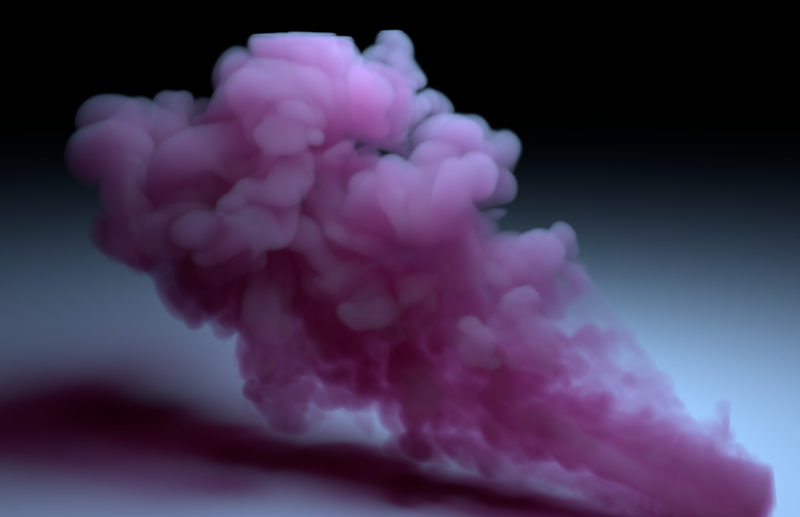
In this tutorial, we will explore ways to reduce noise by altering various sampling values. We will look at various types of noise that can come from a number of places such as lights and volumes. In this case, we will be using one of the example scenes that come with Turbulence FD. The scene used in this example is called steam.c4d and can be found in the 'Examples' folder within the Turbulence FD plugin folder.
The final TFD C4D (R17) scene file can be downloaded here.
The tutorial is divided into the following chapters:
Standard Volume
Lighting
Volume Noise
Volume Indirect
Step Size
Rendering
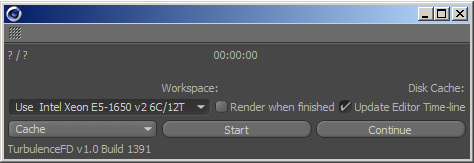
- Open the scene file (steam.c4d) in C4D.
- You will need to cache the simulation first. Open the Simulation Window (Plugins > Turbulence FD > Simulation Window) and press Start. Wait for the simulation to finish and choose a frame that you want to render.
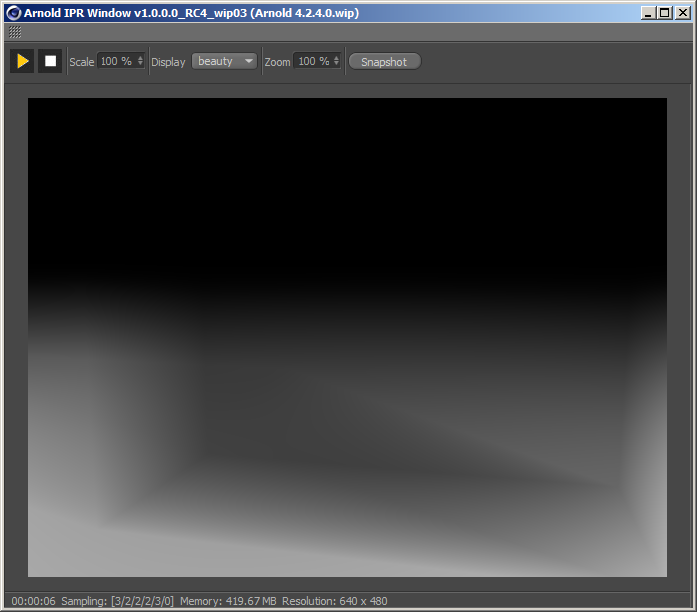
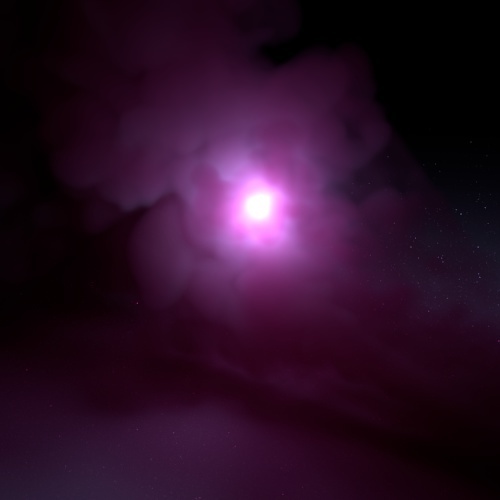
- IPR render the scene. You should get something that looks like the image below. The reason we can't see the volume yet is that we haven't added a Standard Volume shader to it yet.
Standard Volume
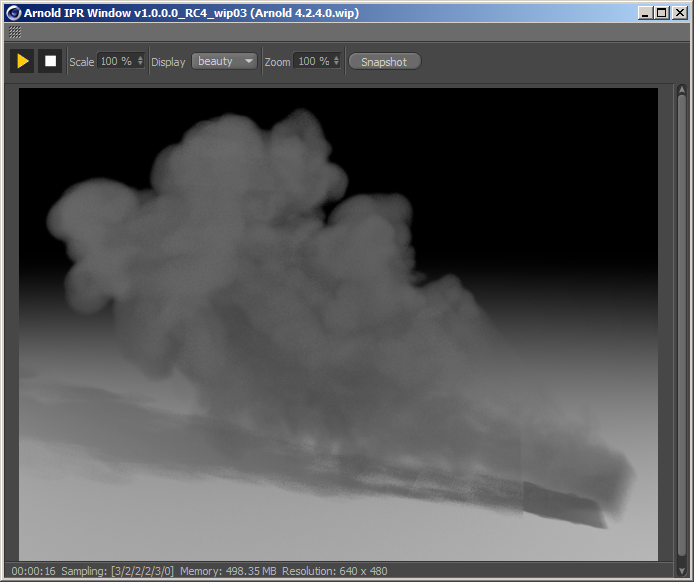
Create a S tandard Volume shader (Arnold > Volume > standard_volume) in the Material Manager and drag and drop it onto the Turbulence FD container in the Object Manager.
Select the standard_volume shader and enter smoke in the Density channel.
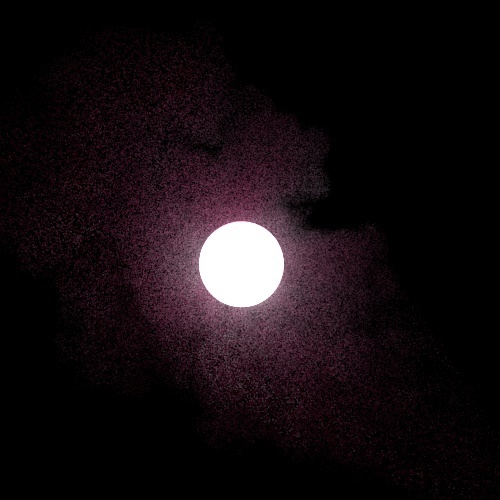
- IPR render the scene again. You should now see the TFD container volume rendered correctly.
Lighting
We will now look at improving the lighting and reducing noise in the scene.
- Let us focus on one light. Delete Light.1 so that we are left with the one remaining C4D Light.
- Right-click on the light in the Object Manager and create an Arnold Tag (C4DtoA Tags > Arnold Parameters).
- Select the tag and increase the number of light samples to 3. If the scene is looking too dark try increasing the Exposure to 1.
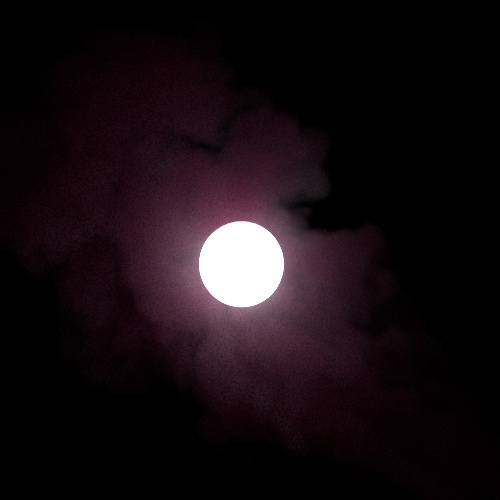
You should notice that the noise in the shadowed areas on the floor is improved when increasing the number of light samples.
 |
 |
| Light samples: 1 | Light samples: 3 |
Volume Noise
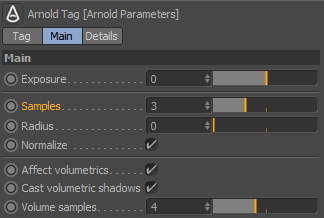
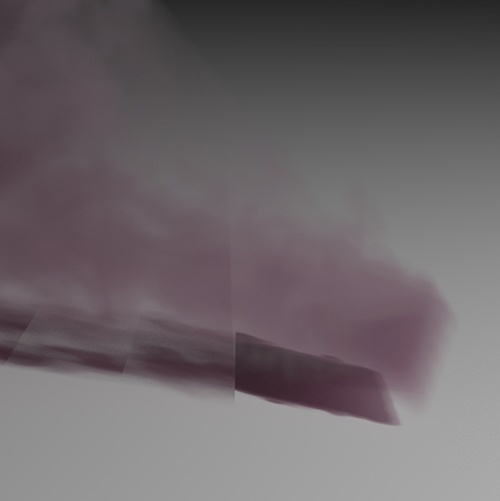
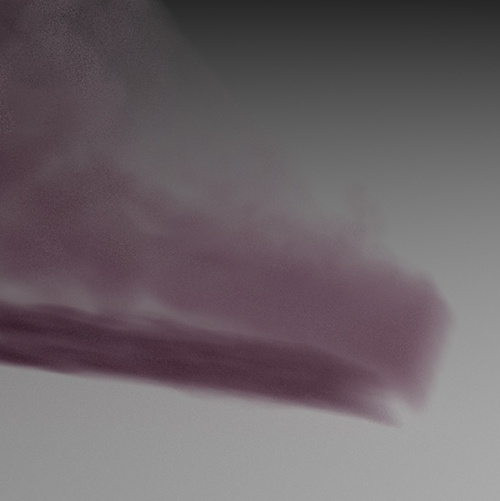
There is still some noise within the TFD container itself. To improve this noise we need to increase the number of volume samples for the light.
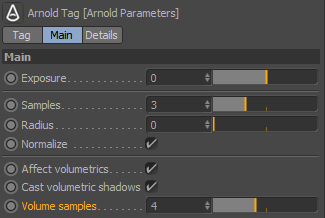
Volume samples in the Arnold Parameters tag for the light
Increasing the number of volume samples in the light's Arnold Tag Parameters will decrease noise within the TFD container volume. Increasing the number of Camera (AA) samples would also help to decrease noise in the volume. However, increasing Camera (AA) samples will significantly increase render times as it might take many AA samples to fully resolve noise in the TFD container volume. Remember to balance volume samples against AA samples, do not drastically increase both at the same time.
 |
 |
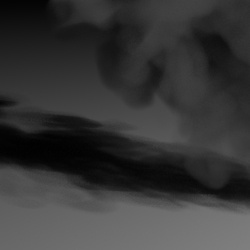
| Volume samples: 1 | Volume samples: 3 |
Placing the light inside the volume produces bright pixels known as 'fireflies'. To reduce this effect you can increase the number of volume samples for the light.
 |
 |
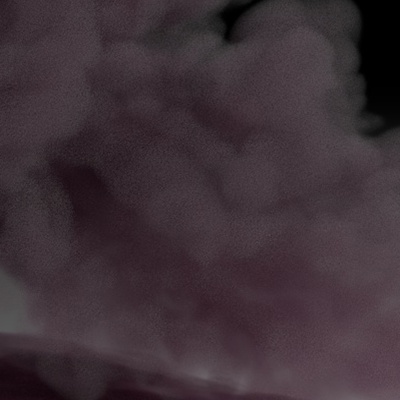
| Volume samples: 2 | Volume samples: 4 |
Volume Indirect
Volume Indirect can be found in the samples section of the Render Settings window. By default, C4DtoA will not compute indirect lighting of a volume such as a TFD container, as it is computationally very expensive. In the next step, we will demonstrate the effect of adjusting 'volume indirect' samples.
Position a sphere inside the TFD container and assign a Standard shader with a high amount of emission. Render the scene with and without any Volume Indirect samples (ensure that Volume Ray Depth is above 1). You should be able to see a difference in the overall illumination of the TFD container. Increasing the amount of Volume Indirect samples will reduce any noise associated with this effect. Bear in mind that increasing this value above 0 will dramatically increase render times.

Volume_indirect: 0 (no indirect light) Volume_indirect: 1 (indirect light visible, but appears noisy) Volume_indirect: 4 (increasing the number of samples looks better)
Step Size
C4DtoA will render the TFD container with a default step size of 10 cm. If the size is too large, the ray marching will skip details in the volume and you may notice aliasing, bias or banding within the TFD container. A way to fix this problem is to add an Arnold tag to the TFD container and reduce the step size to a smaller value, such as 1 cm. Smaller (and therefore more accurate) steps will increase render times while larger steps will render more quickly. The step size is an absolute unit, not relative, and therefore an appropriate step size also depends on the scale of the scene.
- Right-click on the TFD container in the Object Manager and choose C4DtoA Tags> Arnold Parameters.
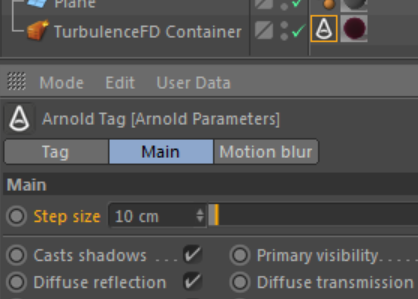
Step size reduced to 0.01 in Arnold Parameters for TFD container
- Reduce the step size until you see improvements in renders of the TFD container. The example below shows a dramatic difference between rendering with a step size of 10 cm and 1 cm.
 |
 |
| Step_size: 0.1 (default) | Step_size: 0.01 |
Rendering
Once you are happy with the results and are ready for the final render, it is time to increase the number of Camera (AA) samples. Something like 5 or 6 should suffice.