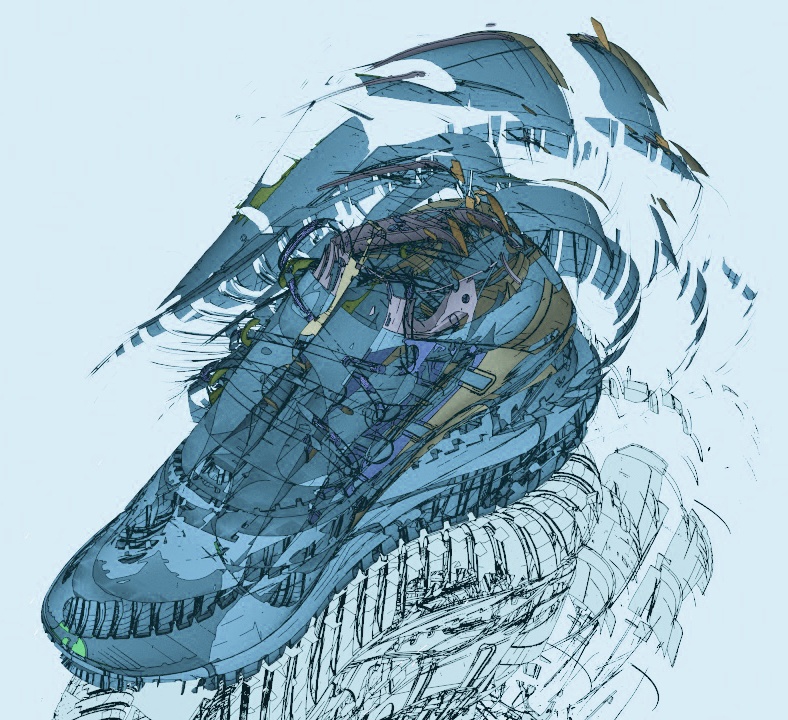
Advertising Campaign
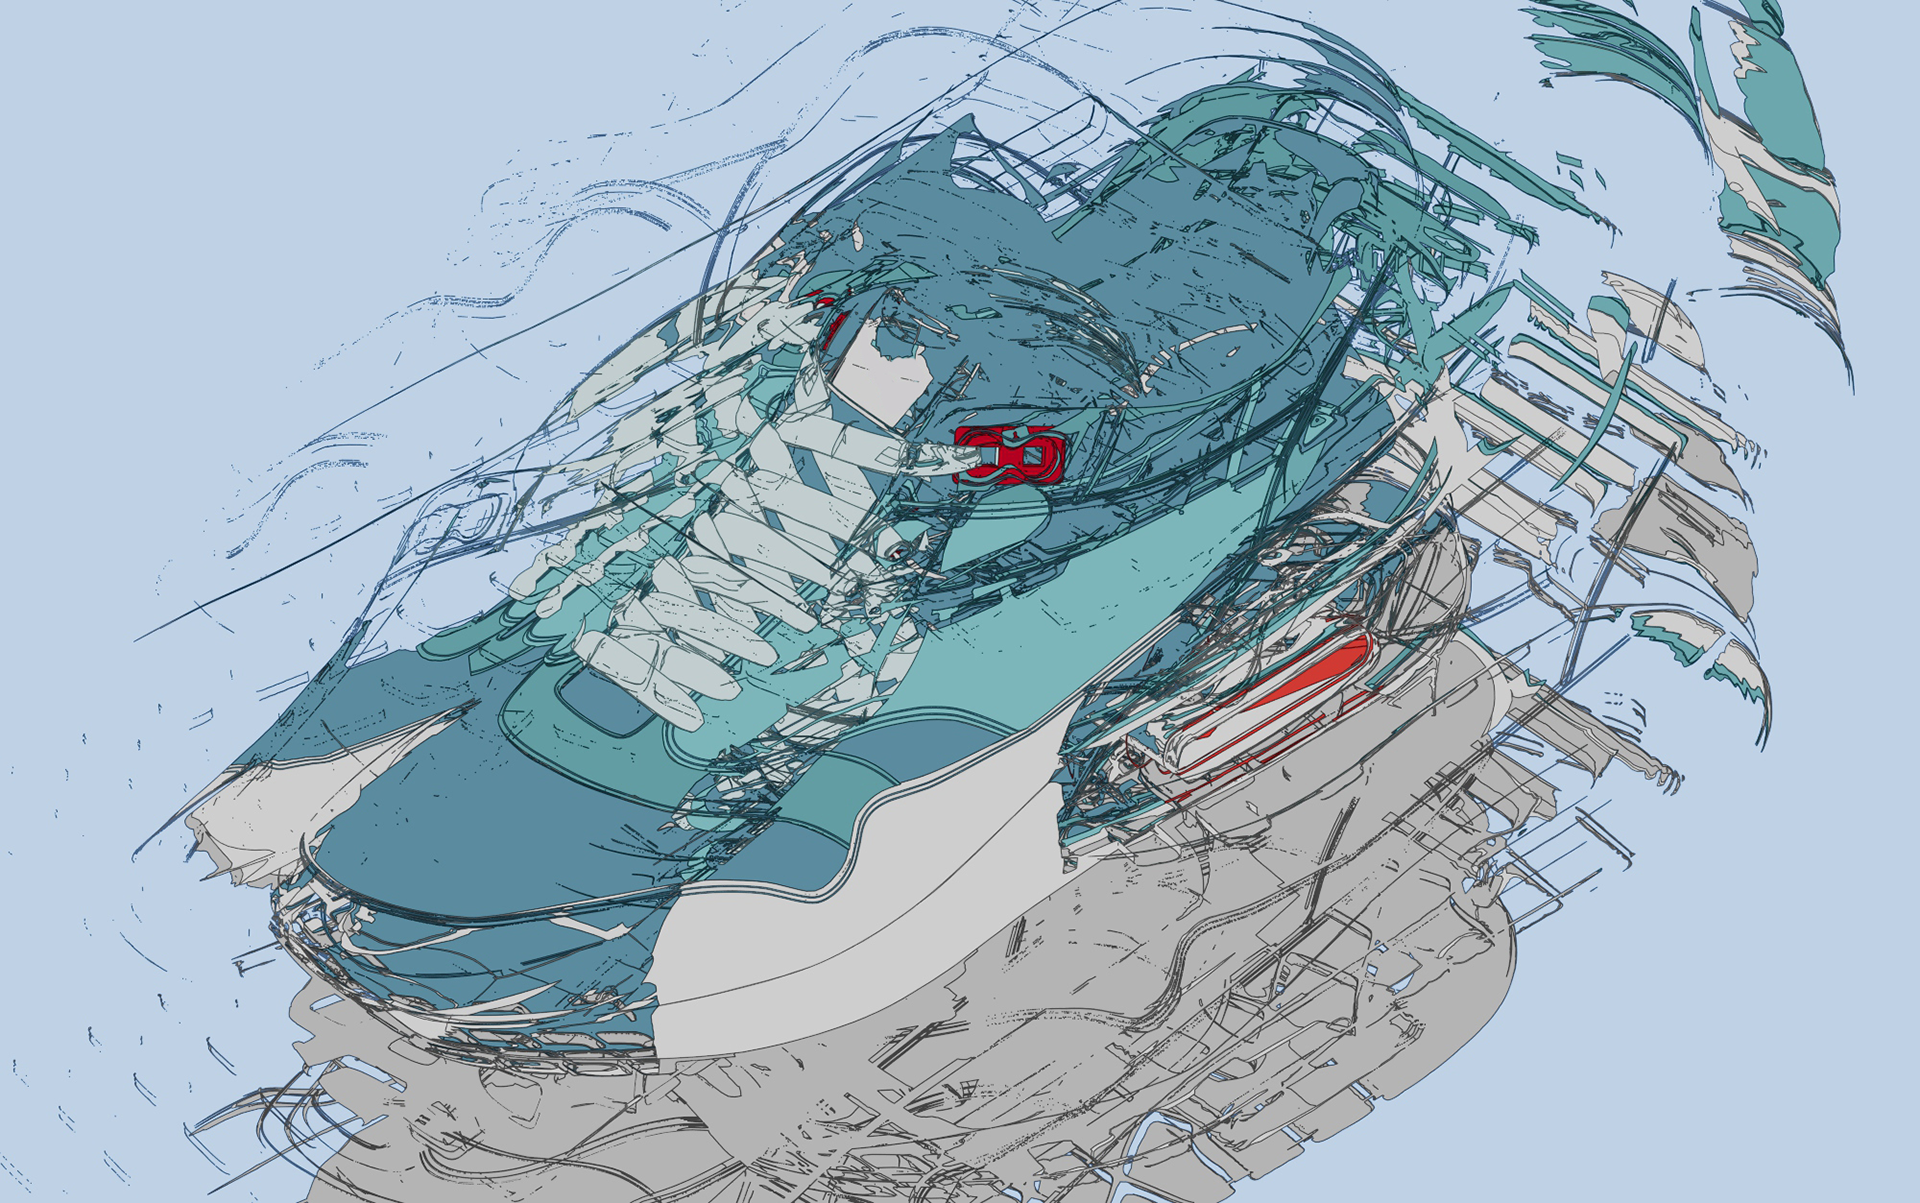
An example of the stylized effect that can be achieved with this tutorial using the toon and clip_geo shaders in Arnold
This tutorial will cover how to create an interesting image that could be used for an advertising campaign or as part of a motion graphics animation. We will cover how to prepare and shade the geometry using the toon shader. We will also cover how to export geometry as an Arnold Scene Source (.ass) file that can be used as a procedural so that we can keep our scene light and responsive. We will then instance those procedurals and use the clip_geo shader to create a cool stylized effect. More examples of this effect can be found here.
In this tutorial, we will use a free to use shoe model that can be downloaded from the Grabcad model library.
The toon shader does not currently work with GPU.
 |
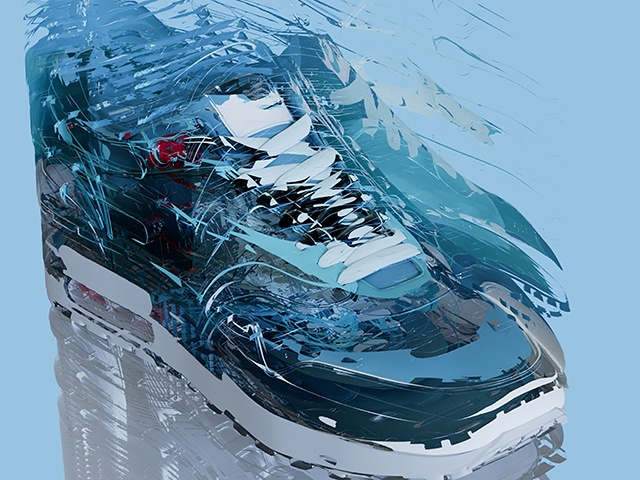 |
Different style variations that can be achieved using this technique
Scene Preparation
Start off by downloading the zip file (link above).
Import the shoe model: tubular nova pk ads.IGS (Z-axis).
Position and orient it so that it sits at the center of the scene grid.
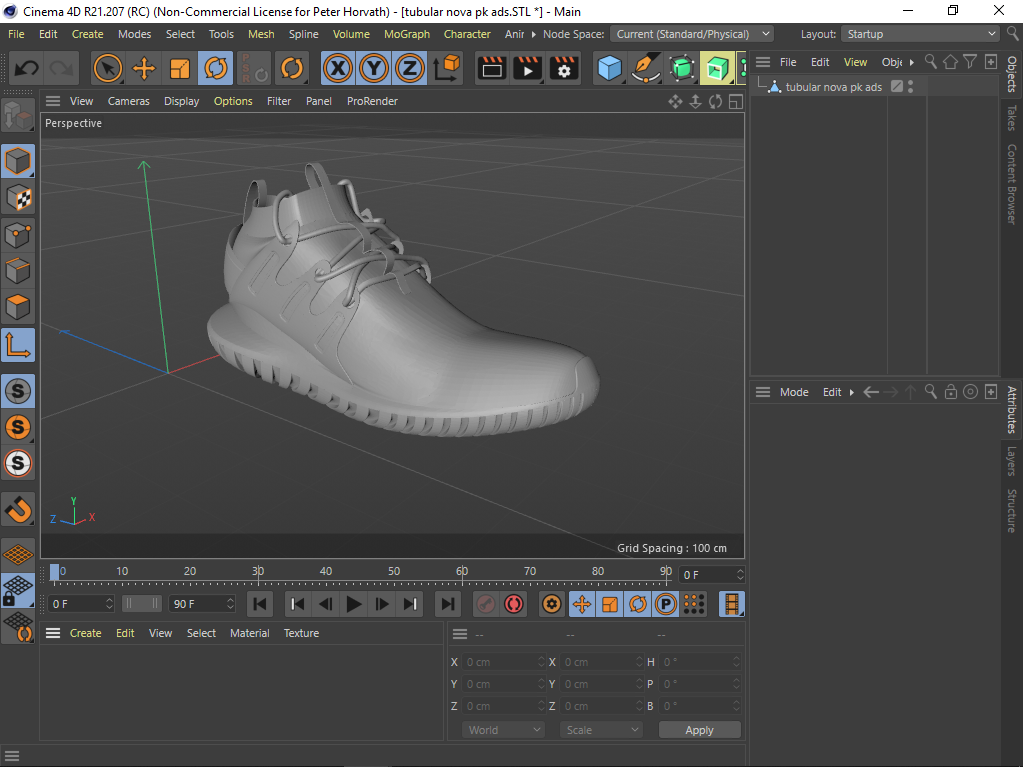
.STEP shoe model imported in C4D
Shading
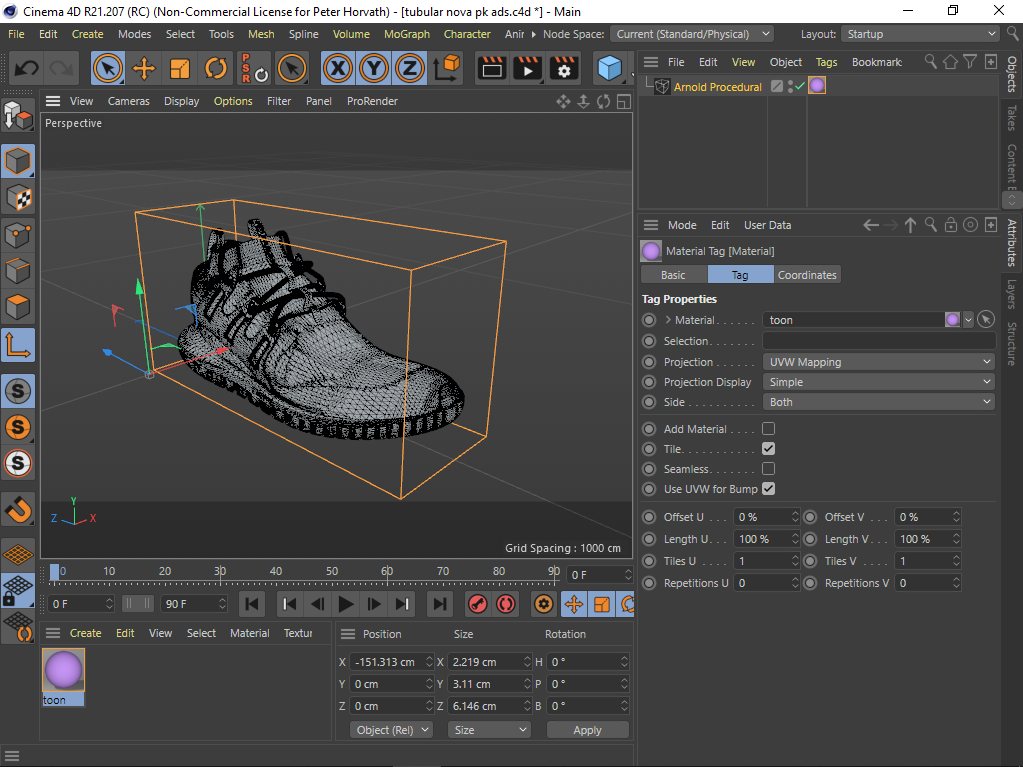
We will now replace the default Lambert with an Arnold toon shader.
Create a toon shader and assign it to the shoe (create -> Arnold -> Surface -> toon).
Under edge_detection, reduce the angle_threshold from 180 to around 10. This will show more detailed edges in the sole of the shoe.
Create a utility shader and connect it to the emission_color of the toon shader. Increase the emission_weight to 1.
Change the utility Color Mode to obj and the shade_mode to ndoteye. This will give us some interesting colors with a flat cartoon style shading.
Use a color_correct shader to refine the hue, saturation, etc values of the color shading effect given by the utility shader.
To view the toon edge, y ou must change the filter_type (sampling settings) to contour. Note that increasing the contour_filter_width (sampling settings) value will increase render times. If it appears too thick try reducing it to 1.

Render Settings: Arnold > Arnold Renderer tab > Filtering > Type: Contour
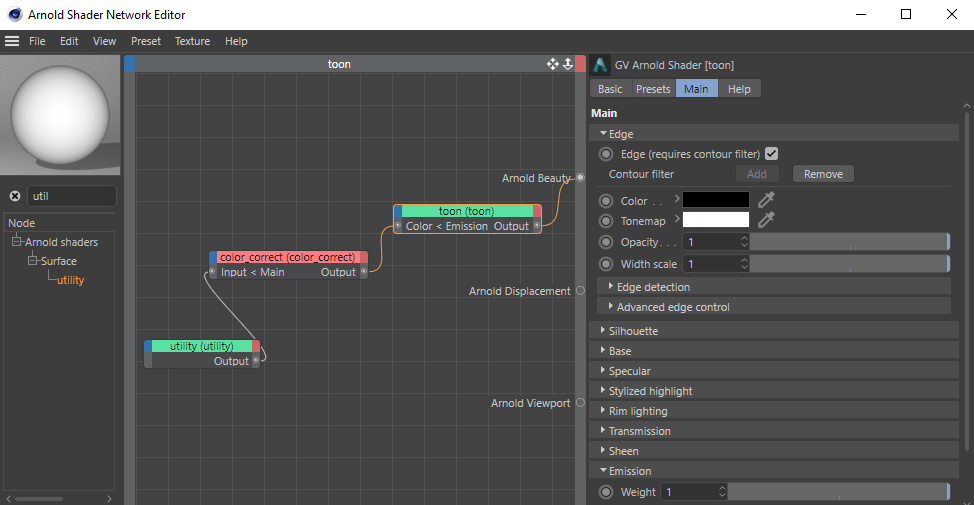
utility -> color_correct -> toon
Arnold Scene Source
We now want to export the finished sneaker geometry as a .ass file. This will allow us to use procedurals which will keep our scene light and responsive.
- First, select the shoe geometry in the scene. set the path where you want to save, change the mode to procedural (this will export only the selected geo with its shader) and press Export.
- Go to Extensions -> C4DtoA -> Scene Export. S et the path where you want to save, change the mode to procedural (this will export only the selected geo with its shader), and press Export.
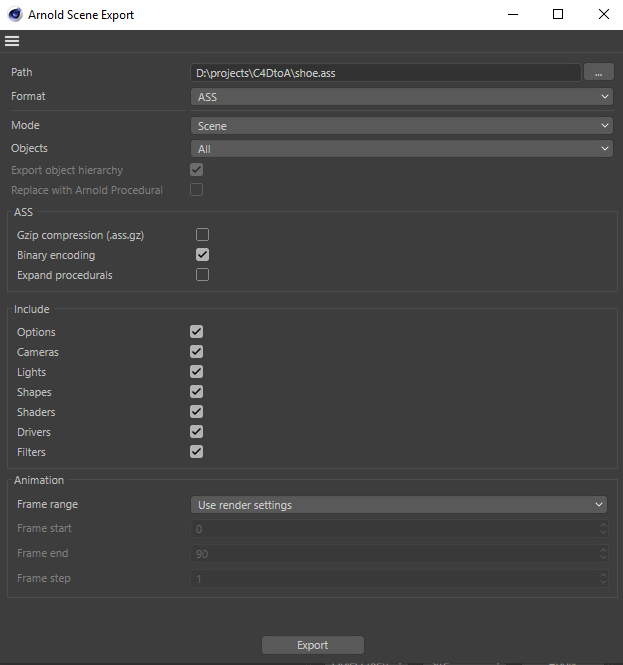
Arnold Scene Export options
Procedural
Next, we want to create an Arnold procedural within which we can import the . ass* file that we exported earlier. *Procedurals allow you to keep your scene light and workable by deferring the loading of geometry data until render time. This will be useful when we create multiple instances.
- Create a new scene.
- Create an Arnold procedural (Extensions -> C4DtoA -> Arnold Procedural.
- Select the Path folder ... in the procedural and choose the shoe .ass file that we exported earlier.
shoe .ass file loaded in Arnold procedural. Viewport Draw Mode: Polywire.
- We only want simple flat lighting for our toon shading effect. We can do this by creating a skydome_light.
Instancing
Now we want to create multiple instances of the procedural and distribute them randomly around the original shoe procedural. These will act as the cutting geometry that provides the effect after we have assigned the clip_geo shader to them.
The position and rotation of the procedurals will determine how the final effect looks, therefore feel free to experiment with this part of the tutorial.
- Duplicate the Arnold procedural and rename it to clip_geo.
- Create a Cloner Object and drag the duplicate procedural (clip_geo) onto it.
- Change the Mode of the Cloner Object to Honeycomb Array. Make sure the instances surround the original shoe procedural.
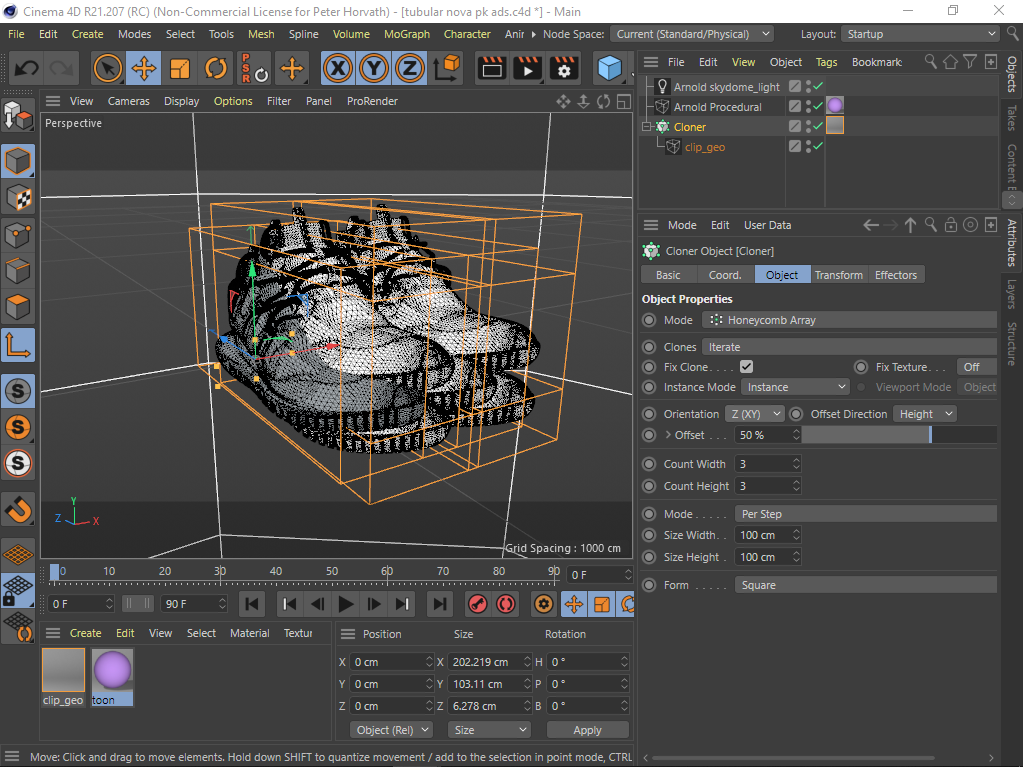
Shoe procedural with Viewport>Display Mode set to wireframe
Clip Geo
Create a clip_geo shader and assign it to the instanced procedurals ( not the original procedural). The clip_geo procedurals will clip geometry from any shape that intersects with it. In this case, the instanced procedurals are clipping the original shoe procedural.
Instanced procedurals clipping the original shoe procedural (floor plane added with another toon shader assigned)
Once you are happy with the effect, you are ready to render. You could also try animating the procedurals to create an effect that could be used for a motion graphics animation.