Polymesh to Volume

Polymesh objects can be rendered as volumes. This gives many creative opportunities for rendering solid objects in varied and interesting ways. This short 'making of' tutorial shows how to combine a polymesh with a volume by combining their shading using the displacement attribute of a standard_volume shader.
The polymesh should be closed and not have anything self-intersecting, otherwise, the volume may not render correctly.
A simple scene that demonstrates this process can be found here.
Step Size
- First of all, we need to convert the head mesh to a volume. Select the mesh and add an Arnold Mesh Volume tag to it. Increase the step_size to 0.1. When the step_size is positive, it turns a polymesh into a volume and its value is used as the base step for raymarching the volume.
More information about volume step_size can be found here.
Standard Volume
- Assign a Standard Volume shader to the polymesh and increase the density to around 20. This will ensure that the displacement texturing looks more defined later.
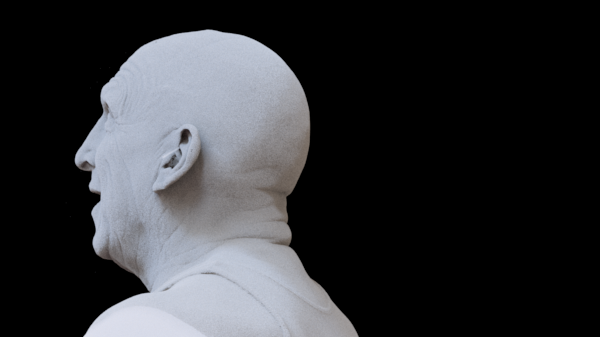
Polymesh rendered as a volume
You must add a step_size value and assign a standard_volume shader for the mesh to render as a volume.
Volume Padding
The next step is to enlarge the volume by using Padding. This will be useful for when we want to displace the volume with a texture. Note that this slack applies not only to the bounding box but also to the voxels used for ray extents inside the bounding box. In this case, a small amount of 0.05 was used.
For best performance, this should be set as low as possible, while still covering the maximum the displacement amount.
Volume
Next, place an Arnold Volume at the rear of the head and assign the same Standard Volume shader to it. Alternatively, you could use a different mesh and apply the same shader as the head to it. The aim is to have something that looks complex for the displacement texturing process.
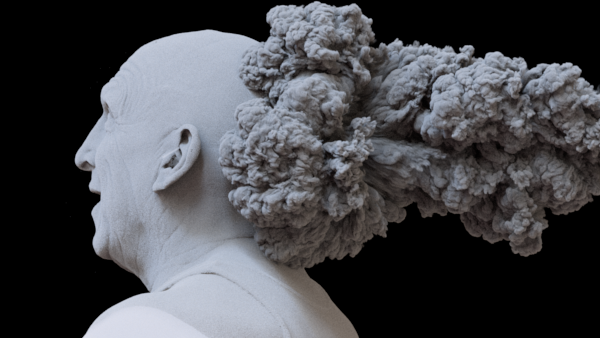
Volume rendered with same standard_volume shader
Displacement Texture (Standard Volume Shader)
- Connect an image texture to the displacement attribute of the standard_volume shader. In this case, a camera_projection shader has been used. We can see the effect of the texture (mostly on the head), however, we need to make the effect more prominent.
A Camera Projection shader is required, otherwise using an image for displacement is not valid.

Displacement texture is faintly visible
Range Shader
- We can use a range shader to remap the input values of the file texture to exaggerate the effect. Connect the file texture to the input of the range shader and connect the range shader to the displacement of the standard_volume shader. Increase the output_max value of the range shader to around 8. You should now start to really see the effect that the file texture has on the volume displacement.
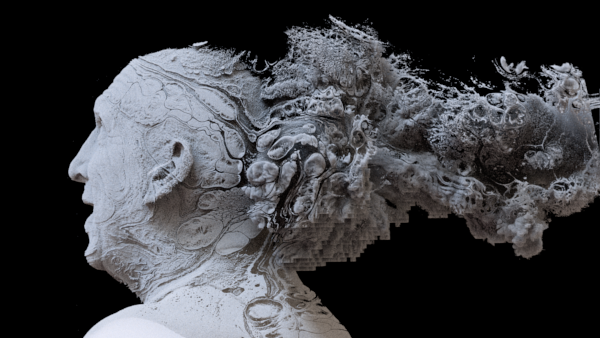
Displacement texture is more obvious due to range shader
- Finally, to add some color, you could try connecting the same file texture to the scatter_color or transparent_weight attributes of the standard_volume shader.


Final shading network