Introduction to Arnold for Houdini
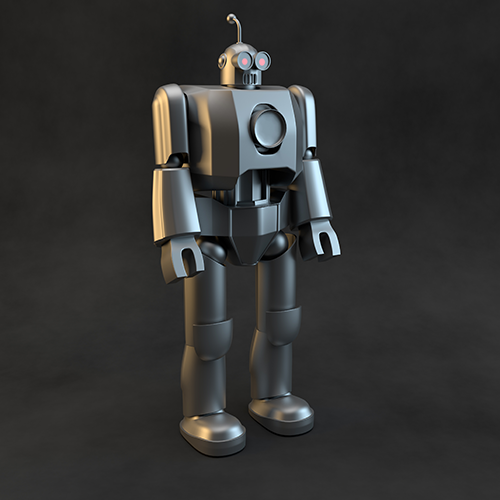 |
Arnold is an advanced Monte Carlo ray tracing renderer built for the demands of feature-length animation and visual effects movies. This is a beginner's tutorial that introduces HtoA, a plug-in that allows you to use the Arnold renderer directly in Houdini. In this tutorial, we will cover how to build a simple photographic lighting studio setup that can be used for lighting and rendering all manner of objects. We will go through the steps of lighting, shading, and rendering a toy robot model using the Arnold renderer. We will use Arnold's own proprietary lights to achieve a physically accurate, photo-realistic lighting setup.
We will use the standard_surface shader to shade the robot and give it a metallic finish. The standard_surface shader is a multi-purpose shader capable of producing all types of materials, from simple plastic to car paint or skin. The standard_surface shader is very powerful, and allows a large number of different sorts of materials to be created, but can be somewhat daunting at first. Due to a large number of controls, the standard_surface shader is split up into several groups, such as Diffuse, Specular, Sub-Surface scattering, etc. We will need to adjust the Diffuse and Glossy attributes in order to get a believable brushed metal effect.
We will also look at some of Arnold's camera lens options to produce realistic, physically accurate depth of field. Lastly, we will look at how to optimize render settings and eliminate any noise that may appear in the render. The estimated time it will take to complete this tutorial should be no more than 30 minutes.
Scene setup
- Start off by opening this start scene. In the scene, you should see the robot model and a simple studio backdrop model.

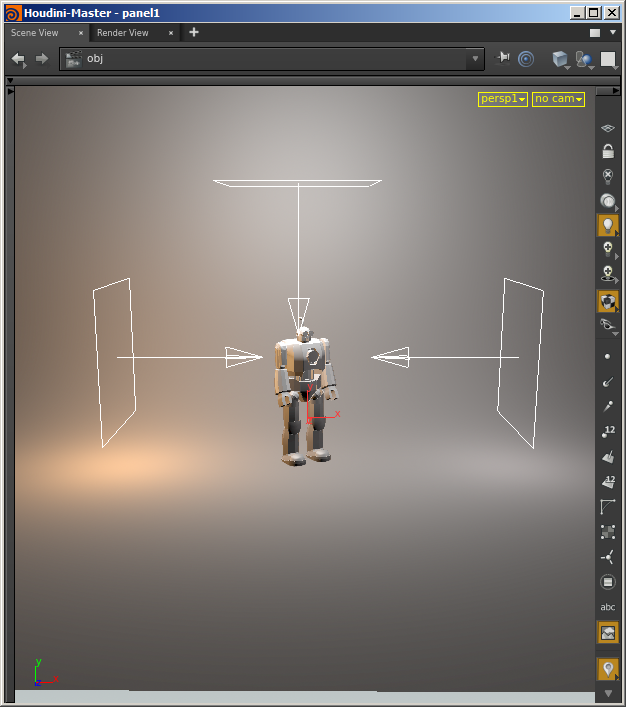
- Now we want to light our studio scene. Start off by creating three Arnold lights. This can be done by clicking on the light icon on the Arnold shelf. Change the light type to Quad.

- Position and scale one light on either side and another in the center, above the robot. Rotate them so that they are pointing inwards towards the robot as indicated in the screengrab below.
Light settings
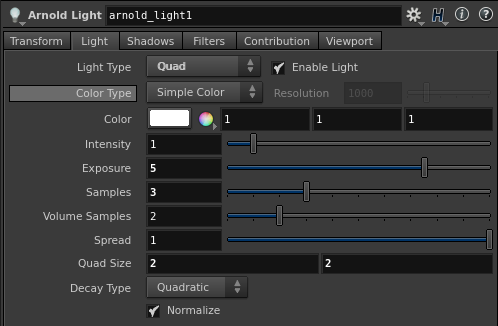
- The scene may appear dark when it is rendered. We, therefore, need to increase the exposure of the lights. Under the Arnold attributes, increase the Exposure to around 5 for each light.
Light Samples
- You may notice some noise in the shadows from the Area lights. This is because the light's samples are set to 1 by default. To reduce the noise, try increasing the light samples to 3. This setting can be found in the Arnold attributes within each light. Light samples control the quality of the noise in the soft shadows and direct specular highlights. The higher the number of samples, the lower the noise, and the longer it takes to render.
 |
 |
| 1 | 3 |
Shading
- Assign a standard_surface shader to the robot. To turn it into a brushed metal material, we will change the following settings. Increase the Metalness to around 1 and change the Base Color to a mid-grey color and reduce the Specular Weight to 0. The Specular Roughness controls the glossiness of the specular reflections. The lower the value, the sharper the reflection. Increase it to around 0.5.
Camera Depth of Field
- We can use Houdini's native camera to render the scene using depth of field. Create a camera and rename it to 'RenderCam'.
- Select Enable Depth of Field. You won't notice any difference in the render unless you increase the Aperture Size. When you increase the 'Aperture Size', you should see that the robot's head is in the camera focus. Try a low value, such as 0.1 (this value is scene scale dependent).
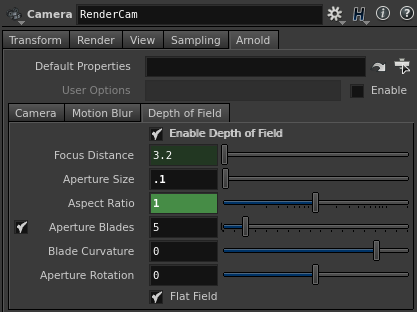
Cameras Arnold DOF parameters
Rendering
- Rendering the scene using the default Camera (AA) setting of 3 is good enough for test renderings. However, for a final render, you will need to increase this to at least 5 or more, depending on the amount of depth of field you have set in the scene.
- There may be some noticeable glossy specular noise on the surface of the robot due to poor sampling of the indirect specular component of the robot's shader. Increasing the global Specular value to 3 helps resolve this noise and creates a cleaner looking render.
Sampling and noise
Noise nearly always comes from insufficient sampling, but increasing sampling for the wrong rays can make the render times increase without helping to remove the noise. The aim is to allocate rays as effectively as possible to minimize the noise in the most efficient manner. So if the Camera samples have to be increased to remove DOF noise, the other settings must be lowered to keep render times manageable. However, if DOF or motion blur is not a concern, then increasing Camera samples would fix all noise elsewhere, but would also slow render times from the unnecessary rays.