Setting up AOVs
This tutorial is a quick look at setting up AOVs in Solaris.
The file used in this tutorial is available here.
For a beginner tutorial on setting up shaders, lights, and importing scenes, see the working with Solaris tutorial.
LOP Introduction
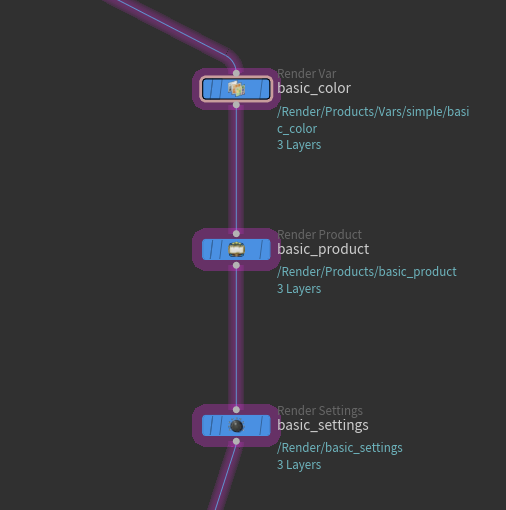
We are going to use three different LOPs to set up AOVs:
Render Var
Render Vars can be used to tell Arnold what to write into each viewport or OpenEXR layer, and how to filter that AOV. They are roughly equivalent to an AOV definition and filter node. When previewing the AOVs in the viewport, we can select which AOV to preview by using the Viewing output button on the right side of the viewport and choosing the preferred layer to preview.
You can read more about Render Vars here.
Render Product
Render Products can be used to collect multiple Render Vars for rendering. They are roughly equivalent to an Arnold Driver with multiple AOV inputs. The main difference is that each Render Product can have its own camera, resolution, data window, pixel aspect, and shutter parameter.
You can read more about Render Products here.
Render Settings
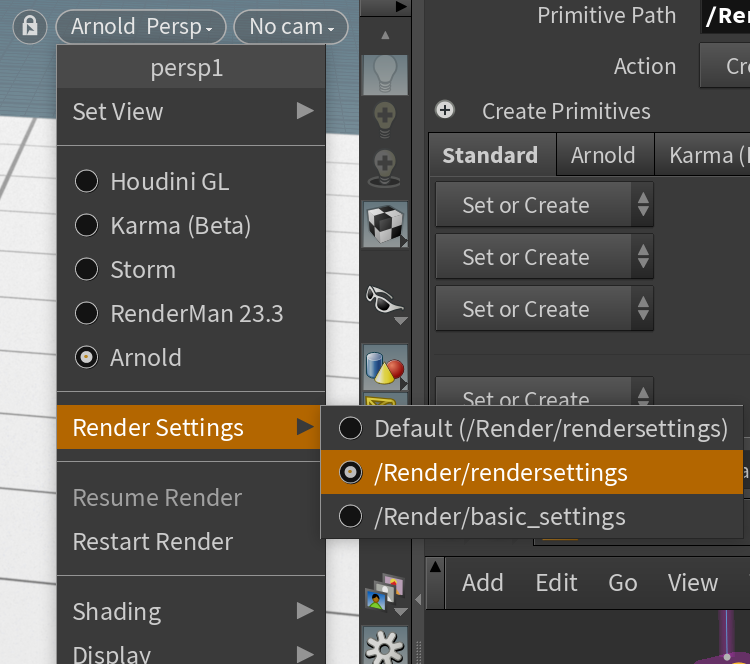
Render Settings can be used to collect multiple Render Products for rendering and setting up global attributes for Arnold. They are roughly equivalent to the Arnold Options node. A scene can contain multiple Render Settings. Switching between Render Settings for the viewport can be done via the UI controls in the upper right corner of the viewport. (Middle Icon -> Render Settings -> Preferred Render Setting).
Single AOV example
In this example, we set up a single color AOV for previewing.
Basic Color
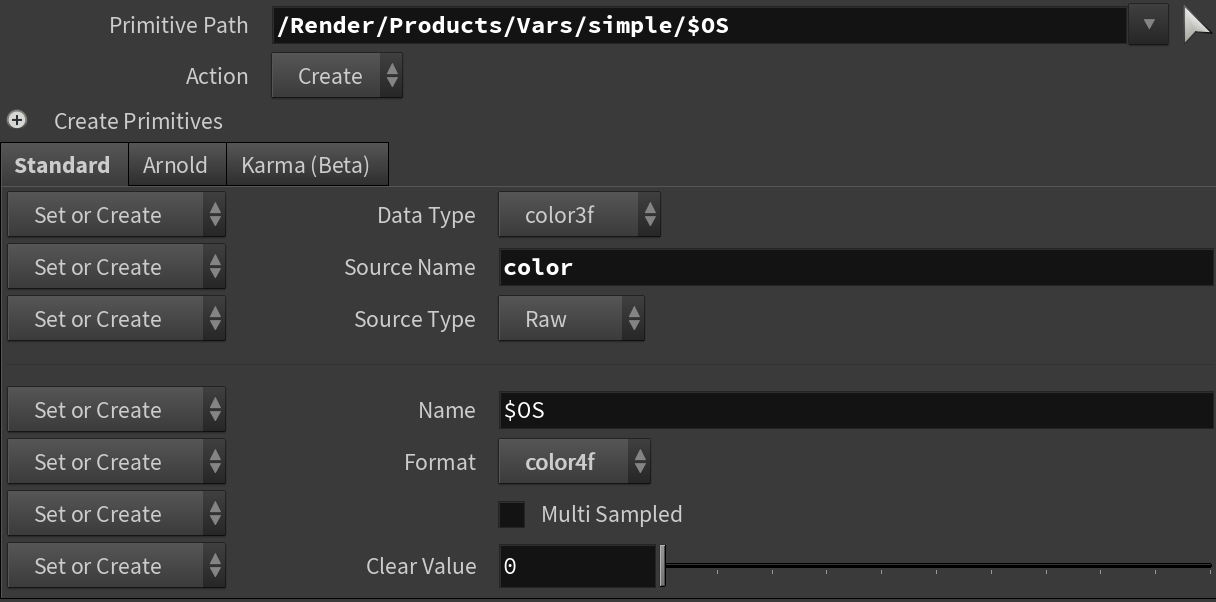
First, let's set up the Render Var.
- Create a new Render Var (TAB -> Rendering -> Render Var)
- Set the data type to color3f instead of float4. This will lead to the background being black, as there is no alpha present for blending the rendered AOV over the native Houdini viewport.
- Set the Source Name to color. This will tell Arnold to use the beauty AOV.
- Set the Source Type to raw. This means that the Source Name parameter will be used to select which AOV to render
- The Name parameter will set the viewport/OpenEXR layer's name. This can be anything, but has to be unique for each collection of Render Vars to render. In this example, we are using $OS, which will set Name to the LOP's name.
Basic Product
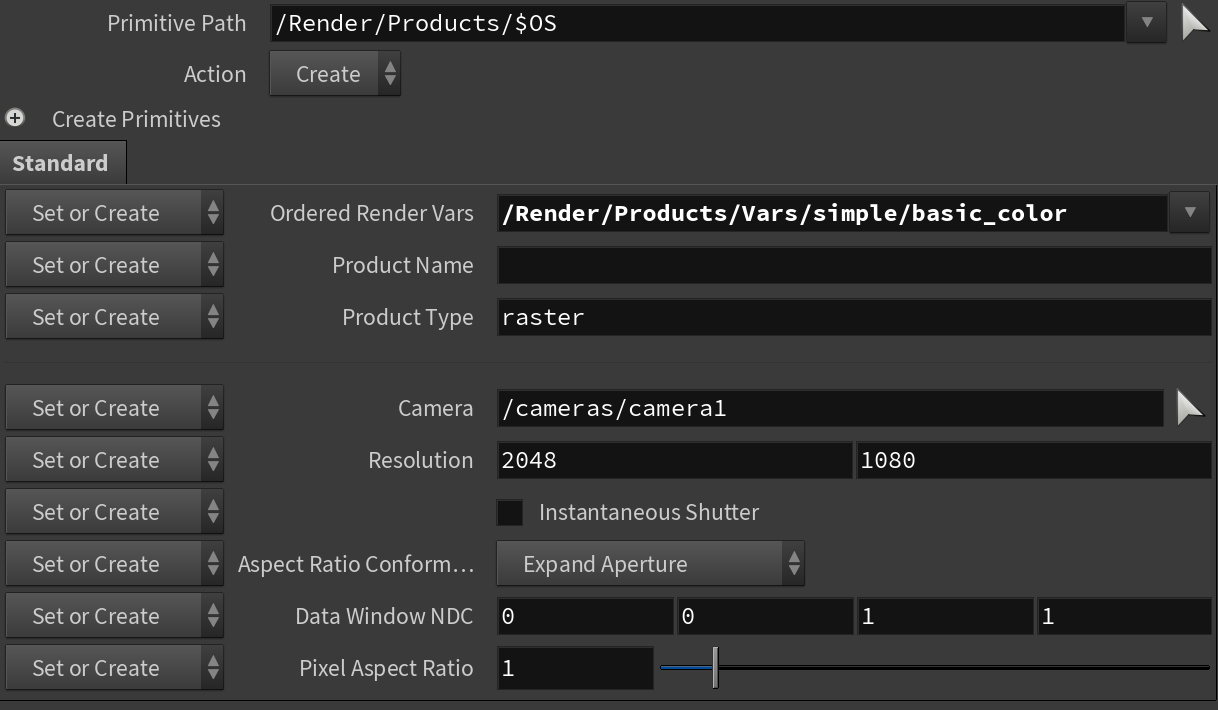
The next step is to configure the Render Product, so we can collect all the Render Vars required.
- Create a new Render Product (TAB -> Rendering -> Render Var)
- Set the Ordered Render Vars parameter to the Render Var we created in the previous step. Pressing the arrow icon on the right side of the parameter will pop up a quick selection of available Render Vars. Note, this is the Render Var's primitive path in the USD stage, not the LOP node's name in the stage. You can find this by looking at the Primitive Path parameter of the Render Var.
- Make sure Product Type is set to raster.
- We don't need to configure the Camera or the Resolution parameter, as in this example, we are rendering into the Solaris viewport.
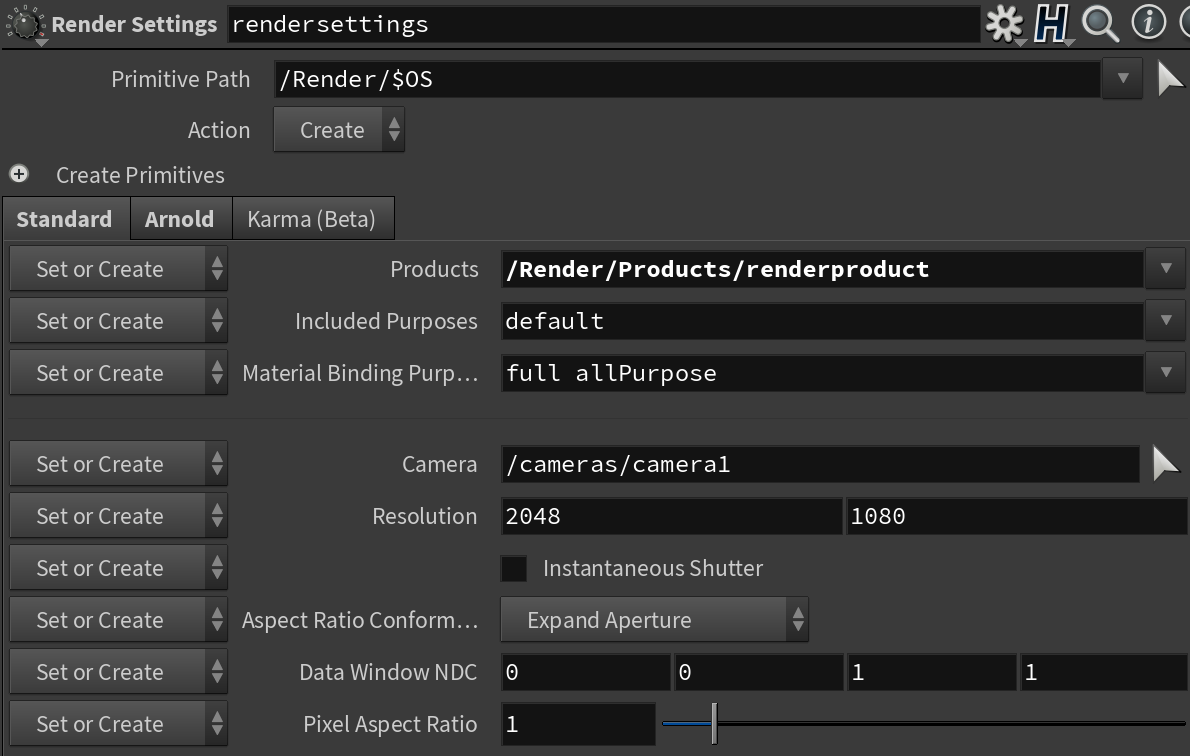
Basic Render Settings
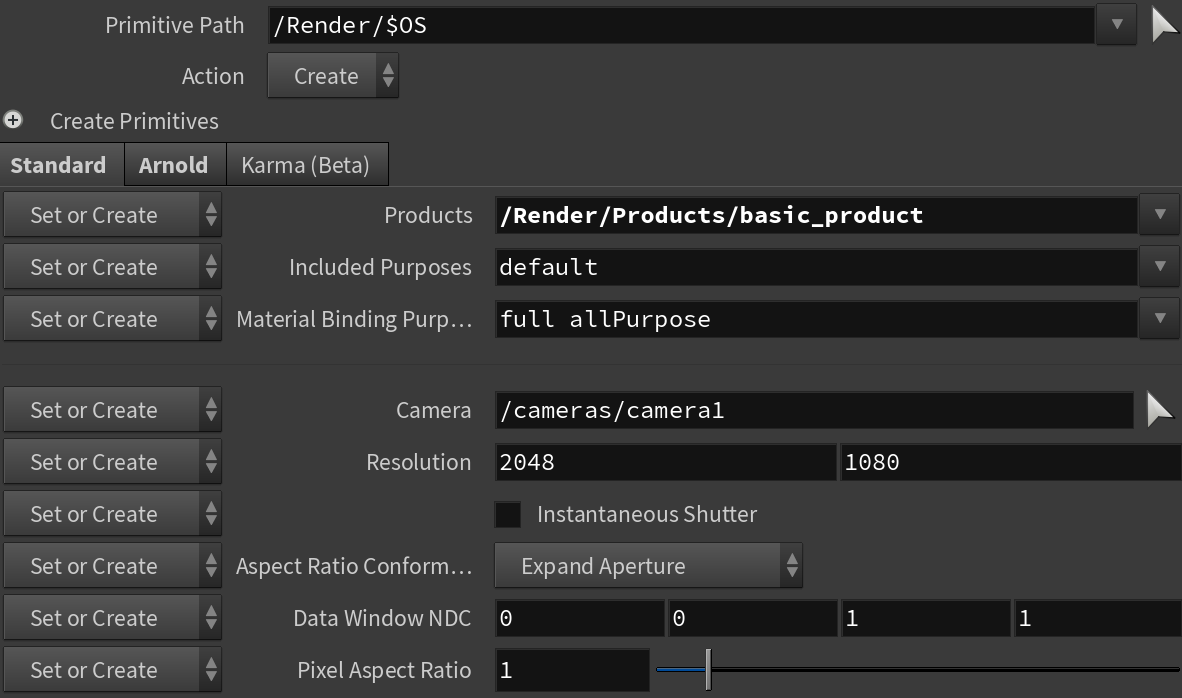
The last step is to set up a Render Settings LOP. If this is the only Render Settings in our scene, it'll be automatically used for the viewport; otherwise, we have to select it for previewing.
- Create a new Render Settings (TAB -> Rendering -> Render Setting)
- Set the Products parameter to our Render Product created in the previous step. Pressing the arrow icon on the right side of the parameter will pop up a quick selection of available Render Products. We need to use the Primitive Path of the Render Product just like when adding Render Vars to a Render Product.
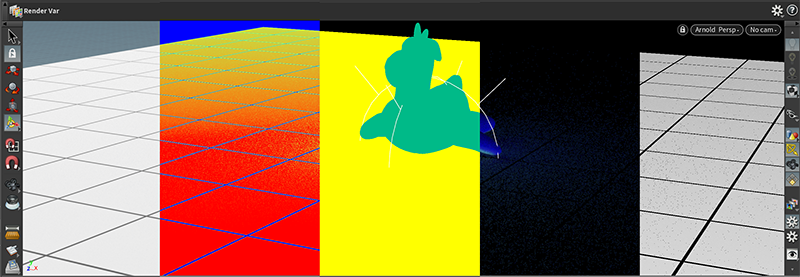
Multiple AOV example
In this example, we set up multiple AOVs for previewing. We will look at different ways to set up filters and AOVs for each Render Var. It's important to note that each Render Var has to have a unique Name parameter per Render Setting.

Beauty with a Triangle Filter
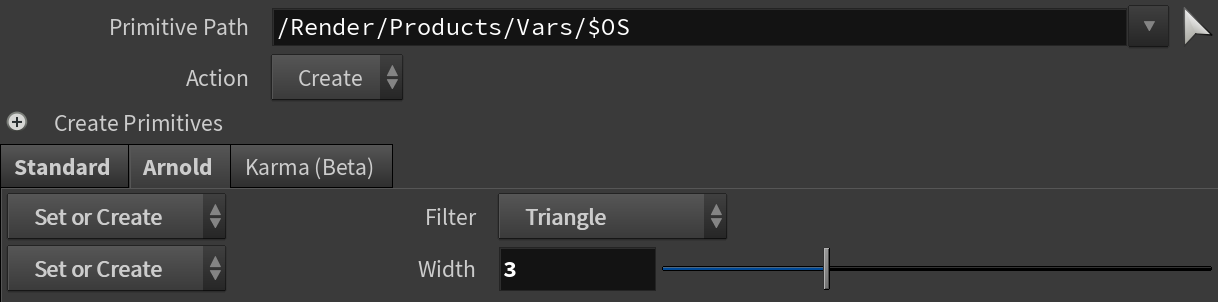
First, let's set up beauty with alpha and a triangle filter.
- Create a new Render Var (TAB -> Rendering -> Render Var)
- Make sure the Data Type parameter is set to float4. This will tell Arnold to calculate the alpha channel for the beauty, so it can be correctly composited over the Solaris viewport.
- Set Source Name to color.
- Set Source Type to raw.
- Set Name to $OS.
- Click on the Arnold tab to access the filter settings.
- Set Filter to Triangle.
- Set Width to 3.

Diffuse Direct with a Closest Filter
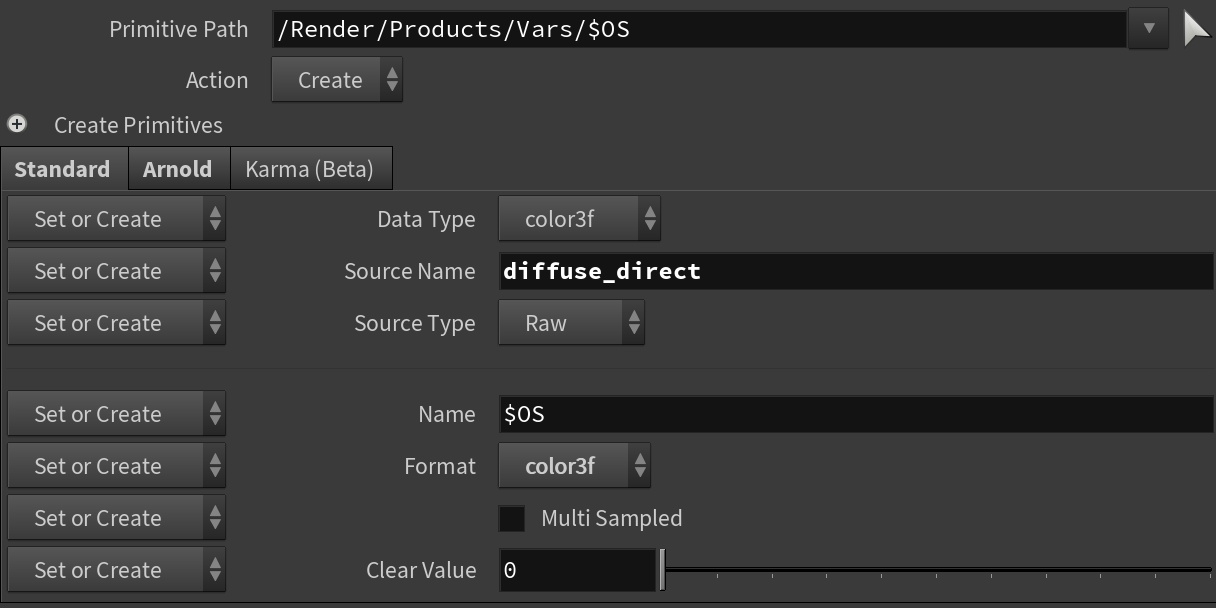
Next, let's create a direct_diffuse AOV with the closest filter.
- Create a new Render Var (TAB -> Rendering -> Render Var)
- Set Data Type to color3f. For secondary AOVs, we generally don't require an alpha channel, and using fewer components allows us to save some memory and computing power.
- Set Source Name to diffuse_direct. This will instruct Arnold to use the diffuse_direct AOV.
- Set Source Type to raw.
- Set Name to $OS.
- Click on the Arnold tab to access the filter settings.
- Set Filter to Closest. Closest filters have no additional parameters.

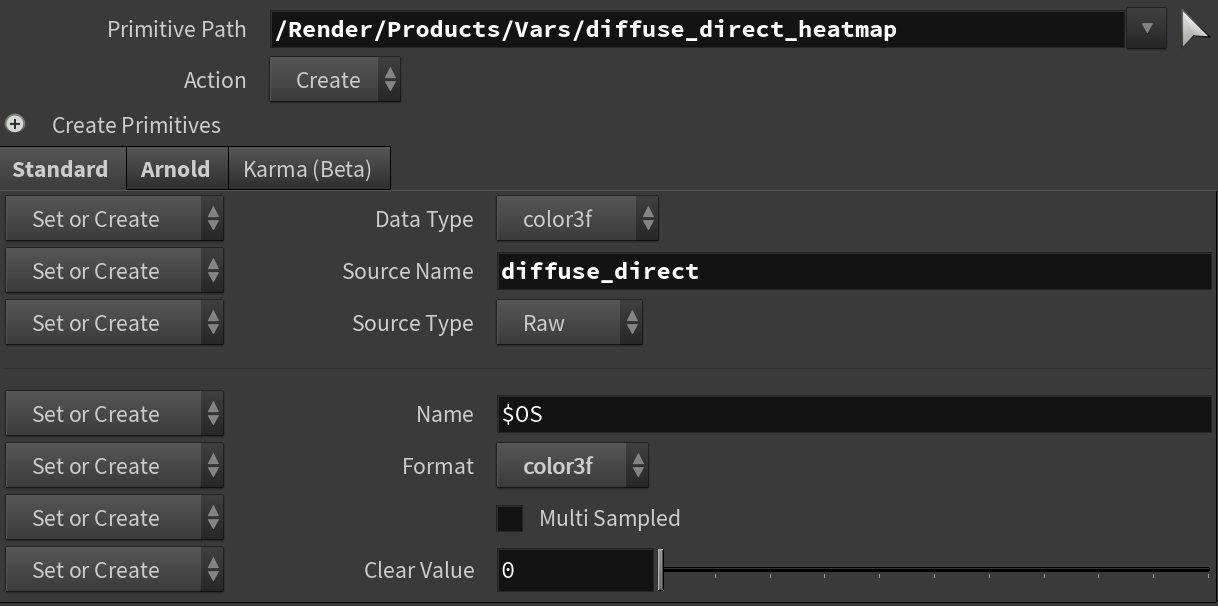
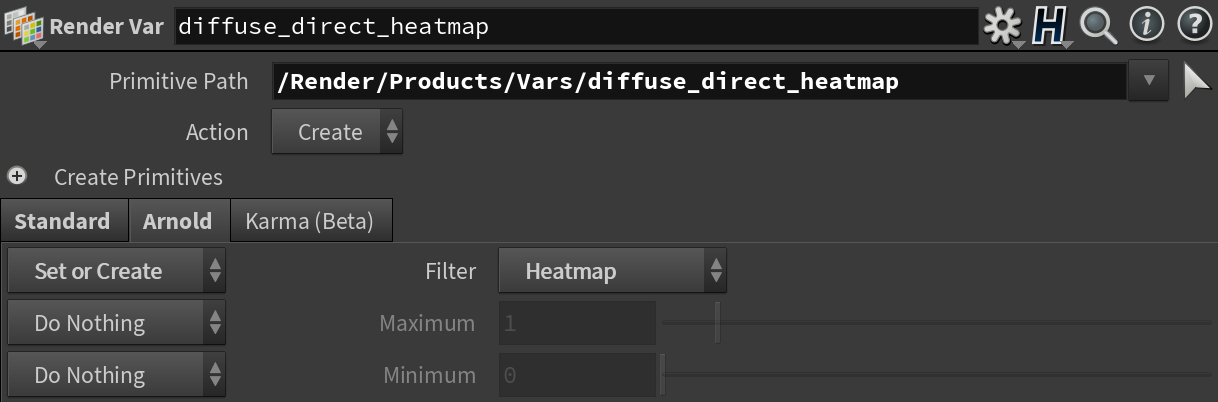
Diffuse Direct with a Heatmap Filter
Next, let's use diffuse_direct again, but with a Heatmap filter. Solaris allows users to use the same AOV, but with different filters. Each AOV will be available using its unique Name parameter, either in the viewport or in an OpenEXR file.
- Create a new Render Var (TAB -> Rendering -> Render Var)
- Set Data Type to color3f.
- Set Source Name to diffuse_direct.
- Set Source Type to raw.
- Set Name to $OS.
- Click on the Arnold tab to access the filter settings.
- Set Filter to Heatmap.
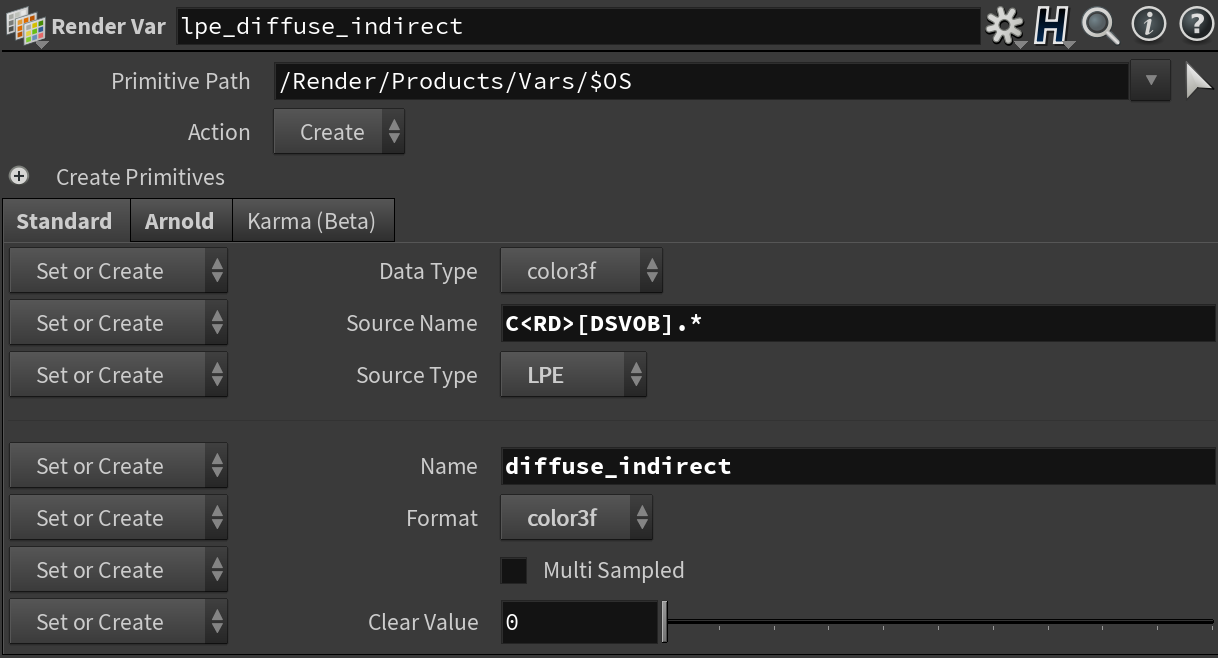
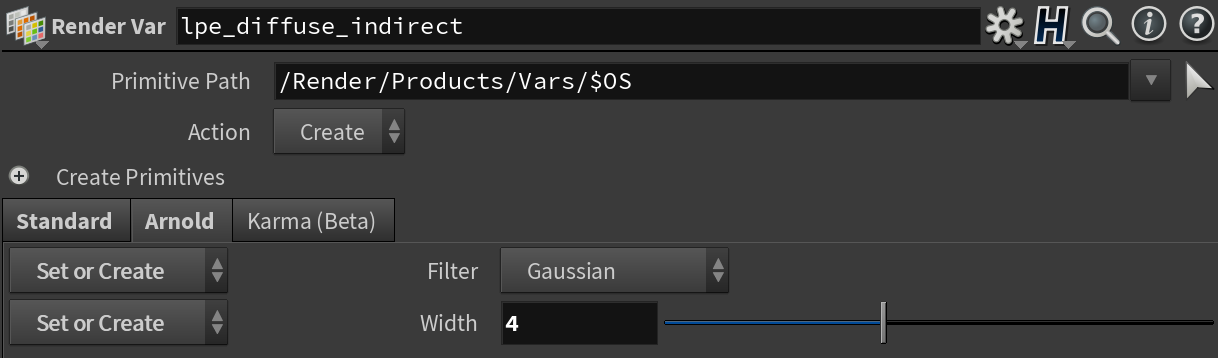
Diffuse Indirect Light Path Expression with a Gaussian Filter
Next, let's create an AOV using a Light Path Expression with a stronger gaussian_filter.
You can read more about Light Path Expressions here.
- Create a new Render Var (TAB -> Rendering -> Render Var)
- Set Data Type to color3f.
- Set Source Name to C
[DSVOB].* . When setting LPEs, Arnold will interpret Source Name as the LPE. - Set Source Type to LPE. This will tell Arnold to interpret Source Name as an LPE.
- Set Name to $OS.
- Click on the Arnold tab to access the filter settings.
- Set Filter to Gaussian.
- Set Width to 4.
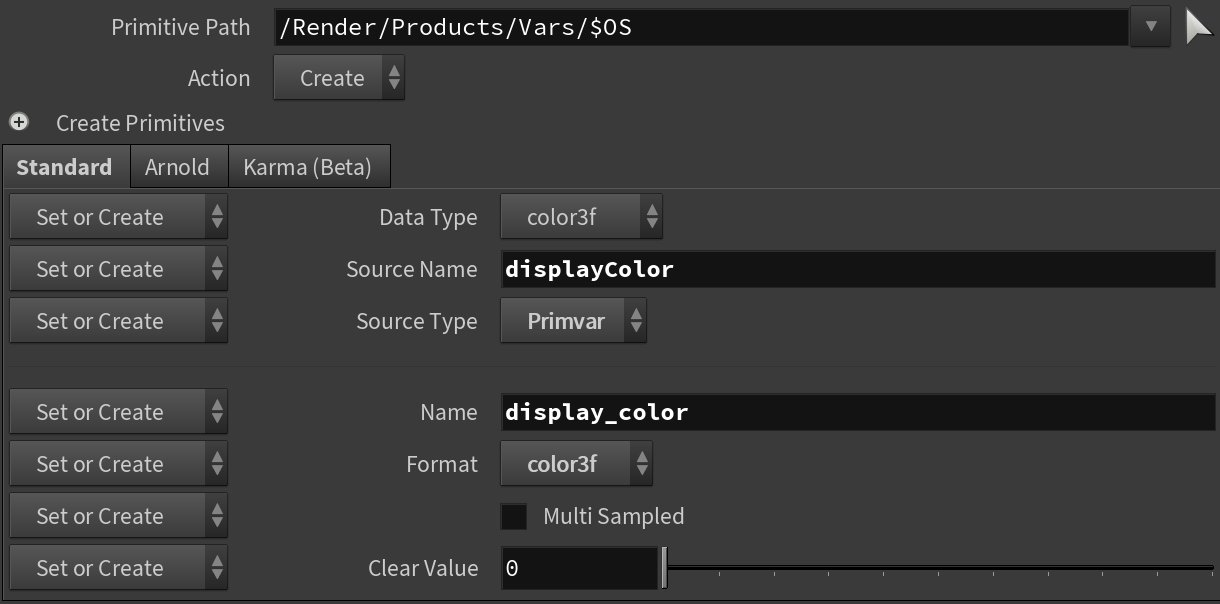
Display Color Primvar with an empty Filter tab
Next, let's display a primvars set on shapes. This allows us to render primvars (user data in Arnold) from any shape, or black if the primvar does not exist.
- Create a new Render Var (TAB -> Rendering -> Render Var)
- Set Data Type to color3f.
- Set Source Name to displayColor. When rendering primvars, Source Name has to match the primvar's name in the USD stage, without the primvars: prefix. So in this case, we are using displayColor to preview the primvars:displayColor attribute on a USD shape.
- Set Source Type to primvar. This will tell Arnold to use Source Name to find the primvar in the scene.
- Set Name to $OS.
- We are not setting up any filter, so Arnold will use a closest_filter.
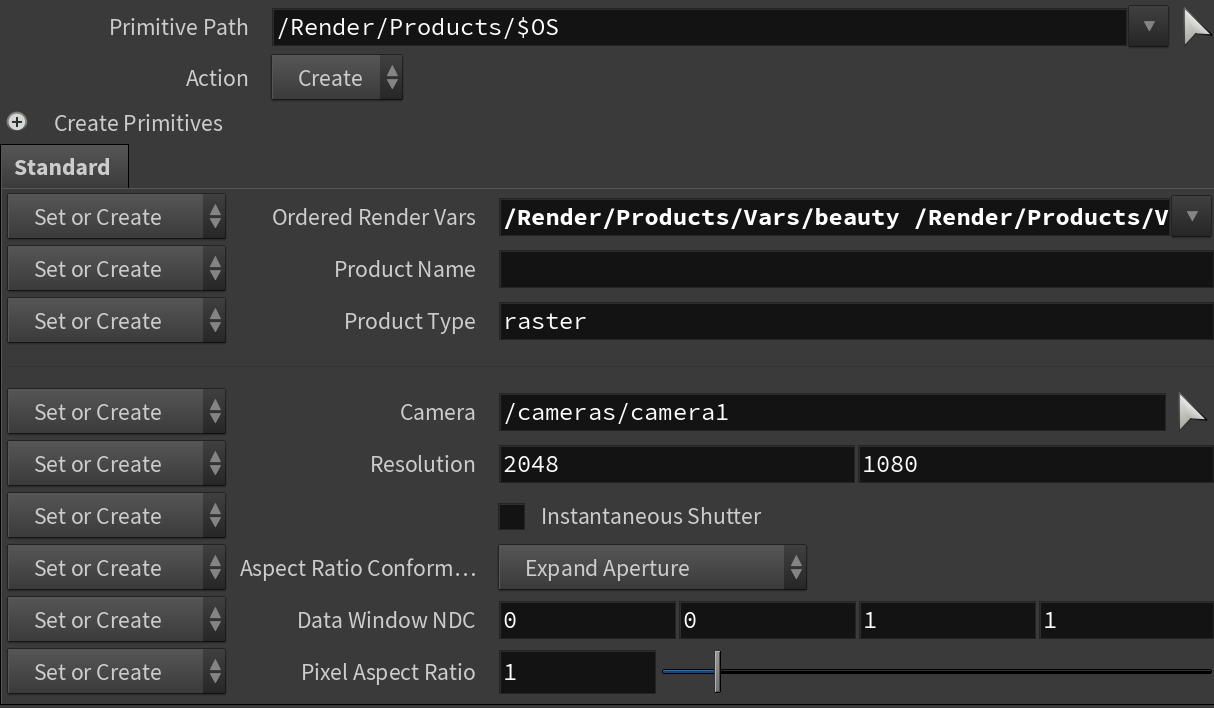
Render Product
Next, we are creating a Render Product to collect all the AOVs previously set.
- Create a new Render Product (TAB -> Rendering -> Render Var)
- Set the Ordered Render Vars parameter, so it contains a path to each Render Var we created in the previous step.
- Make sure Product Type is set to raster.
Render Setting
The last step is to create a Render Setting node. Once this is done, make sure this Render Setting is selected for the viewport if multiple Render Settings exist. Once this setup is complete, and the Render Setting is selected for the viewport, you can preview any of the Render Vars set on the Render Product.
- Create a new Render Settings (TAB -> Rendering -> Render Setting)
- Set the Products parameter to our Render Product created in the previous step.