Arnold RenderView Window
A video showing some of the RenderView features can be found here.
The Arnold RenderView window is an interactive rendering (IPR) utility designed to give real-time feedback on any changes made to the scene while solving several limitations of the DCC's native render view. A long list of artist-friendly features has been added to help with the shading, lighting, and look-dev process, improving interactivity and reducing translation/scene refresh time. For example:
- Smooth, low-latency render updates take place while dragging the mouse rather than at mouse-release time.
- Different cameras, AOVs, and shading modes can be selected at any time, without re-exporting the scene.
- Picking an object with the mouse selects the object in the viewport and highlights it in the RenderView.
- Isolate objects, lights, materials, and even individual shader nodes for easier debugging of shading trees.
- Basic color correction.
- Status bar with comprehensive information about the render in progress and pixel under the cursor.
- Native 3D camera manipulation, including Frame object selection and Frame all.
- Keyboard shortcuts for common actions and display modes.
- Stored image snapshots for easy comparison.
The Arnold RenderView window can be found on the Arnold shelf and under the Maya Arnold menu.

Working with the RenderView
By default, the RenderView acts like an IPR session, progressively rendering the scene by starting with negative AA samples and increasing them in a number of steps. Each change in the scene will automatically trigger a render update. This behavior can be modified by changing the following RenderView options:
- Scene Updates can be disabled. This prevents automatic updates whenever the scene is changed. The user will then manually trigger a new render by calling a Render.
- Progressive refinement can be disabled. This will directly render the image at the "final" AA quality, skipping the intermediate steps.
Disabling both of these options provides the same behavior as Maya's 'Render' command.
Manipulation
By default, the image displayed in the RenderView window can be manipulated in 2D (panned and zoomed) using the Alt key:
- Alt + Left Mouse Button pan the image (middle mouse button also pans).
- Alt + Right Mouse Button zooms in/out.
If the option 3D Manipulation is enabled, then the Alt key allows you to move the Render Camera in 3D space:
- Alt + Left Mouse Button rotates the camera.
- Alt + Middle Mouse Button translates the camera.
- Alt + Right Mouse Button zooms the camera in/out.
Region Rendering
You can use the Crop Region tool to render it to a specific region only. This can be enabled via the menu Render > Crop Region, by pressing the icon,  or by keeping the SHIFT key pressed while dragging a region.
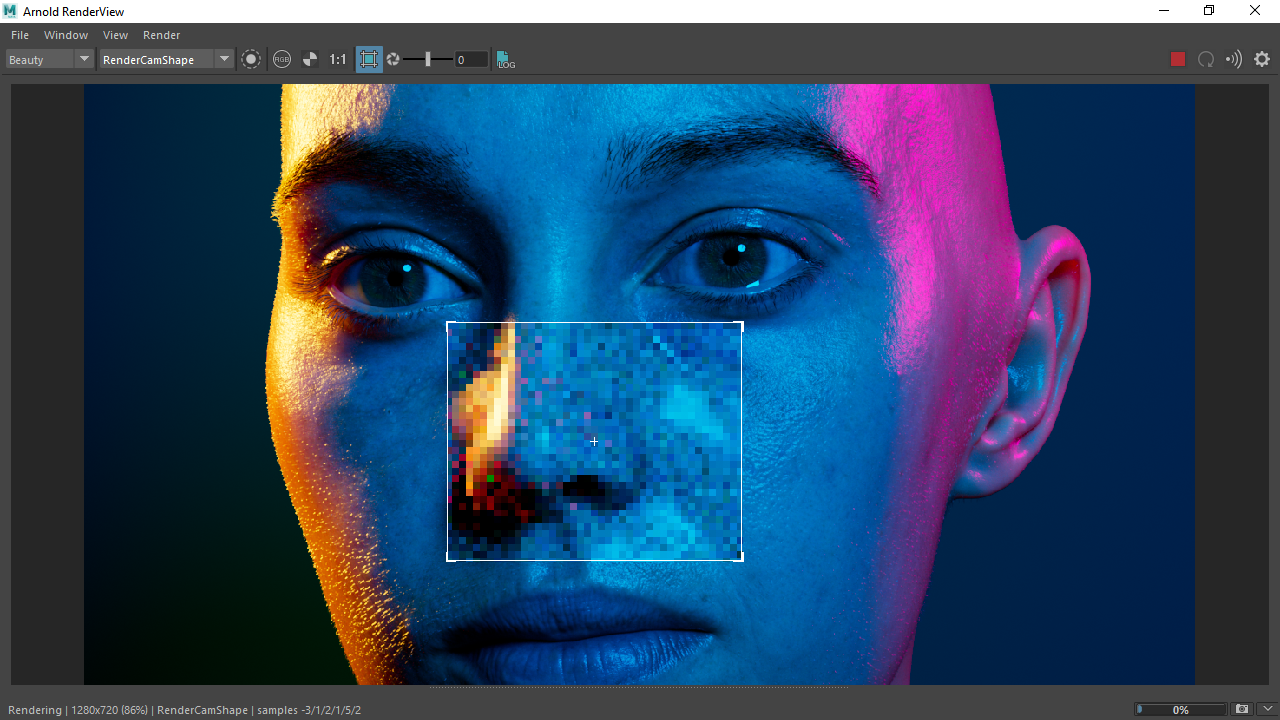
Once the region has been selected, the "crop" option is disabled, so that mouse clicks over the image are seen as "picking" (see the section below).
To clear the Crop Region and render the whole image, click anywhere on the window while the Crop Region option is active. You can also click on the small cross beside the cropped region to clear the region.
Picking
It is possible to 'pick' objects in the RenderView, which selects the visible geometry in the viewport. When doing so, the selected geometry appears temporarily highlighted in the RenderView while the mouse button is pressed.
Picking the geometry (face) highlights it
Status Bar
Just below the render buffer, a Status Bar provides information about the render in progress. When a previously stored snapshot is displayed, information about this previous render is displayed.

- If Debug shading mode is used, the debug mode is shown (OCCLUSION, UV, NORMAL, etc.).
- If Isolate Selected mode is used, the name of the selected node is shown. A ' lock selection'
 option is available for isolate selected, which ignores selection changes.
 - " Rendering... " appears when a render is in progress.
- Render time appears when a render is finished. Note that this render time corresponds to the last AA step, which corresponds approximately to the render time it would take to render this in batch mode.
- Resolution: width x height.
- Zoom factor: 50%, 1:1, 200%, etc.
- Camera name: displays the name of the camera that is being rendered.
- Device: Displays 'GPU' when rendering with GPU. It won't show anything (by default) when rendering with CPU.
- Sampling info: AA samples / GI Diffuse Samples / GI Specular Samples / GI Transmission Samples / GI SSS samples / GI Volume Samples.
- Memory usage displays the memory used for the current render.
When Show Pixel Information is enabled, these additional fields are displayed, relative to the mouse cursor:
- Pixel XY coordinates corresponding to the mouse position within the rendered image.
- Pixel RGBA values as returned by Arnold, below the mouse cursor.
- Luminance values as returned by Arnold, below the mouse cursor.
- EV exposure values as returned by Arnold, below the mouse cursor.
The Status bar can be hidden by disabling Window > Status Bar > Show Progress Bar.
Menus
File Window View Render
File
Save Image
Saves the currently displayed image to disk. The image is color-managed depending on the format. For example, JPEG is sRGB, and EXR is linear.
If a file extension is not set then the image will be saved in JPEG format.
Save Multi-Layer EXR
Saves the currently displayed image to disk with all of the AOVs in a multi-layer EXR.
Save Image Options
Choose to save images using color management and view transform settings.
Load Snapshot Image
Already existing images can be loaded in the Snapshots Library for comparison.
Save Final Images
When enabled, the output images (including AOVs) are automatically dumped to file at every final step of a progressive render. These images are saved in the appropriate project images folder using the file output that is set in the scene. i.e if the scene is set to EXR (default) then the output will be EXR.
Export Arnold Scene
Exports a .ass file of the current scene.
Window
Display Settings
Shows the color correction settings in the Display Settings panel on the right of the RenderView window.
Pixel Information
Displays information about the pixel below the mouse cursor. The XY pixel coordinate will be displayed, as well as the RGBA output value as returned by the renderer (before Color Management is applied).
Status Bar > Show Status Bar
Displays the status bar at the bottom of the RenderView. This status bar shows some useful values such as for render time, resolution, sampling values, and memory usage.
Status Bar > Display Pixel Information
Displays information about the pixel below the mouse cursor in the status bar.
Frame All
By default, the RenderView can be manipulated in 2D by pressing the Alt key (LMB pans the 2D image, RMB or mouse wheel zooms in/out). In this mode, Frame All adjusts the displayed buffer to fit the Viewer size. If 3D Manipulation is enabled, the manipulation no longer affects the 2D image but moves the camera in 3D space. In this mode, Frame All moves the camera to frame the whole scene geometry as if it was performed in the viewport.
Frame Selection
By default, the RenderView can be manipulated in 2D by pressing the Alt key (LMB pans the 2D image, RMB or mouse wheel zooms in/out). In this mode, Frame Selection adjusts the eventual Crop Region to fit the viewer size. If no crop region is active, this behaves exactly as Frame All. If ' 3D Manipulation' is enabled, the manipulation no longer affects the 2D image but moves the camera in 3D space. In this mode, Frame Selection moves the camera to frame the selected geometry as if it was performed in the viewport.
Real Size
If '3D Manipulation' is disabled (default behavior), Real Size adjusts the displayed buffer with its original size, independently of the Viewer size. A 1:1 icon  is also available in the toolbar.
3D Manipulation
By default, the RenderView can be manipulated in 2D by pressing the Alt key (LMB pans the 2D image, RMB, or mouse wheel zooms in/out). If 3D Manipulation is enabled, the mouse manipulation no longer affects the 2D image and instead moves the camera in 3D space. Alt-LMB rotates the camera, Alt-MMB translates the camera and Alt-RMB zooms in and out (similar to the viewport).
Toolbar Icons
Allows you to choose which icons are displayed in the toolbar.

Darken Out-Of-Region
Darkens the area outside of the rendered region.
Show Render Tiles
Displays the visible edge of the render tiles while rendering.
Mouse-centered Zoom
Choose whether or not zoom is centered on the mouse cursor (enabled by default).
Shape Picking
Choose whether or not shapes are selected when clicking on the viewer (enabled by default).
View
Enable AOVs
Renders any AOVs defined in the render settings. These can be displayed during rendering (see below). It is not possible to pick geometry in the RenderView window when this option is disabled.
AOVs
A list of AOVs as defined in the Render Settings. This list is also shown in the toolbar as a drop-down menu. You can change the displayed AOV even during rendering.
All Channels, Red, Green, Blue, Alpha, Luma
Displays the selected color channel in the RenderView. The toolbar icon allows you to switch between them. A right-click menu is also available.

Test Resolution
Fit Window Size dynamically adjusts the render resolution to the size of the window, to always have a 1:1 display ratio.
Store Snapshot
Stores the displayed image in memory. When one or more snapshots have been stored, a slider will appear in the toolbar to help navigate between snapshots.
Previous Snapshot
Navigates between previously-stored snapshots. 'Previous' refers to an older snapshot.
Next Snapshot
Navigates between previously-stored snapshots. 'Next' refers to a more recent snapshot.
Delete Snapshot (Del)
Deletes the current snapshot.
Snapshot library, with thumbnails for each of the stored snapshots. You can also add names and comments.
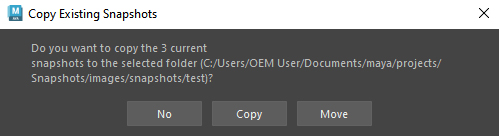
Snapshots Folder
The snapshot folder where the snapshots are saved to disk. The default snapshots folder inserts a subfolder with the scene name. Changing projects will give the option to copy or move the snapshots (when 'Use Snapshots Folder' is enabled).
Press the S hot key in the Arnold RenderView to save a snapshot. Press the Left and Right Arrow keys to navigate between snapshots, and the Up and Down Arrow keys to toggle between the display of snapshots and live rendering.
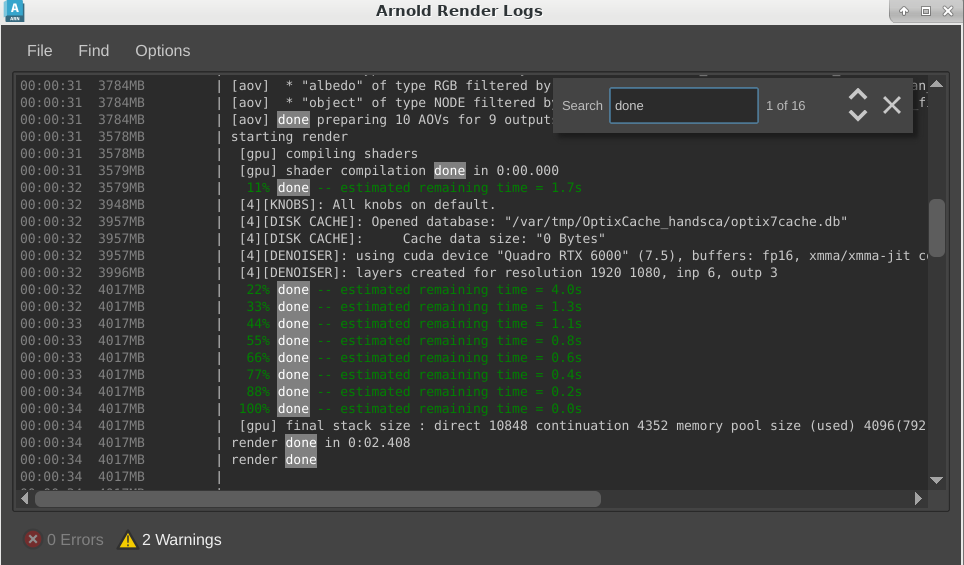
Log
Opens the Arnold Render Logs window where you can view a simple-to-read version of the Arnold log.
IPR Log Frequency
Allows you to control the verbosity of the log during IPR sessions. Last Progressive Step restores the scene verbosity just for the final step by default.
Information on how to read log files can be found here.
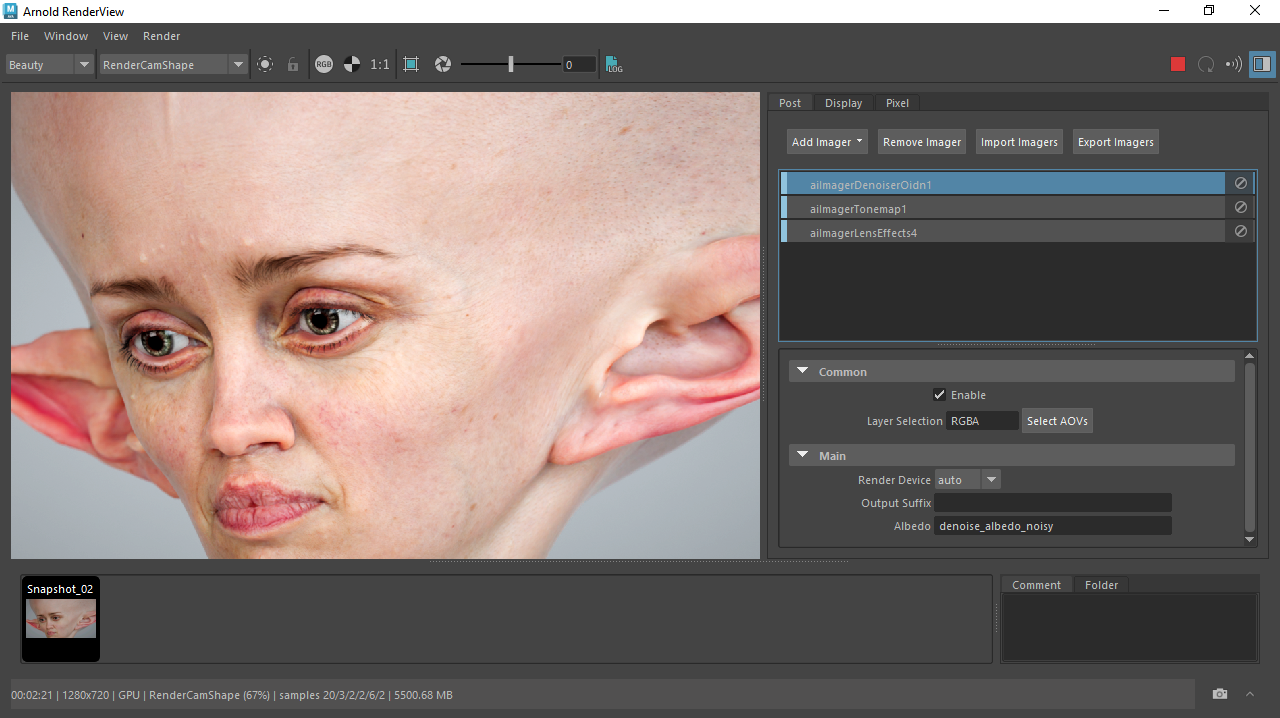
Post
Post-processing nodes called imagers operate on pixels before the output driver. Imagers can be chained together.

Display Settings
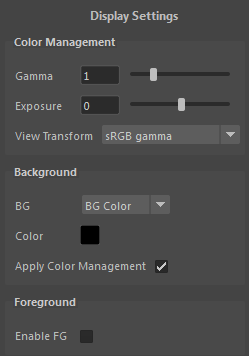
Opens the color correction panel on the right side of the RenderView window, offering various options for adjusting the displayed pixel colors.
Gamma: adjusts the displayed colors with a simple gamma curve.
Exposure: expose the displayed image up or down, in f-stops.
View Transform: choose the default color transform to apply for viewing images in the RenderView.
The overexposed areas near the windows of the interior scenes below particularly benefit from tone mapping.
 |
 |
| Un-tone-mapped (sRGB) View Transform | Unity Neutral Tone Map View Transform |
The RenderView updates the View Transform according to Maya's Color Management settings (including Syncolor native view transforms which are used by default). It is however still possible to override the view transform in ARV only, as with other Maya viewers.
It is recommended that you use the ACES Color Management.
Background
It is sometimes useful to change the color of background pixels in the displayed render.
BG Color: applies a flat background color.
BG Image: displays a background image or texture.
BG Checker: displays a checkerboard pattern as the background.
Color: applies a flat background color.
Apply Color Management: applies Color Management settings to the Background.
Foreground
Applies a foreground image in the RenderView window.
Enable FG: Enable/ disable the visibility of the foreground image.
Image: file path for the foreground image.
Scale: scales the foreground image.
Offset: adds a 2D position offset to the foreground image.
Apply Color Management: applies Color Management settings to the Foreground.
Pixel Information
Shows detailed values for the pixel below the mouse cursor, on all AOVs.
- Pixel XY: coordinates corresponding to the mouse position within the rendered image.
- Shape: The name of the shape below the mouse cursor.
- Average Pixels: T he pixel value that becomes averaged around the surrounding pixels.
- RGBA values as returned by Arnold, below the mouse cursor.
- Luminance values as returned by Arnold, below the mouse cursor.
- HSV values as returned by Arnold, below the mouse cursor.
- Display: Color corrected values below the mouse cursor.

Pixel Information values
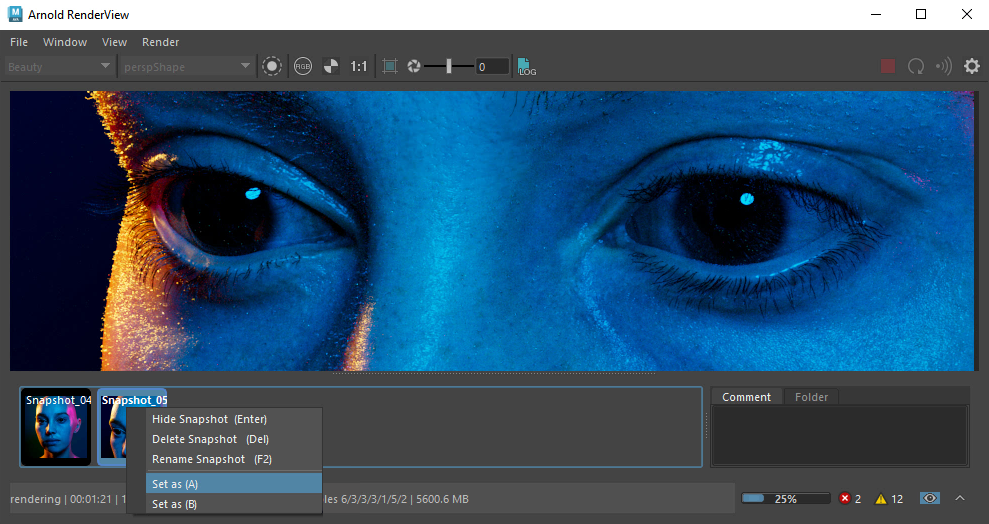
A B Comparison Tool
Allows you to choose between two snapshots to be compared using a wipe tool. Choosing a single snapshot will compare it with the current render.

A/B Comparison tool (right-click snapshots)
Render
Run IPR (Space)
Stops/starts the render.
Scene Updates
If enabled, any change in the scene will automatically refresh the render in real-time. If disabled, changes in the scene won’t interrupt the render, which can still be refreshed manually by pressing “Render”.
Refresh Render (F5)
Restarts the render.
Abort Render (Esc)
Stops the render in progress.
Progressive Refinement
When enabled, the scene will be sampled progressively, starting with negative AA samples for fast feedback. If disabled, only the final AA pass will be rendered.
Crop Region
This option allows you to perform a region render by dragging an area in the RenderView. Geometry selection in the RenderView will not work when this option is enabled. Clicking in the RenderView window clears the crop region.
You can also drag a region in the RenderView while pressing the SHIFT key to perform a temporary region render.
Update Full Scene
Allows you to clear and regenerate the whole Arnold scene. This avoids having to close and re-open the RenderView.
Clear Scene on IPR Stop
Clear the whole Arnold session when the IPR is stopped. When the IPR is restarted, the whole scene is converted from scratch (as with Update Full Scene).
Camera
Shows the list of cameras (including Maya USD cameras) in the scene, allowing the choice of which one will be used for rendering. This list also appears in the Toolbar as a drop-down menu.
Save UI Threads
Allows you to save one or several threads to avoid slowing down the UI, which improves interactivity.
Debug Shading
Temporarily replace the shading applied to all objects with a variety of debugging shading modes. This is used for interactive rendering purposes only and won’t change anything in the scene.
Disabled: render using the real shaders specified in the scene.
Basic: disable all shaders in the scene, switching to a gray ndoteye shader; a very fast shading mode.
Lighting: renders the scene with a white lambert shader.
Occlusion: use ambient occlusion shading.
Wireframe: displays geometry as a wireframe.
Normal: visualizes the normal vector (between 0 and 1, in tangent space).
UV: displays the coordinates of the primary UV set (red=U, green=V).
Primitive ID: displays random colors based on the per-primitive (triangle, curve) index.
Barycentric: displays intra-primitive parametric coordinates (barycentric for triangles, parametric length, and width for curve segments).
Object: displays random colors based on the per-object ID.
Isolate Selected: Isolates the selected node in the render. The following nodes can be selected:
Geometry: renders the selected geometry only; all other geometry is rendered as a black matte.
Materials: renders the selected material only; all other materials are rendered as a black matte.
Shaders: any individual shader (utility, texture, blend, etc.) part of a shader tree can be isolated, showing its resulting output in the render. Any geometry whose shading tree does not contain the isolated shader is rendered as a black matte.
Light: isolating a light means that all other lights are disabled, and the scene is lit exclusively with the selected light.
Editing RenderView Options with MEL Scripting
The RenderView options can be set by MEL script in Maya. For example arnoldRenderView -opt "3D Manipulation" "1". It is also possible to open the viewer without triggering a render by scripting arnoldRenderView -mode open.
For On-Off options, the values "True", "False", "0", "1", "On", "Off" are accepted.
For non-checkable actions (like render, abort, etc...) any value will trigger the action.
Examples in MEL:
arnoldRenderView -opt "3D Manipulation" "1"
arnoldRenderView -opt "AOVs" "indirect_diffuse"
arnoldRenderView -opt "Camera" "perspShape"
arnoldRenderView -opt "Run IPR" "False"
arnoldRenderView -opt "Frame All" "1" // ->the second argument doesn't matter
arnoldRenderView -opt "Save Image (original)" "C:/tmp/happy.exr"
arnoldRenderView -opt "Display Pixel Information" "True"
arnoldRenderView -opt "Test Resolution" "50%"
arnoldRenderView -opt "Debug Shading" "Occlusion"
arnoldRenderView -opt "Show Debug Shading icon" "1"
arnoldRenderView -opt "Crop Region" " 50 50 200 200" // minx miny maxx maxy
For the Display Settings, to edit a parameter found in the group "Color Management" one must add the
prefix "Color Management." and for those in the group "Background" the prefix is "Background." So:
arnoldRenderView -opt "Color Management.gamma" "2.2"
arnoldRenderView -opt "Color Management.Tonemap" "OCIO"
arnoldRenderView -opt "Color Management.OCIO File" "/tmp/config.ocio"
arnoldRenderView -opt "Background.BG" "BG Image"
arnoldRenderView -opt "Background.Color" "0.1 0.2 0.4"
arnoldRenderView -opt "Background.Image" "/tmp/image.###.jpg"
arnoldRenderView -opt "Background.Scale" "1.5 1.2"
Note that these functions can be called before opening the RenderView and will be automatically applied later.