Displacement
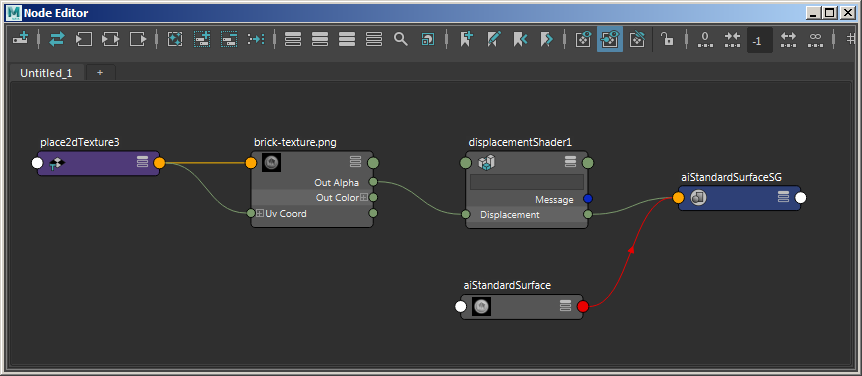
Left: Brick texture -> Displacement -> Shading Group of standard_surface shader. Right: aiImage -> Displacement (Out Color R).
Displacement maps can be an excellent tool for adding surface detail that would take far too long using regular modeling methods.
An example of a scene using displacement in MtoA can be found here.
The Displacement node must be connected to the displacement attribute of the shading group of the material that is assigned to the mesh that requires displacement.
Always ensure that you use the highest quality texture maps for displacement mapping. Arnold works well with very high-resolution maps, as long as the maps have been pre-processed with the maketx utility. It will convert them into .tx files (which are tiled, mipmapped files). See the pages about the maketx utility and .tx files.
When using Color Management in Maya (2017), displacement maps should be set to RAW. More information can be found here.
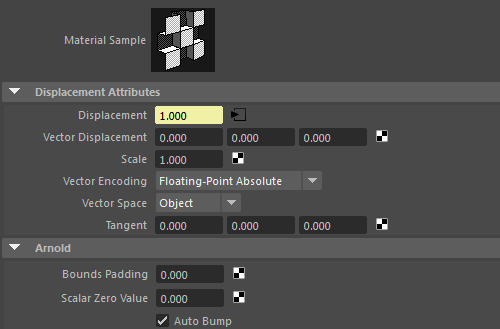
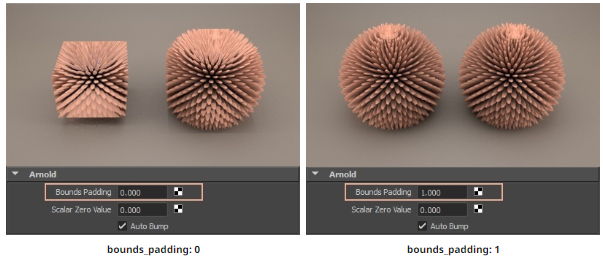
It is possible to set displacement settings on a per-face or per-object basis. However, any values that are entered in the Arnold attributes of the displacement node will override those settings. With multiple displacement shaders per object, and since an object can only have one value of bounds_padding, Arnold takes the maximum value from all of them. Autobump poses the same problem as with padding, and so Arnold enables it if at least one of the displacement shaders has it enabled.
Per-Object MtoA Displacement Attributes
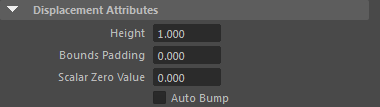
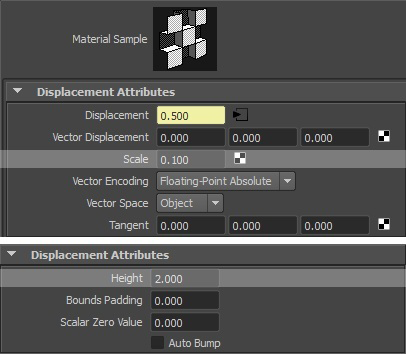
As well as the displacement shader, MtoA also has displacement options on a per-object basis. This means that any changes to the displacement that are made on a mesh will modify the default displacement shader attributes. This may be useful in a scene that has two objects with the same shader but requires different shape displacement values. Another example would be an object that has more than one shader but requires two different height values such as in the example below:
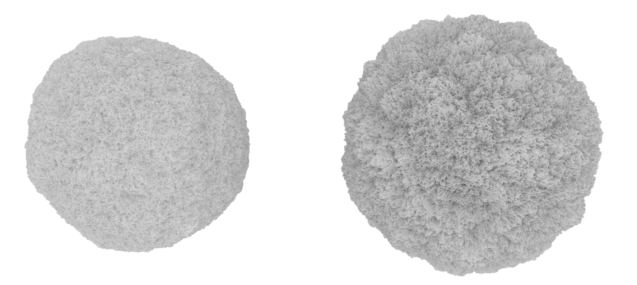
Same displacement shader assigned to two meshes, however, the mesh on the right has a per-object Height of 2
You will have to refresh the IPR when adjusting per-object attributes (this is not necessary when adjusting the Displacement Shader attributes).
The per-object MtoA displacement attributes are divided into the following groups:
Height/Bounds Padding
The mesh on the left has a bounds padding value of 0.5 and the mesh on the right has a bounds padding value of 1 (per object settings).
Shader Displacement and Per-Object Displacement
Care should be taken when using both of these attributes at the same time. The relationship between the displacement shader and the per-object mesh displacement varies when rendering. These differences are as follows:
Height
If the per-object Height value is increased when there is already some Displacement Scale it will have a multiplying effect on the displacement. For example, if the Displacement Scale is set to 0.1 in the shader and the per-object Height is increased from 1 to 2, the Displacement Scale will double in size to 0.2:
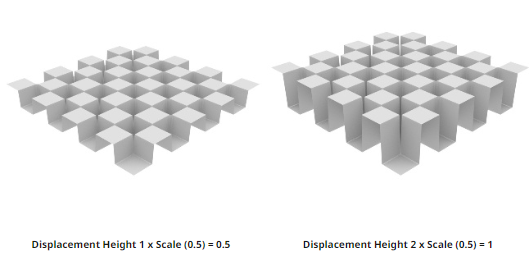
The effect of the Displacement Scale doubles from 0.1 to 0.2 when the mesh Displacement Height is set to 2.
Bounds Padding
The attribute value that is the highest is the one that will be used when rendering.
Scalar Zero Value
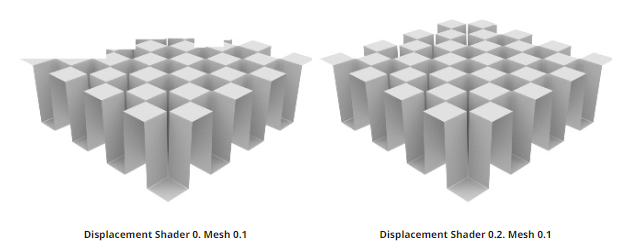
If the per-object Scalar Zero Value is increased when there is already some Displacement Scale it will have an additive effect on the displacement. For example, if the Scalar Zero Value is set to 0.2 in the shader and the per-object Scalar Zero Value is set to 0.2, the Scalar Zero Value will double in size to 0.4:
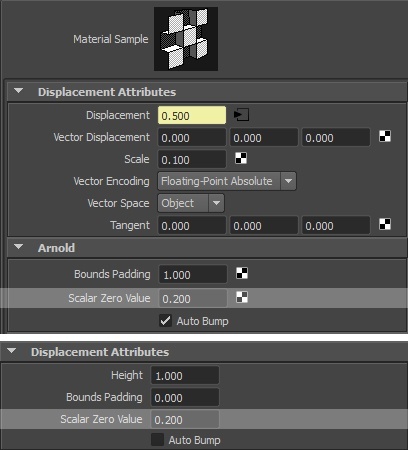

Auto Bump
If autobump in the displacement shader is enabled it will always be enabled. If autobump in the displacement shader is disabled, MtoA will read the shape autobump attribute and export that.