Render an Abstract Head Using Render Curves
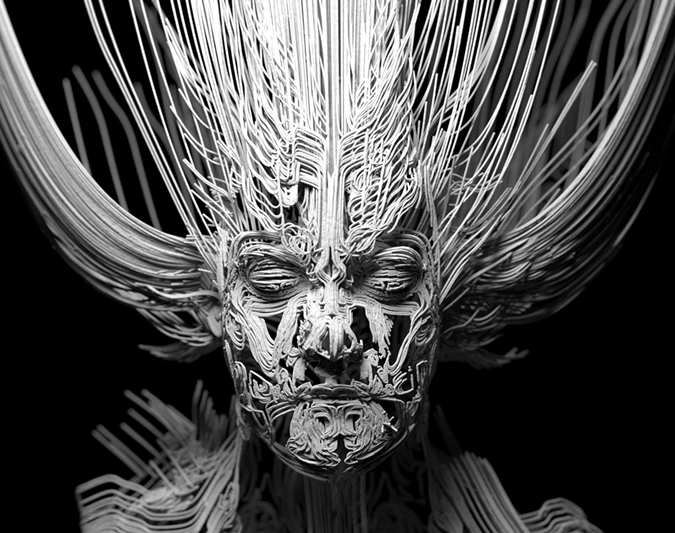
Maya's Paint Effects are a fun and easy way to create complex curve shapes. This tutorial will show you how to render an abstract portrait head using a combination of Maya's Paint Effects brushes, render curves and Override sets.
Many thanks to Lee Perry Smith for the use of the head scan used in this tutorial.
- Start off by downloading the model of Lee Perry Smith and open it in Maya. You should see that the model is made of several pieces. If not, then you need to separate the model - Mesh>Separate.

Toon Outline
Select the entire model and go to Toon>Assign Outline>Add New Toon Outline.
Hide the head model. Select the Toon Outline (pfxToonShape1) and reduce the Line Width so that it is visible as in the image below. In this case, a value of 0.005 was used.
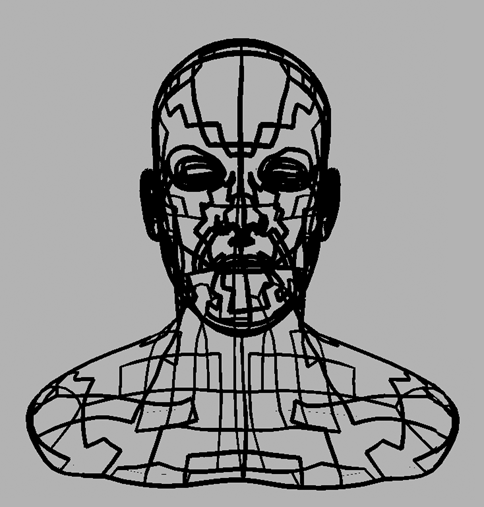
Toon Outline
Assign Paint Effects Brush to Toon Lines
We could convert the Toon Outline to curves as it is, however, we can make it look more interesting by adding a Paint Effects brush to the Toon Outline first.
- Open up the Content Browser window. Under Paint Effects, select the pens folder. The brush that we want to use is called bpointScribbleIndigo.mel. This brush has multiple strokes that will add more volume when converted to curves.
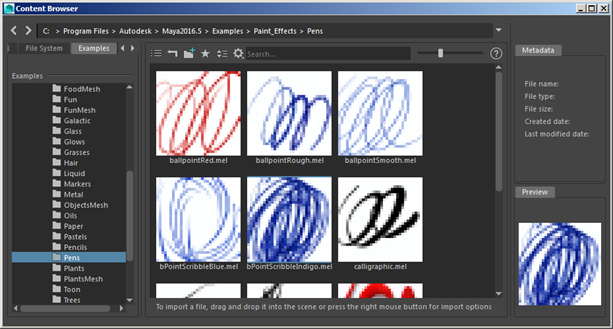
- Select the Toon Outline and shift select the brush 'bpointScribbleIndigo.mel' in the Visor. Under the Toon menu, select Assign Paint Effects Brush to Toon Lines. Depending on the scale of your scene, you may need to reduce the Global Scale of the bpointScribbleIndigo brush in the attribute editor (with the Toon Outline selected). In this case, a value of 1 was used.
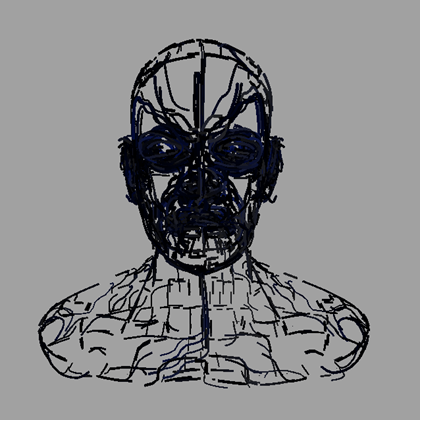
'bpointScribbleIndigo' brush assigned to Toon Outline (Global Scale: 1)
- Increasing the number of Tubes Per Step of the bpointScribbleIndigo brush adds more curves to the stroke.
 |
 |
| Tubes Per Step: 1 | Tubes Per Step: 3 |
Paint Effects Modifier
- We can use a modifier to distort the shape of the curves to create a more interesting head shape. With the pfxToon brush selected, go to Paint Effects>Create Modifier so that it pulls the Paint Effects brush towards the back of the head.
Paint Effects to Curves
Once we are happy with how the Paint Effects look, we can then convert it to curves. With the bpointScribbleIndigo brush selected to go to Modify>Convert>Paint Effects to Curves.
We now need to make the curves renderable with MtoA. To do this, we need to create an Override Set for the curves. Select the curves and create a Maya Set for them - Create>Sets>Set
A quicker and more efficient method for rendering multiple curves is to use the Curve Collector.
- Select the Set and go to Arnold in the Attribute Editor.
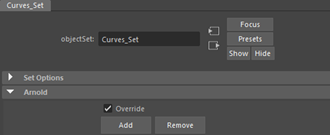
- Select Add and select the following attributes:
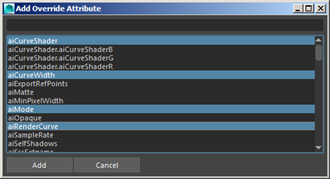
The newly created attributes should appear under Extra Attributes under Arnold in the attribute editor of the Set.
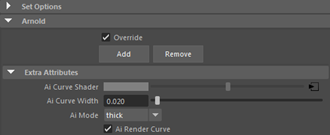
- Connect a standard_surface shader to the Ai Curve Shader attribute.
- Increase the Ai Curve Width to 0.02, depending on how thick you want the curves to look.
- Change the Ai Mode to thick. This will give the curves a round tube profile.
- Select Ai Render Curve for the curves to render.
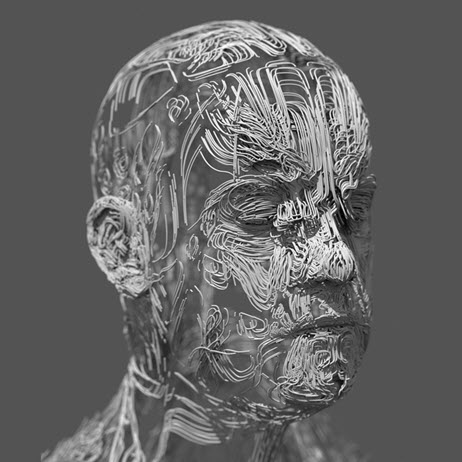
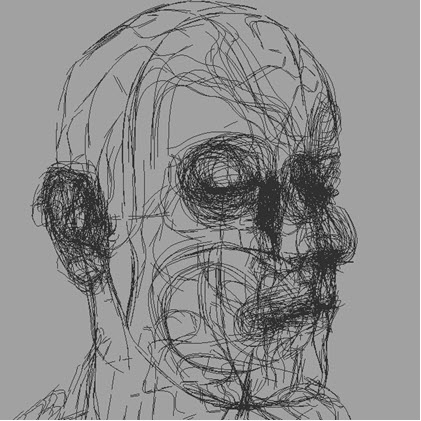
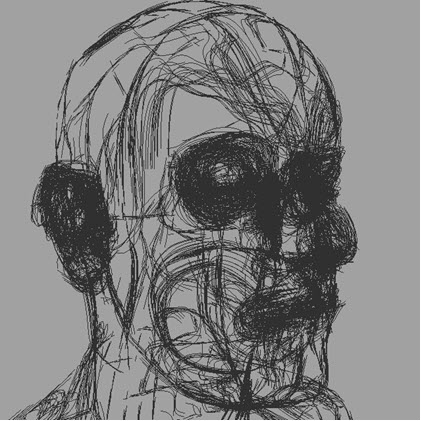
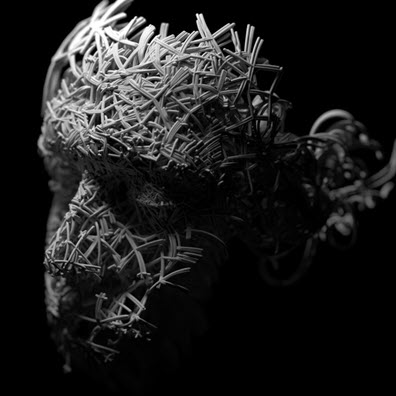
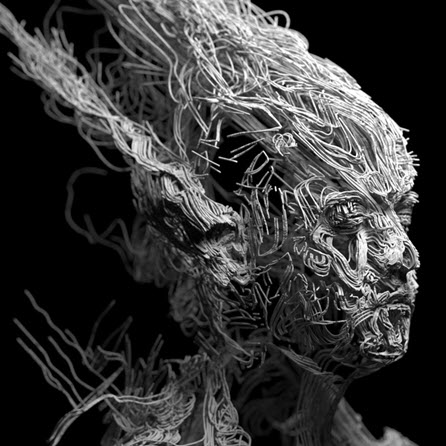
That's it. You are ready to start lighting and rendering! Have fun and try experimenting with different Paint Effects brushes and deformer settings to get some interesting results.
 |
 |
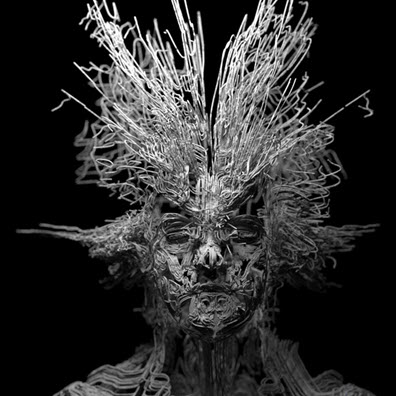 |
Further examples