Final Rendering
To finish off, there are some items which we can fine tune to get the best result possible:
Shadow render
- To render the shadow separately, we will first have to disable Primary Visibility for all of the car objects. Select the car and open Maya's Attribute Spreadsheet window. Select the Primary Visibility column and type 'off' or 0 in the selected column.
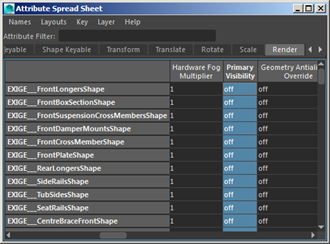
Disable Primary Visibility in the Attribute Spreadsheet
- When you render the car, it will render invisible, but the shadow will remain. The alpha channel should look like the render below:
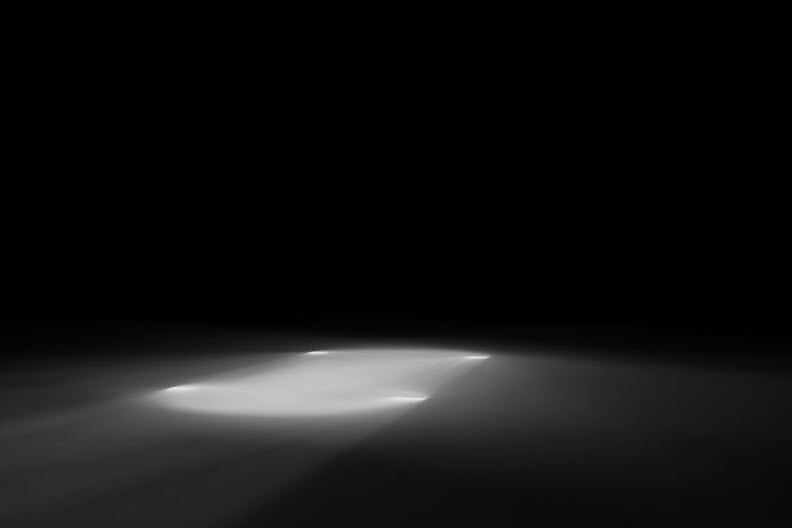
Ai Shadow Matte render
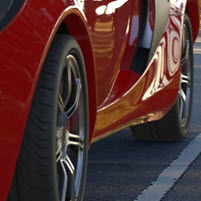
Filter Width

By default, Arnold renders with a filter_width value of 2. However, when rendered, the car looks a little bit too sharp compared to the original photographic backplate. Also, the anti-aliasing on the edges of the car looks too sharp against the photographic background. We could try to fix this in post, however blurring an image in post simply averages the pixels together and can produce unsatisfactory results. It also adds an unnecessary step to post-production work. A better method is to render with a wider Filter Width setting.
Below is a comparison of the same scene rendered with both a filter_width of 2 and 3:
 |
 |
| filter_width: 2. Render appears too sharp against the backplate. | filter_width: 3. Increasing the filter_width helps to blend the render against the backplate. |
A filter_width value of 2.5 is preferable as a value of 3 appears a little too blurry. This is something that can be experimented with and of course, depends on the scene. In this case, the resolution of the HDR map that is being used is smaller than desired. This can produce low-resolution reflections in the materials of our car. Increasing the filter_width also helps in this situation.
Shadow Matte: Indirect Diffuse
Depending on the HDR map and backplate you use, the area of the tire that meets the ground plane can look a little bit dark compared to the light in the photographic background. You may expect more light to be reflected up from the floor onto the bottom of the tire.
We can fix this by enabling the indirect_diffuse attribute of the shadow_matte shader. You can either choose the color manually or select the diffuse_color and click on a pixel on the ground of the image plane background with the color picker. The second method ensures you will get the same color reflected back onto the tire.
Below is an extreme example of the effect:
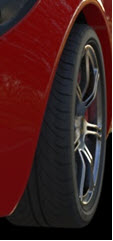 |
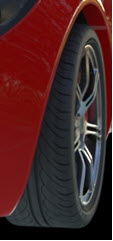 |
| diffuse: 0 | diffuse: 1 |
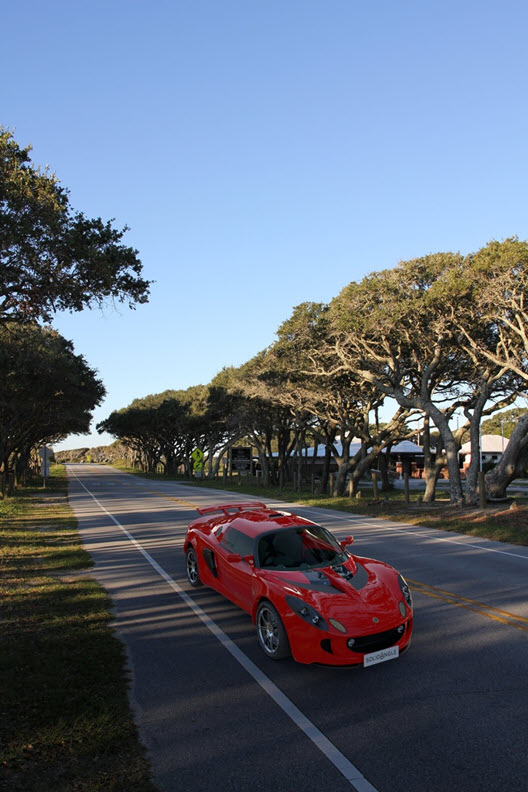
You now have all of the render elements needed to composite a car onto a backplate:
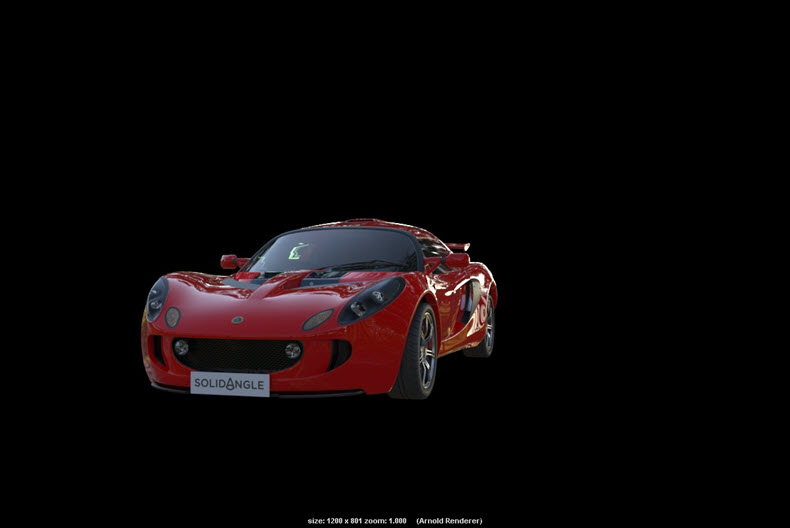 |
 |
 |
| Car beauty render | shadow_matte render | Photographic backplate |
The image below is the final result rendered using 6 AA Samples. The skydome_light samples have been increased to 3 for the final render.
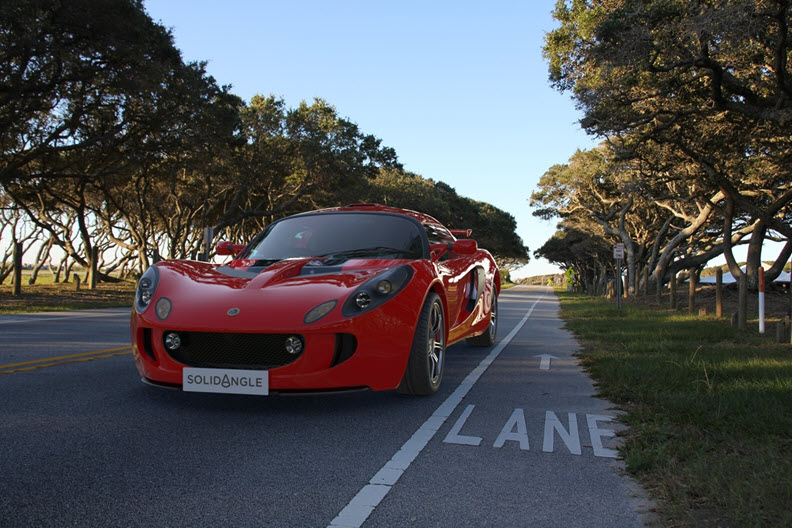
Final composited render
You could also try rendering the other backplate using the same workflow as above: