An Introduction to Stand-ins
 |
 |
Stand-ins allow you to keep your working scene light and workable by deferring the loading of geometry data until render time. It is possible to add huge levels of complexity to your scene with very little effort. In this introductory tutorial, we will show you the steps required to set up a complex scene, very simply, using stand-ins.
The scene can be downloaded here.
The following steps introduce several useful points about using stand-ins (you might like to follow them using a suitable model of your own). Note that this tutorial is only an introduction to stand-ins, which are a very powerful tool.
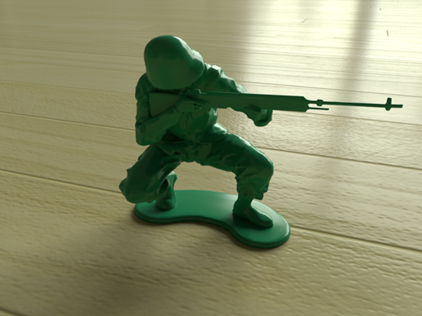
- Open the model that you want to duplicate using Arnold's Stand-in node. Make sure that your model and shading are complete before exporting the model, as you will not be able to modify it after you have exported it. To export the model, select it and go to the Arnold > StandIn > Export menu option. Alternatively, you can export your model as a Stand-in via the File>Export All options.
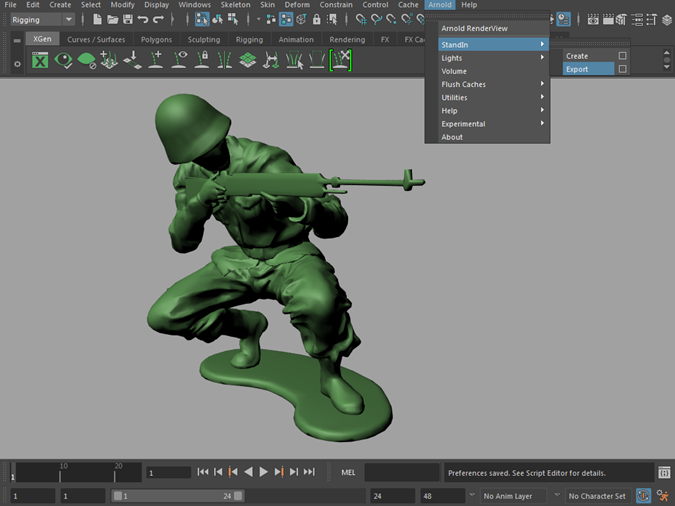
Export model as a stand-in from the Arnold menu
Export Stand-in
- Choose where you want to export the model you want to use as a Stand-in and click OK. Arnold exports your mesh as an .ass file, which contains everything that is needed to render the mesh. If your model's file size is very large, you can choose to compress it, by selecting Compressed. If your model contains animation, click on Sequence and choose the frame range that you want to export (remember to write
'=frame'in the frame attribute of the stand-in once you have created it).

Ass export options
Create Stand-in
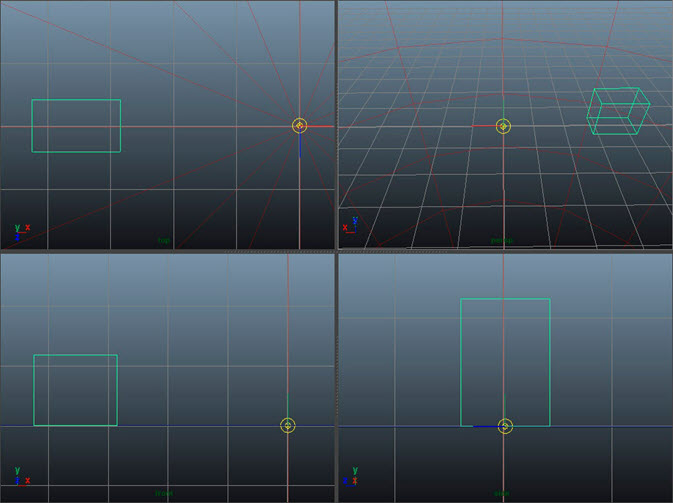
- Create a new scene. Create a new stand-in by going to Arnold>Stand-in>Create. You should see the stand-in represented as a bounding box.
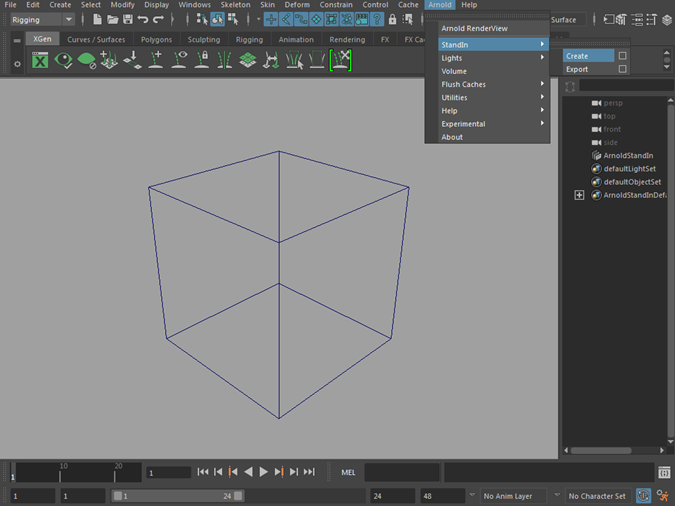
Stand-in viewed as a bounding box in Maya viewport
- Select the stand-in and open the attribute editor. Under path, choose the .ass file that we exported as our stand-in model.
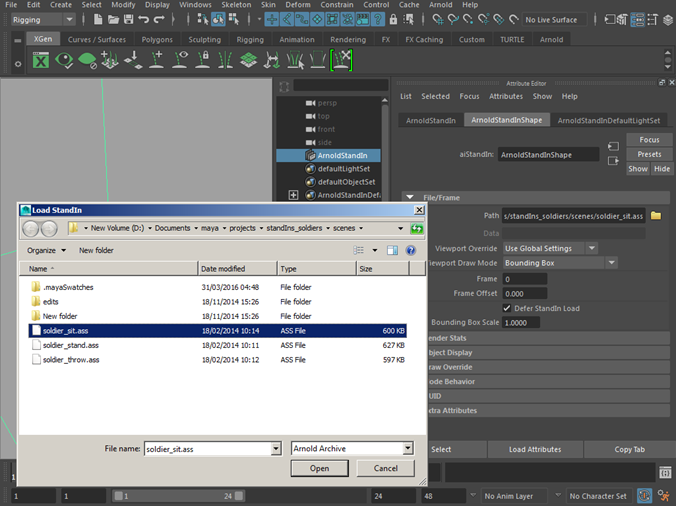
Load the stand-in ass file
- You should notice the shape of the stand-in bounding box change to match the shape of the original model. Position it so that it rests at the center of the grid. Position the pivot at the bottom of the stand-in. This will help us when positioning our instanced stand-in models.

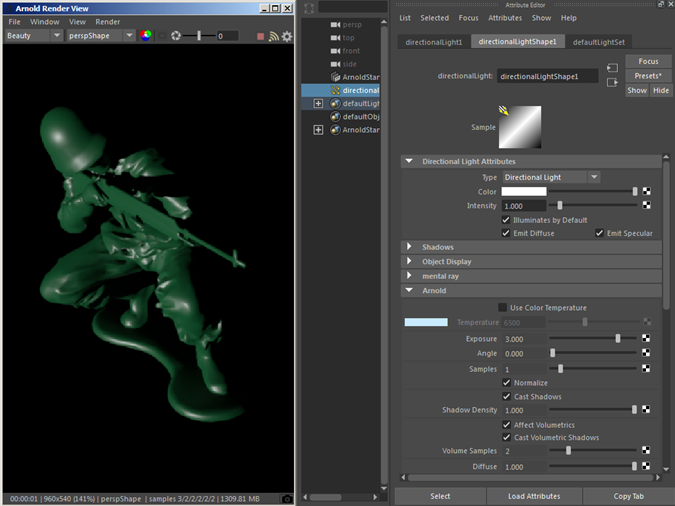
Lighting
- Create a directional light. Point the light at the stand-in and render. You should see the original model with its original shader assignment. If you need to change the shader, you will have to repeat the above procedure by re-exporting the stand-in or assign a new shader to it.
- Let's replace the directional light with HDR lighting. Open the Hypershade window, and create an Ai SkyDomeLight. Assign a file texture to the Color and choose a suitable HDR map.
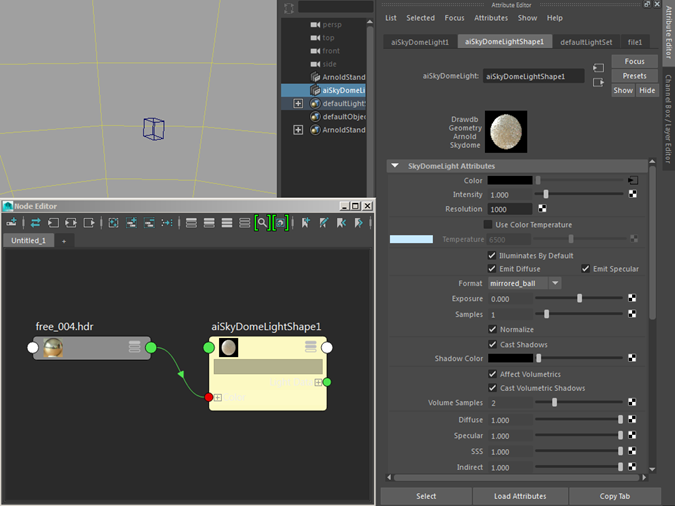
Once rendered, you should see something similar to the following image.
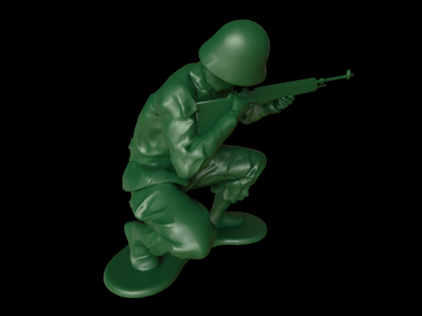
Stand-in lit with Ai SkyDome Light
- Create a polygon plane and scale it up high enough to use as a floor plane for our stand-ins. Assign a standard_surface shader to it and assign a wooden floor texture to the base_color, specular_color and Bump map slots. Increase the specular_weight to around 0.3 and decrease the specular_roughness to 0.2.
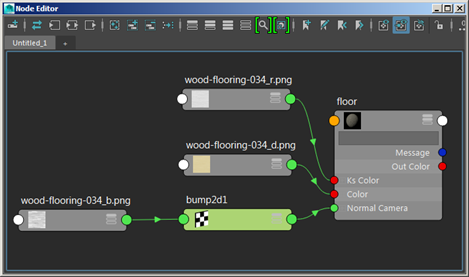
Create a wood floor using the standard_surface shader
So, with one instance of our stand-in geometry, you should have something like the following image.
Instancing the Stand-in
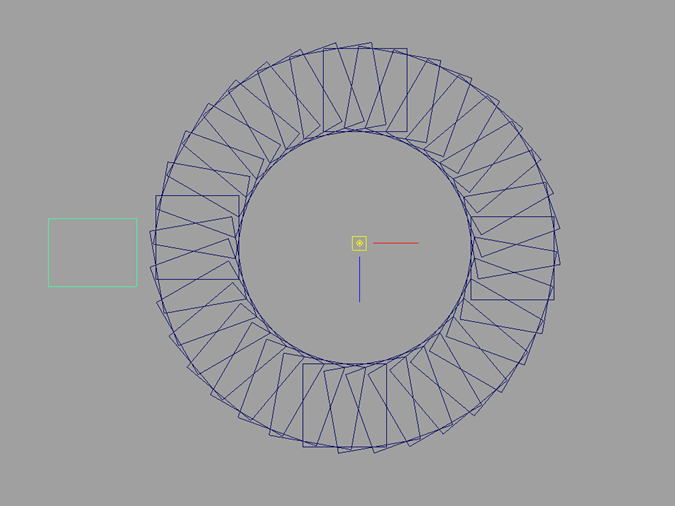
- Now the fun part. Let's start instancing our stand-in. We will use Maya's Duplicate Special options to duplicate the stand-ins in a circle. First, we must set the pivot point correctly. Move the stand-in a few units away from the center and place its pivot at the 0,0,0 center of the grid.
Move stand-in away from the center but move its pivot to 0 0 0
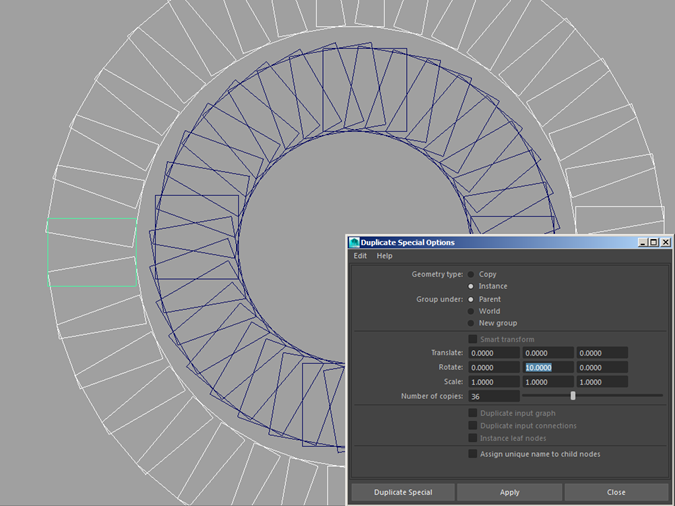
- Select the stand-in and go to the Duplicate Special options. Make sure you select Instance. This is very important, as it will save you memory and your scene will render faster. Change the Y rotation to 10 and increase the number of copies to 36. You may need to change the rotation value according to the size of your model. Otherwise, your instanced stand-ins may penetrate each other. Make sure you delete the original stand-in. Otherwise, you will get duplicate geometry.
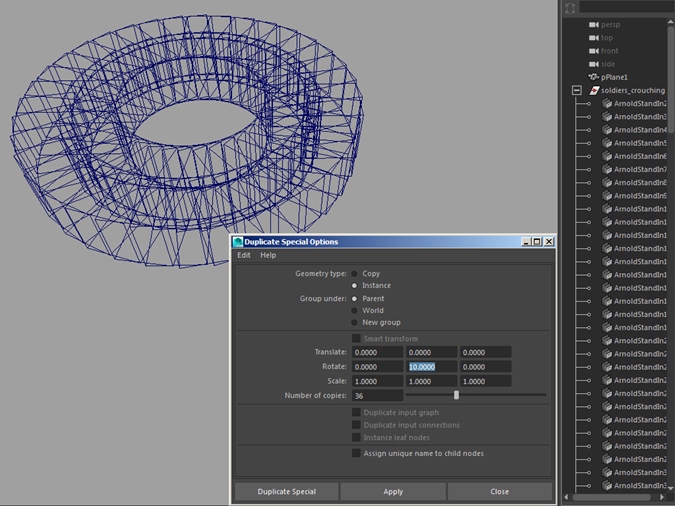
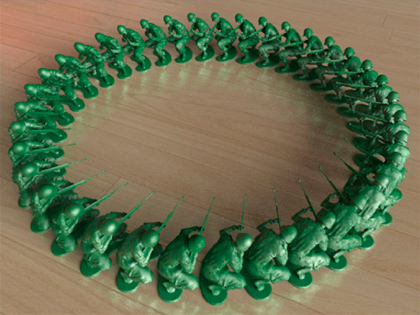
Stand-in's instanced in a circle
This should result in something like the following image.
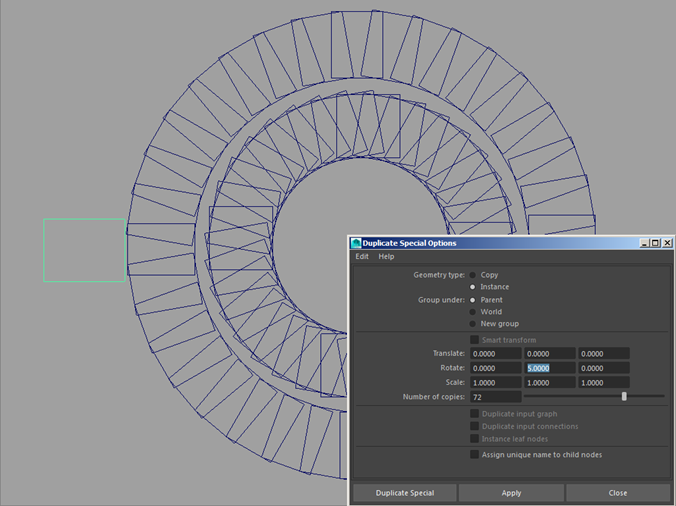
- Duplicate one of the stand-ins, move it out to the side and position its pivot in the 0,0,0 center of the grid.
- Duplicate the stand-ins using the above procedures. Remember to instance them.
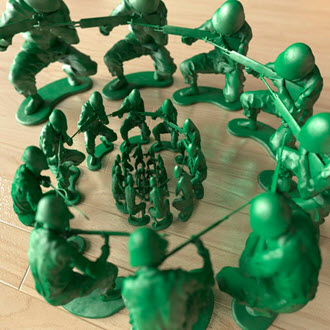
Repeat the procedure for the second row of soldiers
You should now have two rows of the stand-in model. Using the same method, we have created another stand-in for the standing soldier. However, the number of copies has been increased to 72 to compensate for the larger circumference.
Create and duplicate the standing soldier stand-in
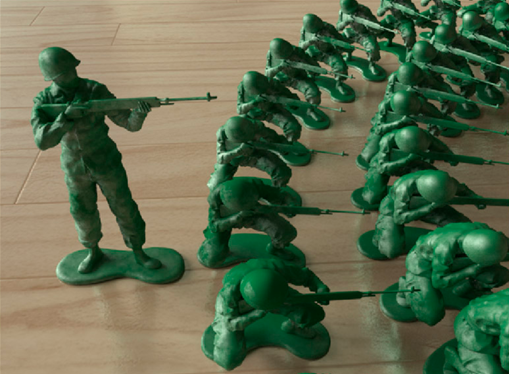
Also, note that the standing soldier stand-in is intersecting the sitting soldier stand-ins. In this case, it does not matter as it is only his gun that is overhanging the sitting soldiers.

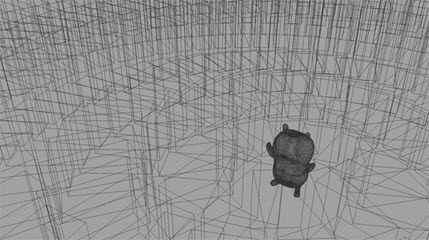
The stand-ins can be instanced many times with little overhead to rendering (the original model has around 20,000 polygons so without instancing using stand-ins the following scene with hundreds of soldiers would be quite large). Arnold, of course, has no trouble rendering the scene.
Conclusion
It's worth pointing out that this introductory tutorial has only covered the basics of using stand-ins. For example, as well as using .ass archive files, stand-ins also work with pre-compiled custom procedural programs that you can provide in the form of a dynamic library, allowing you to use parameterized procedural geometry. Stand-ins can also be recursive, and you can defer the loading of the procedural geometry until it is needed during rendering (i.e., the geometry is not loaded, and uses no memory until a ray enters the object's bounding box). These techniques make it possible for you to assemble scenes in a modular way.
You can see the creative potential that stand-ins can give you. Have fun with stand-ins!
 |
 |
 |
 |
 |
 |
For more details about stand-ins in MtoA see the main MtoA stand-ins description.