2.8 Multiple Sections in a Single Project
Subjects Covered
- Multiple sections in a project
- Linked sections
- Embedded sections
- Data reports
- Notes
- Clear unassigned materials
Outline
In the previous examples for defining section we have create 7 separate section files as shown below. This example will show how to create a single project file (.sst) that will contain all these sections (with no beams or structure).
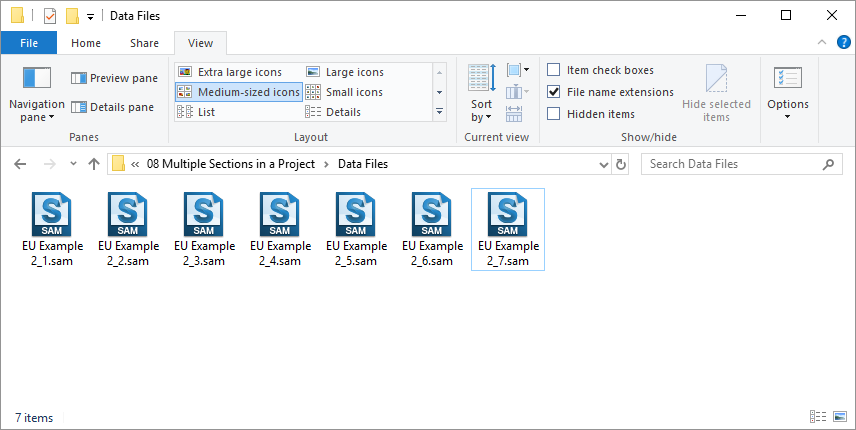
The sections could have been created from scratch in a similar way as the single sections we have created previously, except in a project the Design Sections navigation window allows multiple sections.
However, as these single sections have already been defined we will start a new project and link these 7 data files into the project. These sections cannot be edited as linked files, so we will then embed these sections, which will break the link and allow the data to be edited. An initial investigation on how data reports can be used to secure audit trails on linked files is shown and the re-linking of the embedded data back into separate Design section files is discussed.
Procedure
-
Start the program and begin a new project by using the main menu item File | New | Create From Template and selecting “EU Project” from the list.
-
Use the menu item File |Titles... to set the Project Title as “Multi Section Project” with a sub-title of “Example 2.8”. Also set the Job Number to 2.8. Click on “OK” to close the Titles form. Open the Materials navigation window and note there are the five materials as defined in the project template.
-
Open the Design Sections navigation window and use the + button at the top to add an Existing Design Section, which will open a file browser. Navigate to the file “EU Example 2_1.sam” and “open” it, which will load it as a linked file into the navigation window. Although the data for this section file cannot be manipulated in any way from the project it can be used in Structure Property assignments so that section properties are automatically determined.
-
Repeat the step above for the other 6 sections. You should note that the section name is taken from the “Section Title” defined in the data file.
-
For a quality audit trail it is important to establish where these files have come from and the last modified date. This information can be found in the Section Overview form which is displayed by simply clicking on the linked file in the navigation window.

-
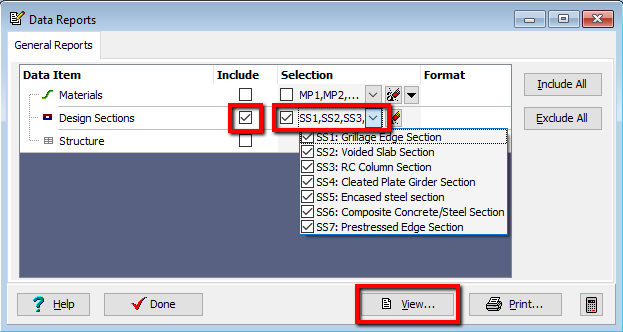
To obtain a single report of this information for all the sections in one go it is possible to use the data reports from the File | Data Reports... menu item. In the Data Reports form select Design Sections and ensure all the sections are included from the drop down list before hitting the View... button.
-
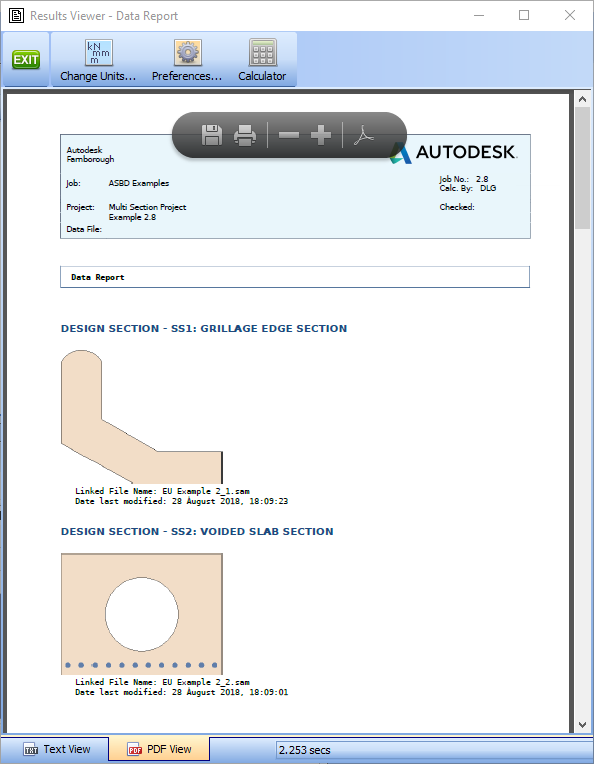
This will produce a “text only” view in the Results Viewer by default but if the “PDF View” tab is selected at the bottom of the viewer than a graphic appears as well.
-
Close the Results Viewer with the Exit button and the Data Reports form with the ✓ Done button.
-
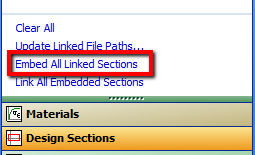
Select Design Sections at the bottom of the navigation window and then click on the task Embed All Linked Sections.
-
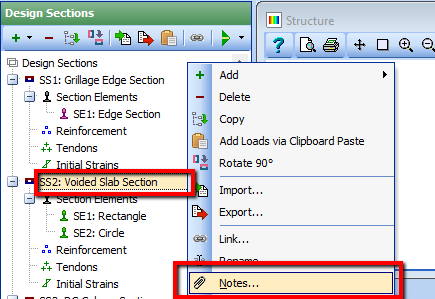
This operation embeds all the data from each section file and displays it in a tree under each section in the same format as the individual section files. This also includes things like the section notes.
-
So if the notes are displayed for section “SS2: Voided Slab Section” it will display the notes associated with that section regarding the continuous edges. Close the Notes form with the ✓ OK button
-
Data Reports can now report on the entire data structure for each section if required, not just the linked file names.
-
If the Materials navigation window is opened you will notice that some additional materials have appeared. This is because we changed some of the material properties when building the sections, so they have been added, – however some of the original properties are unassigned. Select the task Clear Unassigned to reduce the materials to 6.
-
If you click on a particular material in the navigation tree you will notice that at the bottom of the navigation pane that it shows the components of the project that have been assigned to that material. This is for checking purposes.
-
If, and when required, each section may be saved back to a single section file using the Link... option, which will either save to a new file name, or overwrite the original file, whichever you choose.
-
However, in this example will keep the embedded format so use the main menu data item File | Save As to save the data file as “My EU Example 2_8.sst”.
-
Close the program.
Summary
This Example shows how a project can be used to build up a library of sections in a single project file by either importing them from existing Design Section files or by building them up manually (Implied – not shown).
It is also shown how linked files can be embedded to break the file link and import the raw data.