The Version Compare tool allows you to compare any two versions of a Revit design. When you compare two versions of a 2D or 3D design, all changes are presented in a Change list. See more below in the Change List section.
- View the two versions of a design side by side or overlaid on each other.
- Filter the Change list to view just a specific type of change. For example, you may only be interested in the Electrical changes in a model.
- Select an item in the Change list to view a description of the changes.
To compare two versions of a design
- Open a Revit file that has more than one version.
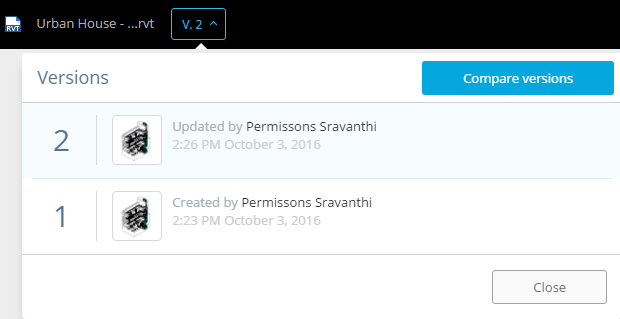
- Click the Version number > Compare Versions.
-

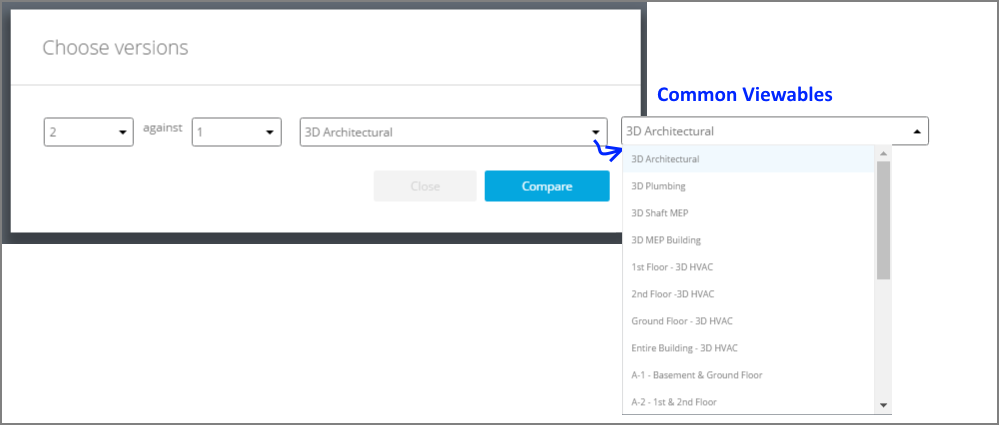
- Select from the list of common viewables between the two versions >
Compare.

The design will open in Version Compare mode in a new tab.
Change List
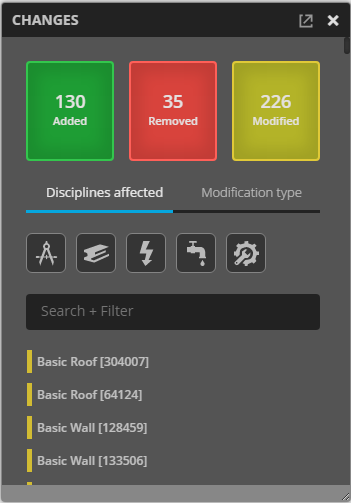
The Change List contains the list of changes between the two versions. These Changes are organized under 3 categories: Added, Removed, Modified. They are also grouped by Disciplines Affected and Modification Type. These categories function as filters that you can turn on and off to view just the changes that you are interested in.
Disciplines affected includes Architectural, Structural, Electrical, Piping, Mechanical, and Miscellaneous changes, if any.
Modification type shows shape changes, transformations (changes in position), and property changes.

View Modes
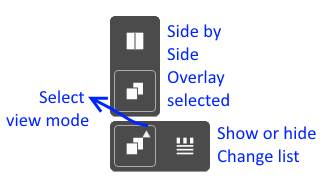
You can switch between Overlay and Side by Side view mode. You can select the View mode from the Change list tools in the Viewer.

In the Side by Side view mode, you can resize the view panels.
Filtering or searching the Change list to view specific changes
You can apply filters progressively to the Change list to view just the changes you want to see. You can also select preset filters or search for an item. By default, all change types are selected, which means all changes are visible. Turn off filters to view only the type of change you want to see.
The image below shows the results of applying several filters to the Change list.
Clicking within the Search + Filter field shows changes grouped by the parts of a model. For example, ducts, or doors, or walls.
Viewing the details of a design change
To view more details on a specific change, select an item from the Change List. The Information dialog provides a description of the change for the Added and Removed categories. For the Modified category, you can switch between the two versions in the Information dialog to see the details of all the changes. In Overlay mode, transformations (changes in the position of a part) are animated when you switch between versions in the Information dialog.