This document explains how to locate a project in Green Building Studio.
Green Building Studio incorporates Google™ Maps to facilitate the entry of a new project and selection of the appropriate weather file.
-
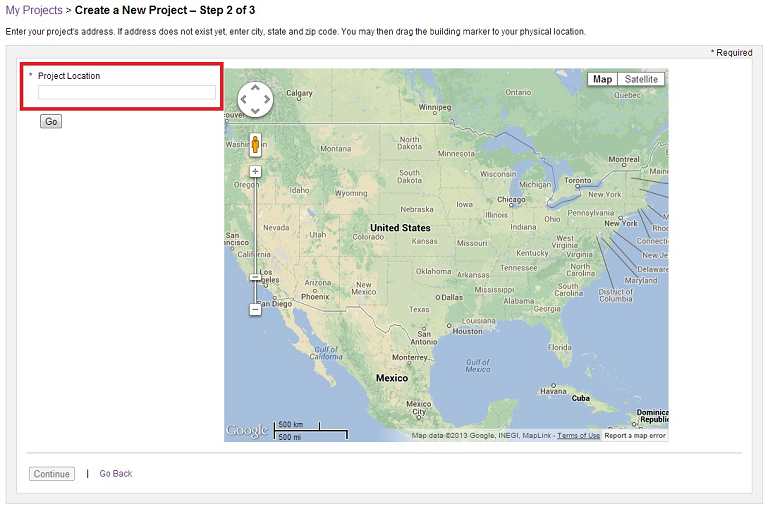
For Project Location, enter one of the following data values for your project in the Project Location text box: address, city, state/territory, country, or postal code.

-
Click Go.
-
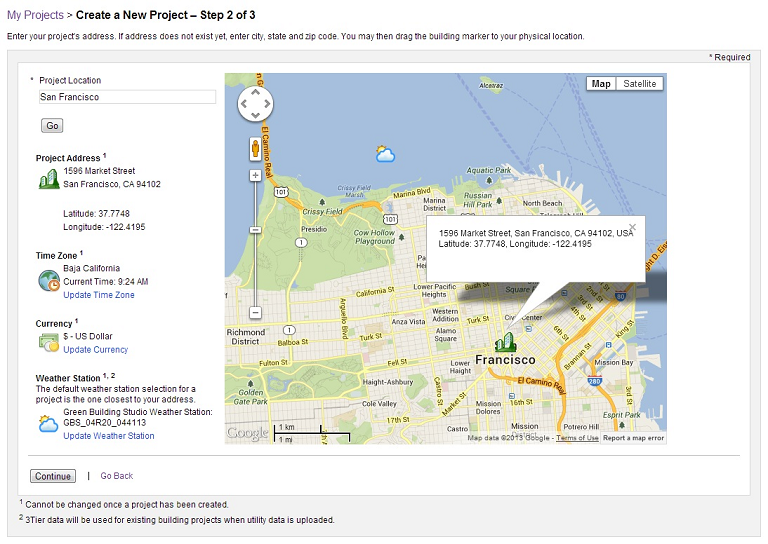
Move the green building icon to relocate the position, if desired.

When you select project location, GBS provides you detailed information on
-
Project Address: It include project address, Latitude, and Longitude of project.
-
Time Zone: It shows the time zone and current time of the project location. You can Update Time Zone of the project. In the dialog, select a time zone and click Update.
 Note: Locations near time zone borders may follow unusual adjustments, which may affect the validity of Photovoltaic Analysis results.
 -
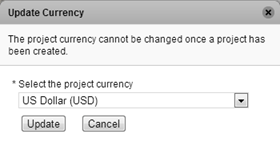
Currency: It shows the currency that will be used for energy cost. To update the currency, click Update Currency. In the dialog, select the currency and click Update.
 Note: Project currency cannot be customized in Revit, but you can create a project in GBS Web prior to running the first analysis from Revit and then select the existing project (the one that you created) when running a Revit simulation.
 -
Weather Station: The default weather station selection for a project is the one closest to your project address. You can change the weather station location for your project by choosing a new location from the provided list.
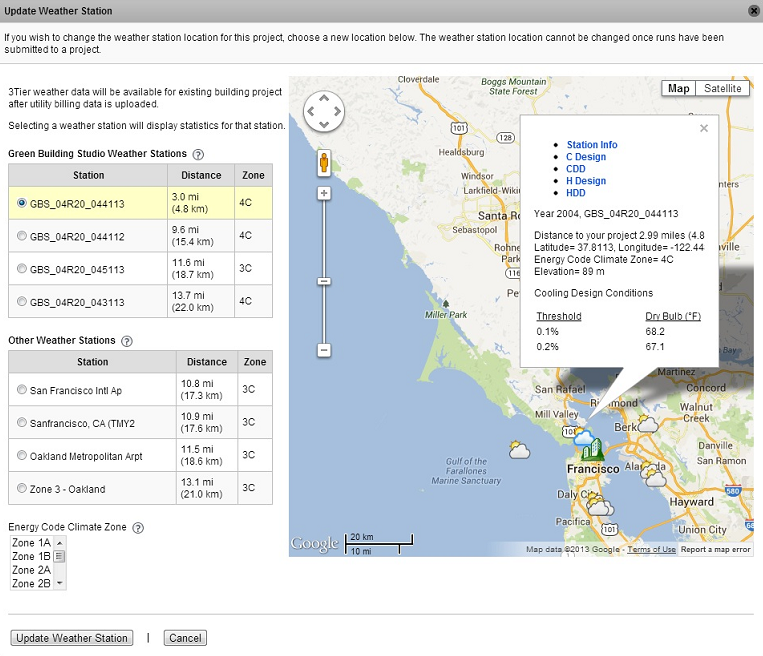
To update the weather station, click Update Weather Station. The Update Weather Station dialog displays the weather files that the Green Building Studio web service has in the vicinity of your project.

Green Building Studio weather stations are based on recent "actual year" weather data. Other Weather Stations are based on TMY2 and CZ2 stations, which are based on 30-year averages of weather data. See here for detail on Weather Data in GBS.
Through this screen you can explore each weather file's degree day and design day characteristics and select the appropriate one. In the dialog, click Update Weather Station below the map.Note: The weather station location cannot be changed once runs have been submitted to a project.
-
-
Click Continue to proceed to the next step, accepting the Autodesk Green Building Studio Web Service Terms of Use (TOU) and creating the project. See Creating a New Project: Sharing Project Data.