| Quick Start |
Your illuminance simulation results depend on how much light bounces off of the interior surfaces of your model. Follow these steps to set this behavior.
- Select the object to which you want to assign material properties and from the Properties editor, select Edit Type.
- You need to change the properties associated with the Material (object) or Structure.
- Select the interior surface material of layered construction by clicking on the last material on the interior side of the construction. This will take you to the Material Browser.
- Go to appearance tab.
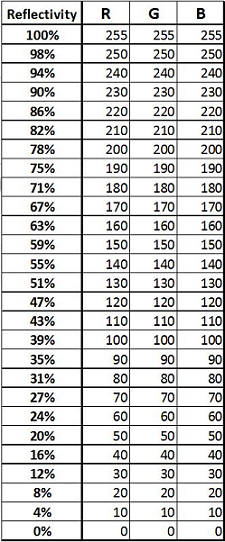
- Change the reflectivity by changing the RGB in the Generic section using the table provided below, in the detail workflow.
| Detail Workflow |
It is also important to consider the material properties of the other objects so that 360 Rendering accurately calculates the light bouncing off surfaces in the model to accurately visualize light intensity falling on a surface. You can change opaque material properties using a similar process to that of glazing.
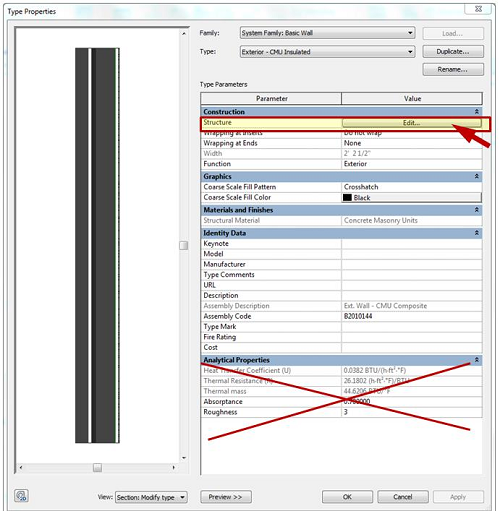
- Select the object to which you want to assign material properties. From the Properties editor, select Edit Type.
- The Type Properties dialog box will appear. You’ll want to change the properties associated with the Material (object) or Structure (wall, floors, roofs, and ceilings). If you are changing the properties for an object, the process of accessing the material editor is the same as for accessing glazing materials. The rest of this section will explain the process for walls, floors, roofs, and ceilings. Again, ignore the Analytical Properties.
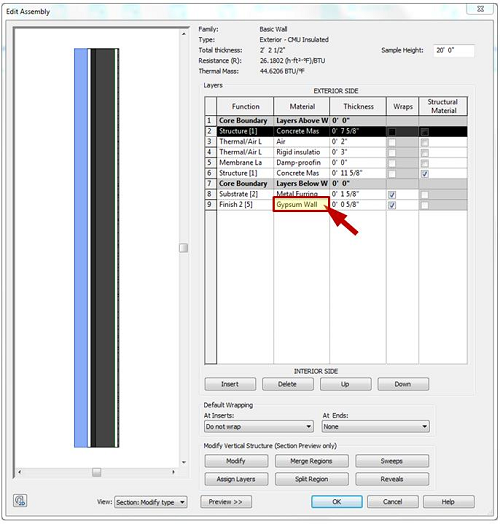
- For a wall, select the interior surface material of the construction by clicking on the last material on the interior side of the construction. This will take you to the Material Browser.
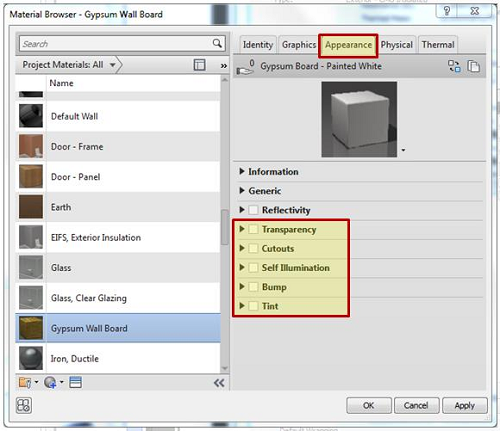
- As with glazing properties, the Appearance tab is the only one that affects the results of illuminance simulations. The other tabs NOT USED are mentioned below…
- Information on the Identity tab is not used for rendering or appearance.Use something descriptive in the Class for clarity only.
- Information on the Graphics tab is only for how the material appears on the computer screen.It is a good idea to select Use Render Appearance at the top so you can validate your model on screen.
- The Physical and Thermal tabs also have no effect on rendering or illuminance performance.
- On the Appearance Tab, the RGB Color settings within the Generic panel determine the reflectivity (%) of the material, based on the following formula: (0.2126 R + 0.7152 G + 0.0722 B) / 255 If all other attributes in the Appearance tab are unchecked, the material will have a matte finish, with only diffuse reflectivity (not shiny/ specular). It is also possible to simulate specular materials by selecting “Reflectivity” and changing the settings there (described below).
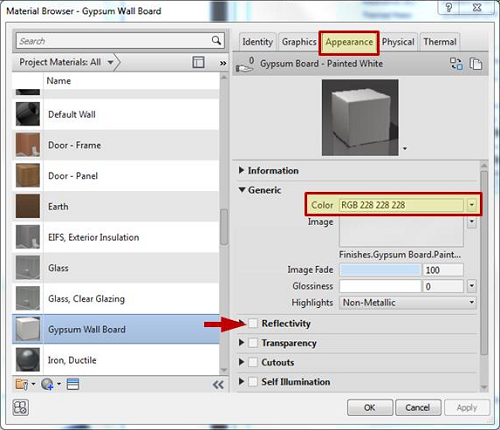
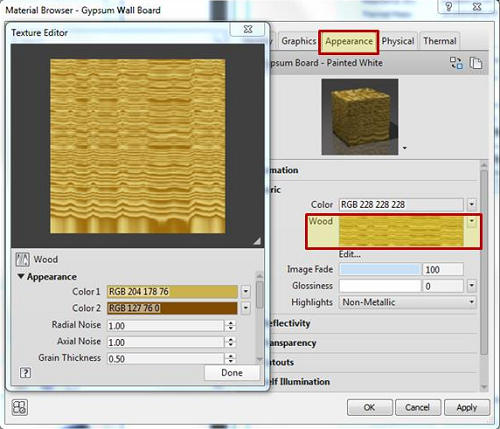
 Note: If an Image is selected, the average colors of the picture determine the basic material reflectivity due to Color in percent, by the formula: (0.2126 R + 0.7152 G + 0.0722 B) / 255 for each color in the picture.
 Note: The other Generic attributes only have an effect if you’re trying to create a specular material (Reflectivity is checked and the values entered there are non-zero).
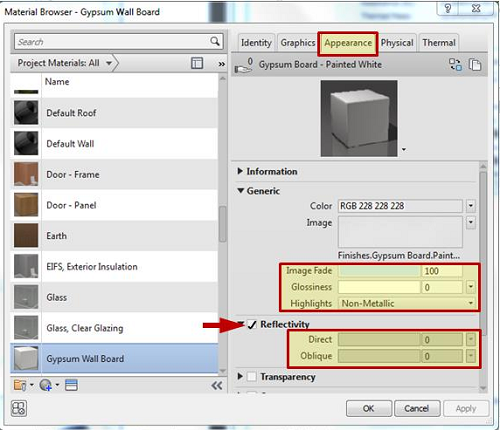
The term ‘Reflectivity’ here refers to Specular Reflectivity, which means non-diffuse, mirror-like reflectivity, not overall surface reflectivity like that determined by the Color attribute in the Generic section.
The other sections in the Appearance Tab (transparency, self-illumination, tint, etc.) define other surface appearance properties, and therefore affect light behavior. They will all affect overall light reflectivity in about the way you would visually expect.
