LA/R generates lighting analysis plane from unhidden floors that are associated with Levels included in the analysis. All floors included will generate an analysis plane at the height of 30" above for LEED.
To manage analysis plane:
- Create level in your model. To learn how to create and modify levels see Levels in Revit Help.
- Join interior floor layers (i.e. finish floor to subfloor) so only the top layer of a floor generates analysis plane. Learn how to join floors here. Note: Both sub-floor and finish floor should be on the same level and offset rather than being on different levels.
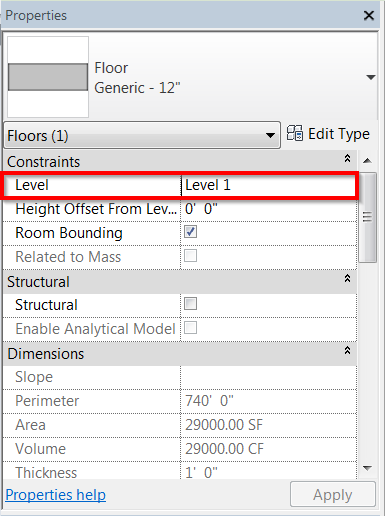
- From Properties window
 Constraints
 Level, select the level that you want to assign to the floor. See Modify Floor Properties for more detail.
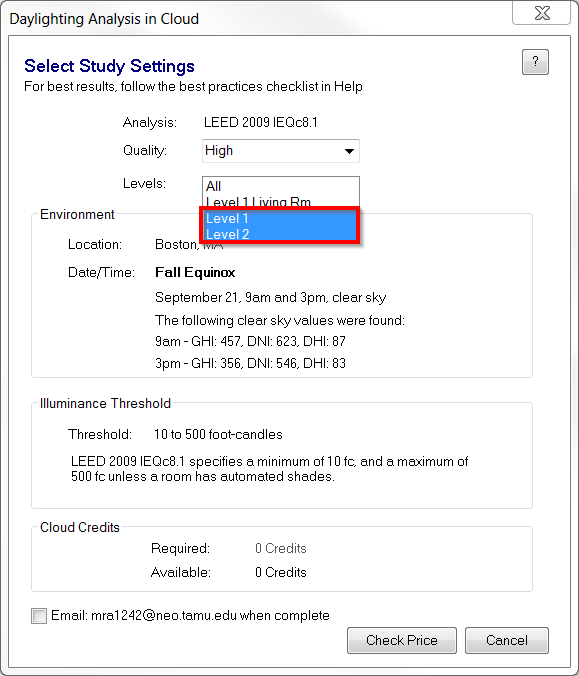
- In Daylight Analysis in Cloud interface select levels to control what is sent for analysis.
 Note: In order to keep the cost of analysis low, exterior floors should reference a separate level so you can exclude them from the analysis. Also floors in surrounding context should be on a separate level and excluded from the analysis. See Manage Cost of Your Analysis for more hints.
Note: The floors must be part of the core model and be editable, so floors in a linked model are not analyzed, even though they will affect the lighting characteristics of the analysis as a whole. Floors in copied groups will need to be ungrouped (you will get a warning and option window to do this) so that the analysis results will be unique for each floor.