Set up a granular simulation
Granular simulations include scenarios where grains of solid material can flow. In addition to sand and snow, the granular framework is also used for gel and rubber.
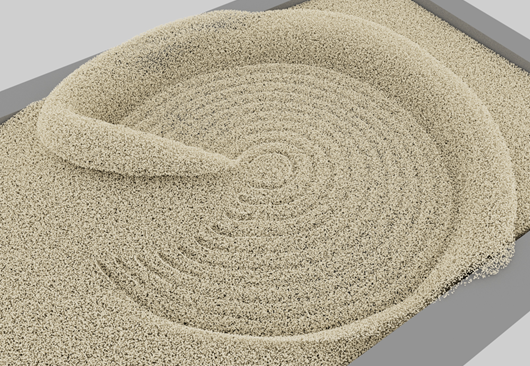
- Sand uses a simpler and faster method. It can be used to simulate wet or dry sand, as well as other materials.
- Snow uses a method that allows the material to pack together and become firmer. It can also be used for other materials besides snow.
- Gel can be used for materials that flow and clump with high viscosity, such as icing, toothpaste, ketchup, melted chocolate, and foam.
- Rubber can be used not only for rubber itself but also for other purely elastic materials. It is easier to use and has better performance than gel with an extremely high yield stress, and is also more realistic under large deformations.
Instead of building an MPM simulation graph from scratch, check out the sample graphs available in the Bifrost Browser. If one of them is similar to the effect you want to achieve, you can import it and then adapt it to your needs or simply study how it works.
For sand and snow, another alternative is to add a basic_mpm_sand_graph or basic_mpm_snow_graph node and then explode it to get a graph with a few basic connections and setting already made.
To set up a granular simulation:
Prepare the meshes to use as emitters for the granular materials, as well as the meshes to use as objects to collide with (including receptacles to hold the materials if required). These meshes can be input from the scene or created in the graph. For best results:
- The meshes should be as regular as possible, for example, composed of triangles or quads without any long slivers.
- The edge lengths should reflect the size of detail that you want in the simulation.
- If you are using emitter meshes from the scene, you probably want to hide them.
Add one of the following nodes to the graph, set its parameters, and connect the output of an emitter mesh into its
geometryinput.source_mpm_sandsource_mpm_snowsource_mpm_gelsource_mpm_rubber
Note that by default, the source node is set to create a one-time emission on frame 1, which is appropriate for something like a snow bank or sandy beach. If you want a continuous emission instead, turn off
use_end_frameon the source node.Repeat the previous step for additional emitters. You can combine different materials in the same simulation.
- Use separate source nodes if you want different meshes to emit with different properties.
- Connect multiple meshes into the same node for efficiency if you want them to emit in the same way. Alternatively, you can merge the meshes into a single mesh beforehand.
- You can combine different materials, for example both sand and snow, in the same simulation.
Connect the outputs from the source nodes into the
sourcesport of asimulate_mpmnode.Connect the ouput of an
mpm_solver_settingsnode into thesettingsport of thesimulate_mpmnode, and set its properties.Connect the meshes that you want to use as obstacles into
collidernodes. As with sources, you can have multiple geometries connected to a singlecollidernode, and multiplecollidersnodes connected to thesimulate_mpmnode. For example to make footprints, you need a collider for the ground that prevents the snow or sand from falling away, as well as colliders for the people walking.Connect the outputs of the
collidernodes into thecollidersinput of thesimulate_mpmnode.Optionally, connect influence nodes, such as
wind_influence,turbulence_influence, orground_plane_influenceinto theinfluencesinput of thesimulate_mpmnode.At this point, you can preview the flow of particles by toggling the P (proxy) or D (diagnostic) flag on the
simulate_mpmnode and playing through from the first frame. Adjust the simulation parameters as desired.Tip:If you experience problems with collisions (such as particles leaking through colliders, or offset collisions), try setting the
methodon thecollidernode toVolume. This is more accurate but takes longer to compute. You can also try turning onlag_colliderson thempm_solver_settingsnode.For the final rendering, it's best to cache the particles to files on disk. Rendering typically takes longer than the simulation and can be easily resumed (unlike the simulation). There are many ways to cache, but here are some suggestions:
- Optionally before caching, you can reduce the size of the cache files by removing point properties that are not needed for rendering. Since the
granular_particlesoutput ofsimulate_mpmis an array (one points object for each material type), first connect it intosplit_points_by_material. Connect each of the outputs that you want (such assand_particles) into anerase_component_propertiesnode, and then connect that into anoutputnode at the top level of the graph or aterminalnode. Add a watchpoint on those final connections to see the list of properties, and enter any properties that you don't want to cache into thepropertiesparameter oferase_component_properties. - For the caching itself, connect the output of
erase_component_properties(or thegranular_particlesoutput ofsimulate_mpmif you are not usingerase_component_properties) to afile_cachenode, and connect its output to anoutputnode at the top level of the graph or aterminalnode. Enter a file name and location, set thefile_cachenode'smodetoWrite Mode, and play through the full simulation from the start frame. When you are finished, don't forget to set thefile_cachenode'smodetoRead Mode.
- Optionally before caching, you can reduce the size of the cache files by removing point properties that are not needed for rendering. Since the
In some situations, especially for gel or rubber simulations, you may want to mesh the output.
- Use
points_to_volumefollowed byvolume_to_mesh. - To tweak the mesh output, you can use
set_geo_propertyto adjustpoint_sizebeforepoints_to_volume. - You can also use
smooth_voxel_propertyto adjust volume properties afterwards — the details depend on what you are trying to simulate and how you want it to look.
- Use
Adjusting sand and snow
Here are some tips for emulating different sand and snow conditions with the parameters on the source node:
cohesioncontrols how strongly the grains stick together, so use higher values for wetter sand or snow.- If the snow or sand is so wet that it should start to behave like a liquid, reduce
friction. - For snow,
initial_firmnesscontrols how packed it is. Use low values for light, fluffy snow.
Adjusting gel
The yield_stress property on the source_mpm_gel node controls the overall behavior — the larger the value, the more the gel will clump together and resist yielding under shear force.