Cost Payment Application
When a billing period is activated and the schedule of values is locked, you can create the cost payment application to send to a supplier. Payment applications can be generated in the Cost tool.
In this article:
- Create a Cost Payment Application
- Add a Change Order to a Cost Payment Application
- Link Budget and Cost Payment Applications
- Work with a Schedule of Values after Creating a Cost Payment Application
- Create a Cost Payment Application Document
- Foreign Currency Payment Applications
- Complete a Cost Payment Application
- Export and Reimport Cost Payment Applications
- More Resources
- Related Articles
Create a Cost Payment Application
Before working with the cost payment application workflow, make sure that you have managed permissions. As a project administrator, set the:
- Full Control option for the general contractor
- Collaborate option for the supplier in the Cost Payment Application column
You can create a cost payment application and send it to your suppliers. This option allows you to create a single cost payment application for one contract and one billing period at a time. This option does not require the linked main contract and its master billing periods.
To do so:
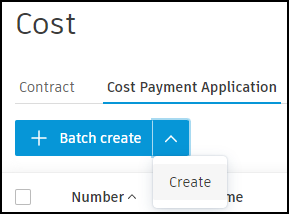
Select the Cost tool from the left navigation.
Switch to the Cost Payment Application tab.
Click Create.
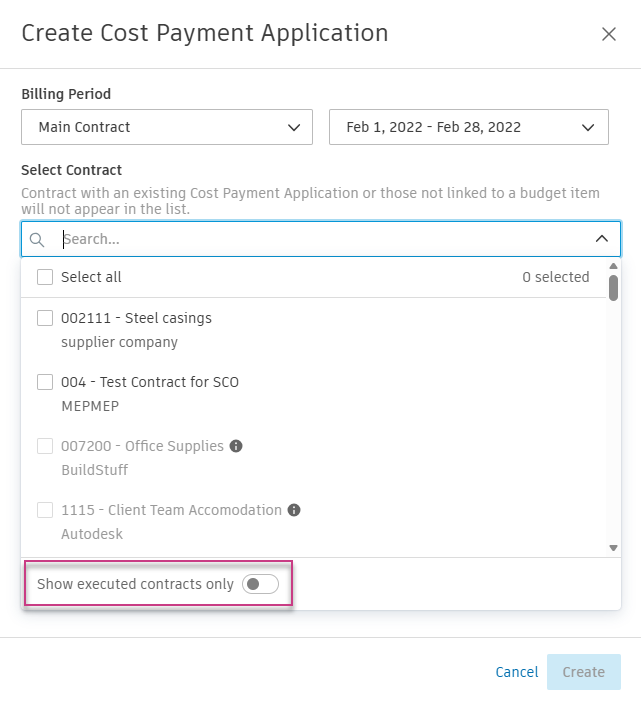
Select the main contract from the first drop-down list and the billing period from the second drop-down list:

The created cost payment application shows on the list with a draft status.
Select a contract in the contract picker
When you create or batch-create a cost payment application, the contract picker lists contracts that are linked to a budget item. Contracts that already have a cost payment application for the selected billing period don't appear in the list.
The contracts available to you also depend on the project's payment application creation setting and your permission level.
Contract in any status (default)
When a project administrator leaves Allow Cost Payment Applications to be created against set to Contract in any status, the picker shows contracts in all statuses (for example, Draft, Pending Supplier Input, and Executed).
At the bottom of the picker, the Show executed Contract only toggle is off. Turn it on to filter the list to executed contracts only.
Executed Contract only
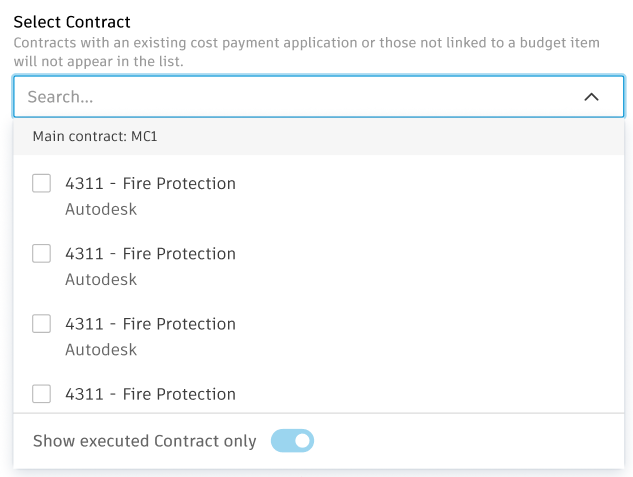
When a project administrator sets Allow Cost Payment Applications to be created against to Executed Contract only, only executed contracts appear in the picker for Create and Batch create.
The Show executed Contract only toggle is on and disabled. Hover over the toggle to see: Payment applications are limited to executed Contract by the project administrator.
This applies to members with Full Control or Collaborate + Create permission.
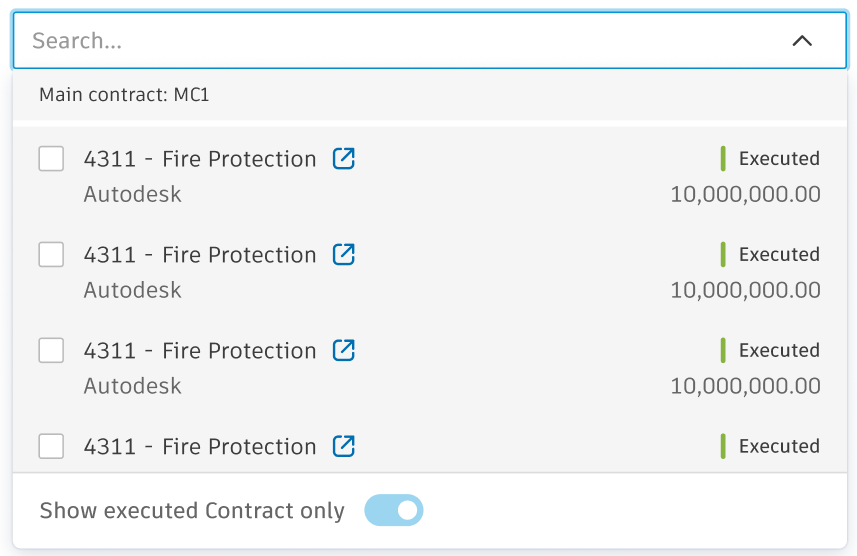
Collaborator + Create
Collaborators with Create permission see contracts assigned to the same supplier only. When Executed Contract only applies, only executed contracts are selectable. The Show executed Contract only toggle is on and disabled.
Batch-Create Cost Payment Applications
You can also batch-create a cost payment application from several contracts. This option allows you to create multiple cost payment applications for several contracts and billing periods in one go.
Preconditions for batch-creating cost payment applications:
- The contract's budgets are linked to the main contract
- The main contract has master billing periods
To do so:
Click Batch create.
Choose the billing periods and contracts. The chosen items show on the list.
Click Create. The created cost payment applications show on the list with the Draft status.
Create Multiple Payment Applications in a Billing Period
Administrators can generate up to five payment applications in a single billing period. This is beneficial in scenarios such as making advanced payments, releasing retention separately, and creating net adjustments retrospectively.
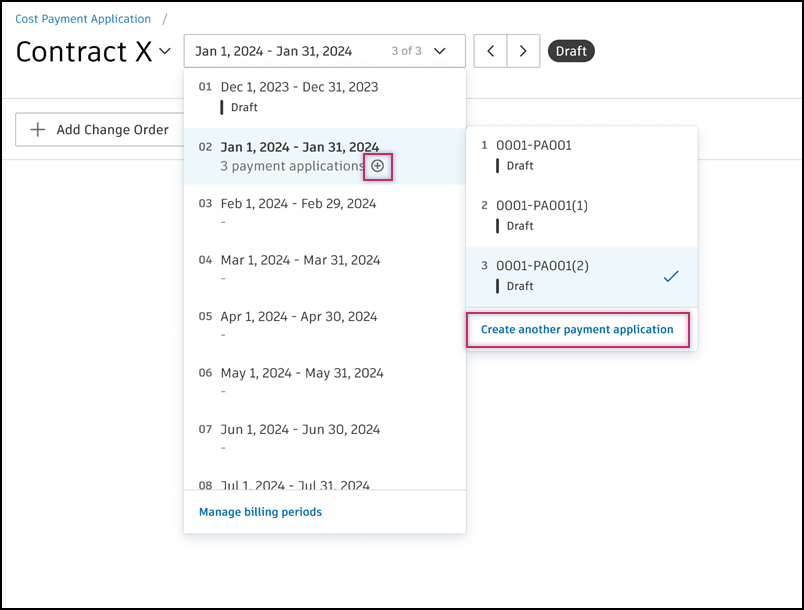
To add multiple pay applications in a period:
Go to Cost Payment Application, select the billing period to which you want to add a payment application.
Select the plus sign
 within the Manage billing period drop-down or choose Create another payment application in the drop-down submenu.
New payment applications are added at the end and have consecutive numbers provided in parentheses.
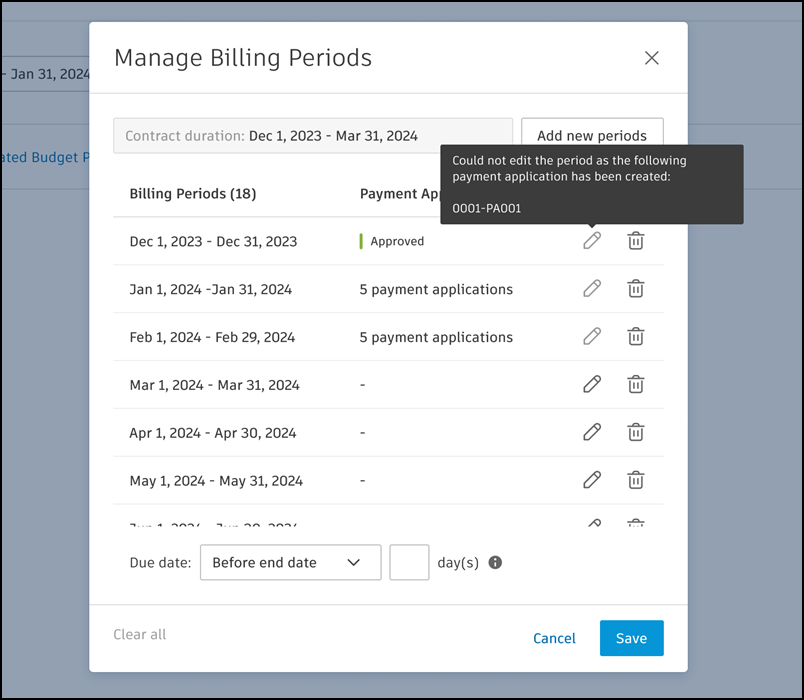
To manage payment applications in a billing period, select Manage billing periods in the drop-down menu. Here, you can rename or delete any application.
Add a Change Order to a Cost Payment Application
To learn how to add a change order to a cost payment application, see Add Change Orders to Payment Applications.
Link Budget and Cost Payment Applications
Once a cost payment application is created, it can be associated with the budget payment application. Linking reduces manual entry and potential mistakes.
To link budget and cost payment application:
Go to the Budget Payment Application tab.
Select the main contract. The details panel opens.
Click Add in the Associated Cost section.
Choose between two options:
- Create to create a payment application from the existing contracts.
- Add Existing to add the existing cost payment application. Use the checkboxes to select the cost payment applications to import.
Click Add.
To update the information automatically, you need to associate cost payment applications for each budget payment application (a new billing period).
Work with a Schedule of Values after Creating a Cost Payment Application
After creating a cost payment application, there are a few rules to keep in mind:
- If a new Schedule of Values (SOV) is added, it won't appear in the existing cost payment application.
- If an SOV is deleted and the Work Completed value is zero, it will be automatically removed from the existing cost payment application. If Work Completed is not zero, an error will pop up when attempting to delete the SOV.
- When an SOV is updated (the amount), the update won't sync with the existing cost payment application.
- The next cost payment application that is created will synchronize with the latest structure and amounts of the SOV.
Learn more about the Schedule of Values.
Create a Cost Payment Application Document
You can generate a document and add it to a cost payment application. The most effective approach is to create a document template that can be shared across multiple payment applications. For best results, associate cost payment applications with contracts before generating documents to enable effective sharing.
To learn how to create and customize document templates, see Document Templates in Cost Management. Payment applications' documents created this way are mostly view-only. See Export Payment Reports to create a document that can be filled out by the subcontractor.
For a complete list of available document template variables, see Payment Application Variables.
Foreign Currency Payment Applications
Cost payment applications can be entered and managed in foreign currencies for international suppliers. For detailed information on setting up and managing foreign currency payment applications, exchange rates, and currency conversion, see Foreign Currency in Payment Applications.
Complete a Cost Payment Application
After creating your cost payment application, you can:
- Add change orders to include approved or open subcontractor change orders
- Request and review supplier input to collaborate with suppliers on payment applications
You may also set your last payment application as final to enhance the payment process. See Stages of Payment Applications to learn more.
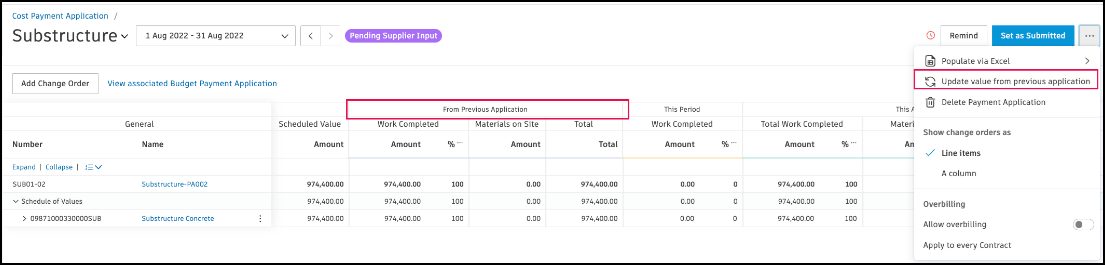
After acceptance, the cost payment application can be set as approved, and then as paid. You can learn more about payment application statuses. The information is updated in the From Previous Applications section in the active billing period.
Export and Reimport Cost Payment Applications
Cost payment applications can be exported for subcontractors to enter their billing information, and you can generate reports to share information with stakeholders. For detailed instructions on all export and import options, see Export Payment Reports.
More Resources
Learn more about managing cost payment applications with the workflow guide. You can also take a course on this article.