Photos (Android)
Use the Autodesk Construction Cloud app on Android to add, view, and export photos from your projects.
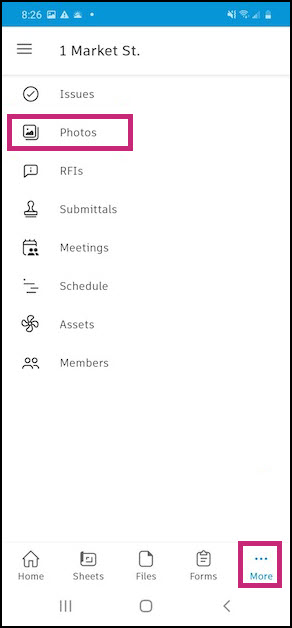
To access the Photos tool on Android, open a project and tap on the More icon ![]() in the bottom navigation menu. Then tap Photos.
in the bottom navigation menu. Then tap Photos.
In this topic, you'll learn how to do the following in the Autodesk Construction Cloud app on Android:
Add Photos (Android)
- Open the Photos tool in the Autodesk Construction Cloud app.
- Tap the
 icon.
icon. - Select whether to use your camera or to select an existing photo from your device.
- Allow the Autodesk Construction Cloud app to access your device's camera or library.
- Take photos or videos or select one from your library.
Your photos or videos will now appear in the Photos gallery.
Search, Filter, and Sort Photos (Android)
In the Photos tool in the Autodesk Construction Cloud app, you can search, filter, and sort through all your project photos.
Tap
 to search for photos and videos by name.
 Tap
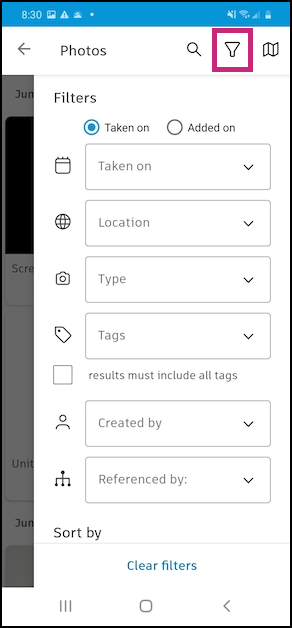
 to filter or sort the photo gallery by certain criteria.
 - You can apply as many filters as you'd like. Click the filter icon again or click away to view the gallery with the filters.
- You can sort photos and videos by the date they were taken, the date they were added, or title. You can also choose to sort in ascending or descending order. Click the filter icon again or click away to view the sorted gallery.
Tap
 to view a geographical map of your photos. If your photos have a GPS location, you can navigate through the map to find photos based on location.
View and Edit Photos (Android)
- Open the Photos tool in the Autodesk Construction Cloud app.
- Tap on any photo or video to view it and see more options.
- Tap the
 icon to see details about the photo. This includes its creator, the date, and time it was taken, the date and time it was added to the project, and its location on the map. Learn more about photo details here.
 - Tap the
 to edit the photo's name and location.
Add and Remove Tags on Photos (Android)
You can manually add tags to organize your project photos. Autodesk Construction Cloud can also automatically apply tags to photos. Learn more
In the Photos tool in the Autodesk Construction Cloud app, tap on any photo or video to view it.
Tap the
icon to see details about the photo. Tap the number of Tags Applied. If there are existing tags, they will appear in the Selected Tags section.
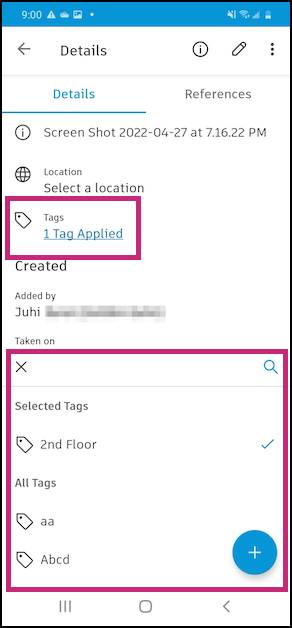
To remove a tag, tap on a tag in the Selected Tags section and it will be immediately removed.
To add tags:
- Existing tags: Tap
 to search or scroll to find the tag and tap on it.
 - New tags: Tap , enter a tag name, and tap OK.
The number of tags applied will update accordingly.
- Existing tags: Tap
Mark up Photos (Android)
Once you've added a photo to the gallery, you can apply markups.
In the Photos tool in the Autodesk Construction Cloud app, tap the photo you want to markup.
Tap the More icon
 at the top-right corner of the screen.
Tap Copy and Markup.
Select a color at the bottom and use your finger to draw a markup.
Tip: To undo or redo your changes, click the respective icons at the bottom of the screen.
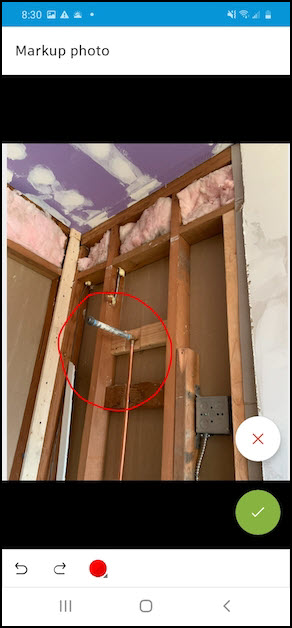
When you're done, tap
 .
.
Your original photo will remain in the gallery along with the new one with markups applied.