Tags in Photos
Tags in the Photos tool are labels for organizing and finding photos on your project. You can use tags to filter photos directly from the photos gallery.
There are two types of tags in Photos:
- Manual tags created by project members
- Autotags added automatically to photos by Autodesk Build
In this topic, you'll learn how to:
- Create Tags on Photos
- Add or Remove Manual Photo Tags
- Use Autotags on Photos
- Disable Autotags on Photos
Create Tags on Photos
In the photo gallery, click to open a photo that you want to tag.
In the Details tab on the right panel, click the pencil icon in the Tags field.
Type in the tag and then press Enter or click Create option in the drop-down menu.
Note: A tag can have a maximum of 64 characters.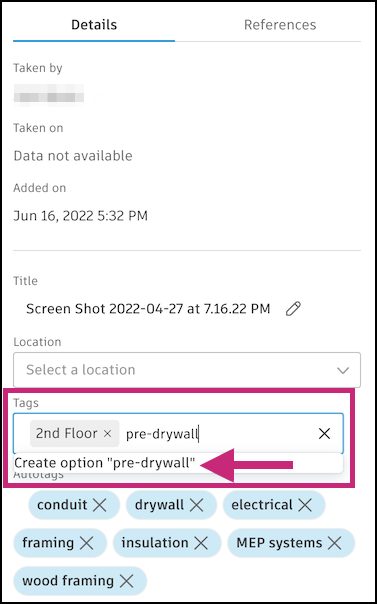
Add or Remove Manual Photo Tags
To add a tag:
- In the photo gallery, click to open a photo that you want to tag.
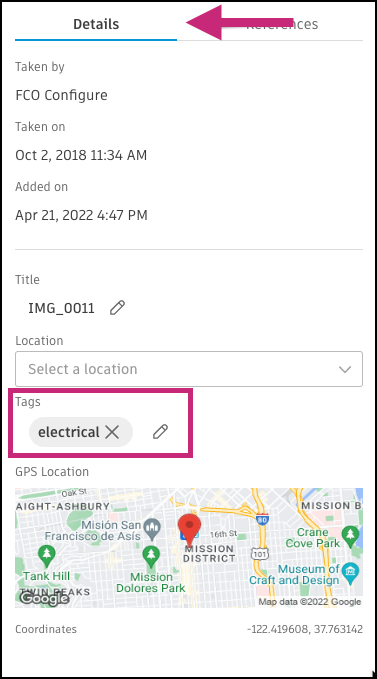
- In the "Tags" field in the "Details" tab, click the pencil and select a tag from the drop-down menu.
To remove a tag, click x on the tag.
Use Autotags on Photos
Autotags uses machine learning to apply tags to photos automatically. This makes your images easy to access for tracking progress, documenting completed work, and referencing. Autotags together with manual tags can make organizing and finding photos easy, powerful, and customizable.
Autodesk Build currently supports the following autotags organized in these categories:
The categories are also tags that are automatically applied. Any photos with tags in that category will also receive the category tag. Category tags add an extra level to help organize related photos.
Site
- Site earthworks
- Site utilities
- Trench
Concrete
- Rebar
- Formwork
Framing
- Ceiling framing
- Metal framing
- Wood framing
MEP Systems
- Ductwork
- Conduit
- Wiring
- Electrical cabinet
Electrical
- Conduit
- Wiring
- Electrical cabinet
- Lighting
- Switches outlets
Plumbing Fixtures
- Sink
- Toilet
- Bathtub
Fire Protection
- Fireproofed steel structure
- Fire seal
Openings
- Door
- Window
Finishes
- Floor finish
- Tile
- Cabinet
- Baseboard finish
- Countertop
Misc (not included in a category)
Pavement
Steel structure
Steel deck
Drywall
Insulation
Air diffuser
Repair tape
Ceiling tile
Bannister
People
- Note: Autodesk Build does not use facial recognition or attempt to identify individuals
Documents
Heavy equipment
Ladder
Stairs
Wall
You can always remove an autotag from the photo detail page.
Disable Autotags on Photos
If you don't want autotags to show on your photo details, you can disable the feature.
From the photos gallery, click Settings and click to turn off autotags.
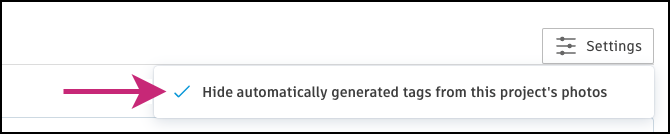
Disabling the autotags feature stops autotags from being added to any new photos added to your project. However, it does not remove existing autotags from before the feature was disabled. Those autotags can be removed manually.