Import Issues
The Issues tool allows you to import multiple issues to a single project at once. Your team can quickly start tracking work, resolving problems, and preventing delays.
Create Issues by Importing on Web
You can create multiple issues at once by importing a CSV or XLXS file into the Issues tool.
Only members with Manage issues or Manage member permissions access can import issues. Permissions can be managed by Admins in the issues settings.
Click the Issues tool.
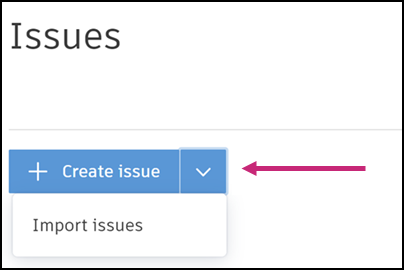
Next to "Create issue", click the arrow to open the drop-down menu.

Click Import issues.
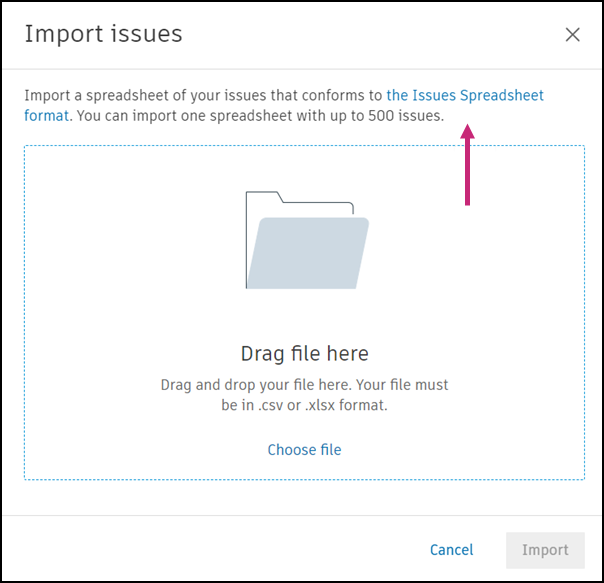
Drag your file into the window or click Choose file to select from your computer.
Note:Your file must conform to the requirements noted in the following section. If you have not yet created a file, click the Issues Spreadsheet format to download the template and fill it out accordingly.

Click Import.
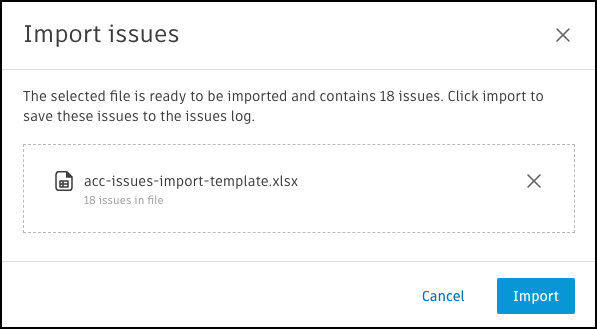
If there are no errors, you can confirm the number of issues to be imported. Click Import or click to discard the file and upload again.
 Note:
Note:Do not close the tab during the import process.
Your issues will be automatically assigned the next available sequential numbers and will appear in your issues log.
Import Issues Requirements
The following are requirements when uploading a spreadsheet of issues into the Issues Tool:
- Your file must be in a CSV or XLSX format. We currently support Excel 2007 format (or later).
- Maximum 500 issues can be imported at one time.
- "Title" is the only required field.
- When using the provided template, do not delete or rename any columns even if unused.
Column Requirements for Importing Issues
In your CSV or XLSX file to import, the following fields on an issue must meet these requirements:
Title: Maximum 100 characters
Status: Must be "Open, In Review, Pending, or Closed". If not specified, this will default to "Open"
Category: Must match a category configured in your issues settings.
- If not specified, this will default to "General". On older projects, if there is no "General" category, you will experience an error. To resolve, enter in a category for that line item
Type: Must match a type configured in your issues settings and belong to the category provided in the "Category" column.
- If not specified, this will default to "General". On older projects, if there is no "General" category, you will experience an error. To resolve, enter in a category for that line item
Description: Maximum 1,000 characters
Assigned To: Maximum one individual, role, or company. For an individual member, this must be an email address. For a company or role, this must match an existing company or role in your project
Location: Must match a location configured in your project settings. Location format must use the following syntax
ACC > TakeoffNote: You need to use a space before and after the caret icon.Location details: Maximum 250 characters
Due Date: Use YYYY-MM-DD or another Excel date format
Start Date: Use YYYY-MM-DD or another Excel date format
Root Cause Category: Must match a root cause category configured in your issues settings
Root Cause: Must match a root cause configured in your issues settings
An issue template in XLSX format
The template is available for download here:
Before importing, make sure all the categories, types, locations, and root causes in your file are preconfigured in your issues settings. If they do not exist in your issues settings, you will receive an error.
Importing Issues with Custom Fields
You can also add custom fields when importing multiple issues from a CSV or XLSX file.
To add a custom field to an issue, add as many columns as needed to the rightmost out of the box columns in your spreadsheet and enter in information accordingly.
The following are requirements on custom fields in the spreadsheet:
The first row of your new column must match a custom field title configured in your issues settings.
Each custom field title in the first row must be unique.
The custom field value must meet the requirements of its specified custom field type:
- Dropdown: Must match one of the options configured in your issues settings.
- Numeric: Use only numeric values
- Paragraph: Maximum 2500 characters
- Text: Maximum 250 characters
The custom field must belong to the type provided in the "Type" column. Custom fields can be assigned to issue types in your issues settings
Troubleshooting Import Issues Errors
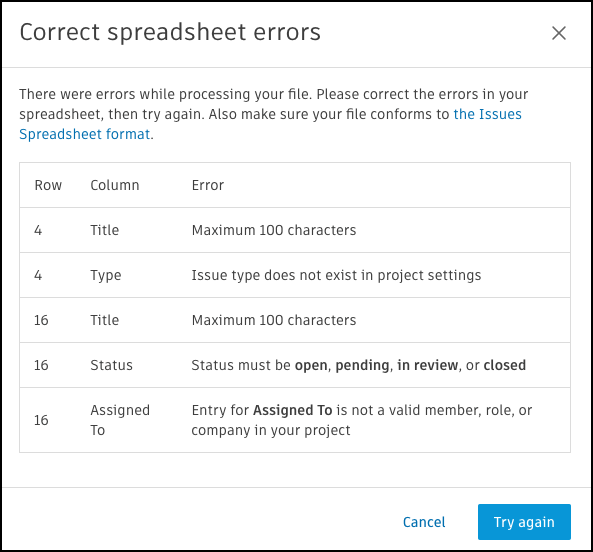
If fields do not meet the criteria, the specific rows and columns affected and the errors triggered will be listed.
Review the Issues Spreadsheet format file or the previously mentioned details on this page for more information.

To successfully import issues, correct the errors on the file on your computer and save the updated CSV or XLSX file.
Click Try again.
Drag your updated file into the window or click Choose file to select from your computer.
Click Import.
Once there are no errors, you can confirm the number of issues to be imported.
Click Import.
