GPS Locations on Issues on Android
On the Autodesk Construction Cloud mobile app, you can add GPS coordinates on issues to help your team understand the location of the issues on your project. With coordinates added, your team can also see a map of all your issues on the web.
For the GPS location to appear as a field on an issue, it must be visible for the issue's type. Project administrators can manage fields in the settings. Learn more in Manage Fields in Issue Types.
This article includes:
Add GPS Locations to Issues on Android
You can add a GPS location when creating or editing an issue.
In the Autodesk Construction Cloud mobile app, navigate to the Issues tool.
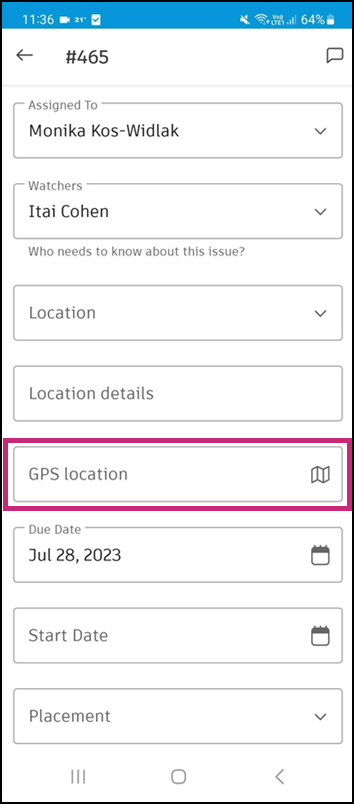
Tap on an existing issue or create an issue.
Tap on the GPS location field.
Allow the app to use your location. Select from While using this app, Only this time, or Don't allow.
a. If you allow the app to use your location, you will be directed to place an issue pin on the map. The map that appears is based on your current location. Move the map to the desired location and tap Done to place the issue.
b. If you don't allow the app to use your location, you will be directed to place an issue pin on the map. The map that appears is based on your project's location. Move the map to the desired location and tap the map to place the issue.
You will be asked if you would like to change your settings for next time. We do suggest granting access to your location to quickly add GPS coordinates to your issues. Click Change setting or No, thanks.
Learn more about managing your Android device's location settings.
Edit and Remove GPS Locations on Issues on Android
In the Autodesk Construction Cloud mobile app, tap on an issue in the Issues tool.
In the issue's details:
a. Tap on the thumbnail map.
b. Tap the issue pin, and then tap Move or Delete in the menu.
i. Move: Hold and drag the issue map to a new location. Tap to place the pin.
ii. Delete: In the pop-up, tap Delete.
Known Bugs for GPS Locations on Issues on Android
- If the Autodesk Construction Cloud mobile app doesn't have permission to use the device's GPS location, the application might crash.
See Issues on Autodesk Construction Cloud mobile app (Android) to learn more about working with issues using your Android mobile device.