Work with Issues in the Viewer on Android
You can view, edit, and manage issues directly within the Autodesk Forma mobile app viewer on Android. This allows you to work with issues placed on 2D files, sheets, and 3D models, helping you visualize and resolve problems in context. Use viewer tools to navigate, measure, and markup your models and drawings for enhanced collaboration.
This topic includes:
- Open Issues in the Viewer on Android
- Work with Issues Placed on 2D Files in the Viewer on Android
- Work with Markups in the Viewer on Android
Open Issues in the Viewer on Android
Open the Autodesk Forma mobile app.
Tap the project that you want to open.
Tap the Issues icon. If you do not see Issues on the bottom menu, tap the More menu icon
 and then find Issues.
 Navigate to the issue that you want to open in the viewer.
Tap the Placement field.
Tap Go to file/Go to sheet. This action opens your issue in the viewer.
Note: If the file has not been downloaded yet, you may be prompted to download it.
Work with Issues Placed on 3D Models in the New Viewer on Android
Working with issues on 3D models in the new viewer for Android allows you to visually place, review, and manage issues directly within your project’s 3D environment. This feature helps teams identify and resolve design or construction problems in context, improving collaboration and accuracy. You can view issue pins on models, access issue details, and use specialized tools for navigation, measurement, and markup.
Follow steps 1-6 in Open Issues in the Viewer on Android to open your issue in the viewer.
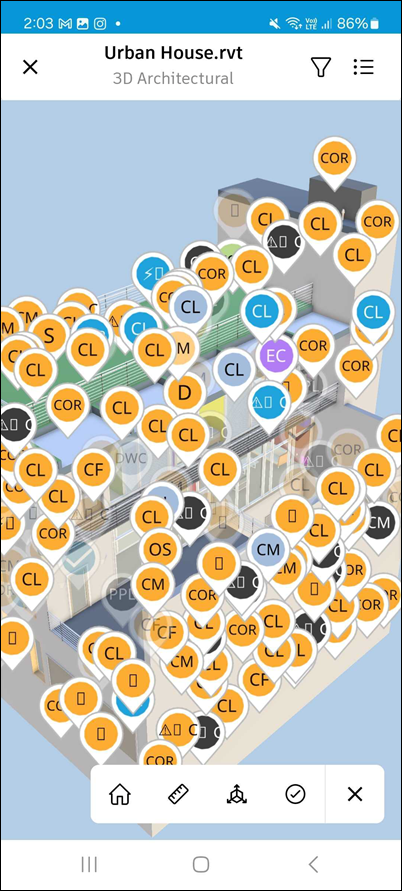
You'll be able to view issues placed on a 3D model in the new viewer.
Tip:Tap Don't show me again to hide the banner. You can turn the new 3D model viewer back on in the Settings menu
 in the top right of the screen.
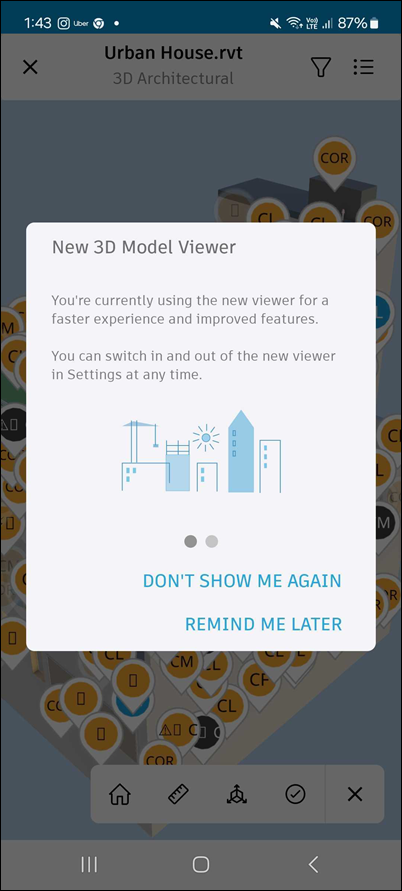
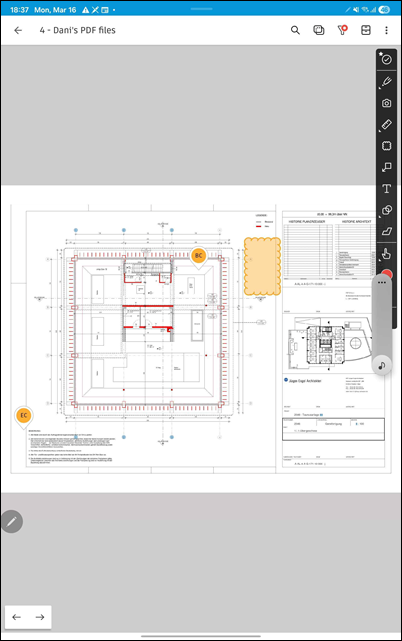
Issue pins visually mark the exact locations on the 3D model where issues have been placed, helping you quickly identify and access issue details in context.
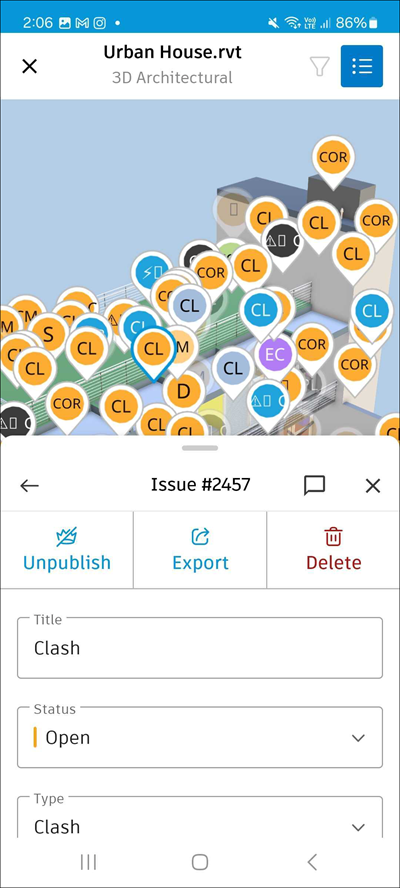
Tap the desired issue pin to open its details panel, where you can view, edit, comment, export, delete, publish, or unpublish the issue directly from the model.
The following tools are available in the toolbar.
Note: The letters correspond to the letters in this screenshot.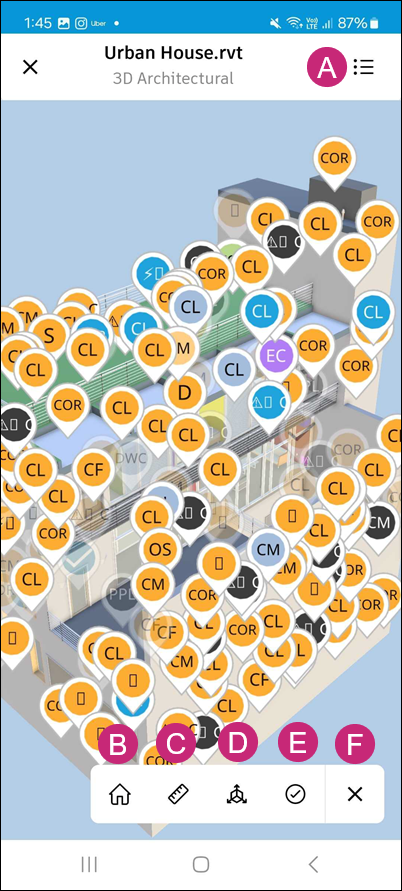
A: Menu: Tap the menu to access the following:
Views: Browse different 2D and 3D views associated with your model
Viewpoints: See different viewpoints associated with your model
Issues: View and edit the list of issues associated with your model
Model Browser: Browse through the model structure
Assets: View and edits assets associated with your model
Settings: Access the settings menu to adjust your viewing experience, such as:
Select units of measurement as needed
Change selection mode
Review the hand gestures: zoom, pan, look around, and rotate
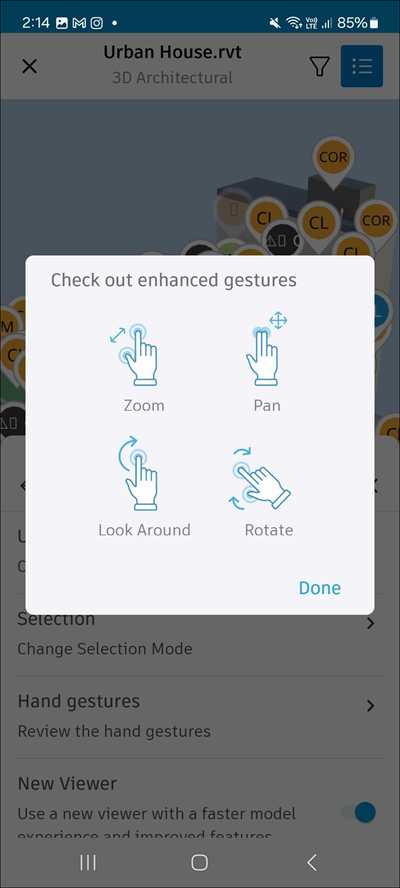
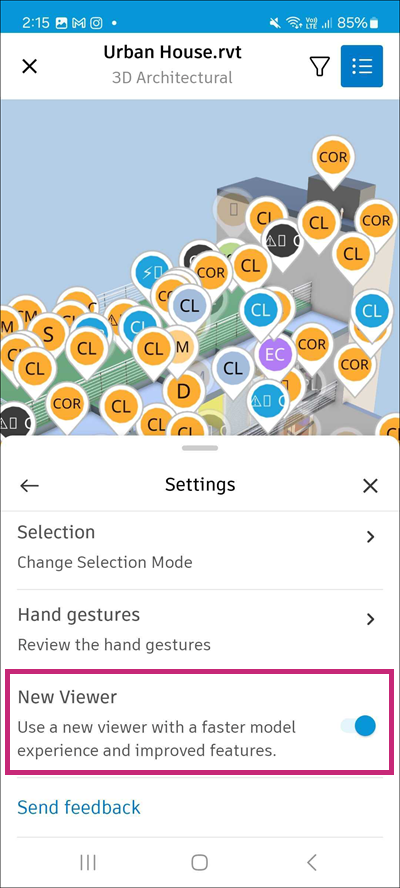
Toggle the new viewer option on or off to use the new 3D model viewer. This option is enabled by default. If you disable it, you will be able to use the legacy viewer.
Send feedback about the feature
Details: View details about the model, such as the file name, file size, and version.
B: Home view: Tap to return to the default view.
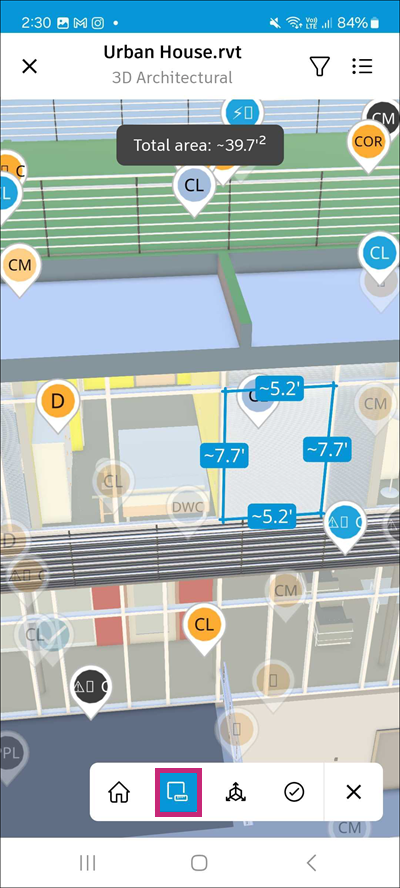
C: Measurement: The following four measurement tools are available:
Straight line measure: Tap two points on the model to measure the distance between them. You can also touch and hold to open a closeup of your touchpoint and let go to create the first point. Then hold and drag the point to measure a length.
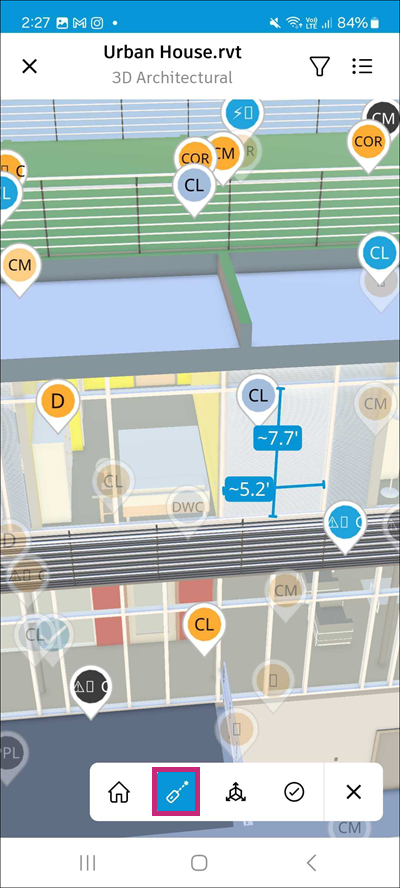
Laser measure: Tap any surface of the model to view measurements to the nearest edges.
Surface measure: Tap a curved or flat surface to view its measurements. Depending on the surface type, you may see:
Straight edges - lengths of individual edges
Circles - circumference and diameter
Arcs- Arc length (can be circular or general arcs)
Ellipses - circumference, half-major axis, and half-minor axis
Cylinders and conic sections - Length dimension between the centers of two parallel circular ends
Total area - Displayed for flat surfaces only
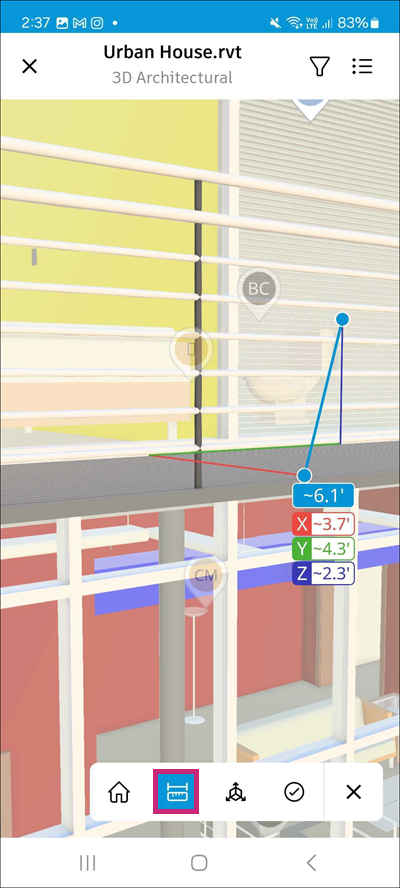
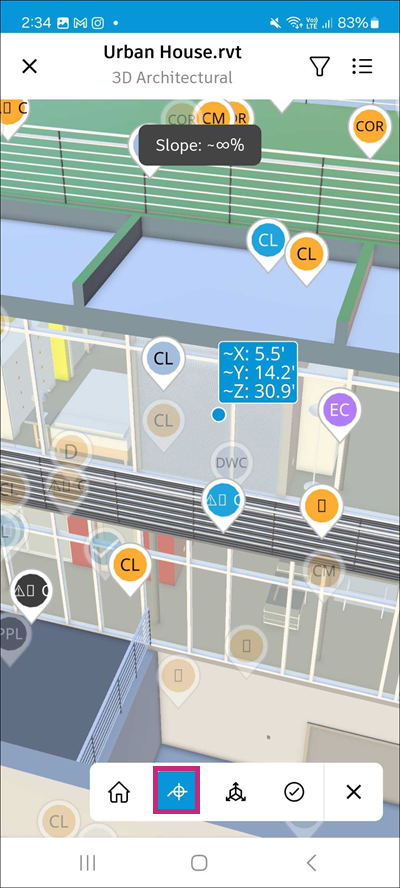
Spot coordinate: Tap a point on the model to view its:
X, Y coordinates
Elevation (Z)
Slope
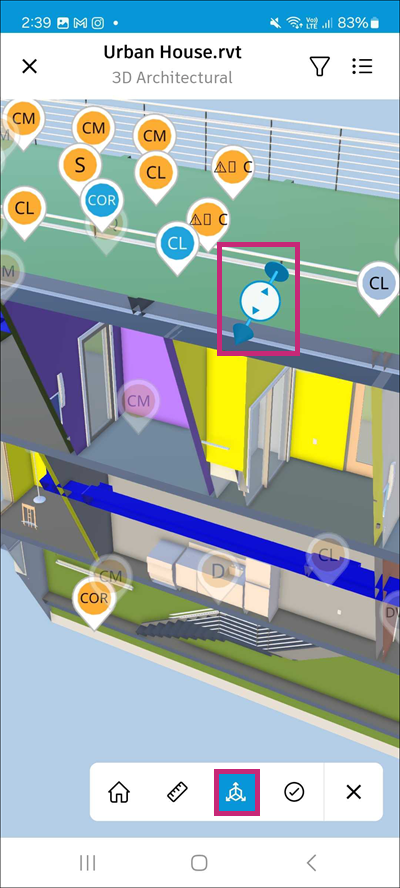
D: Sectioning: Tap a surface to create a section cut through the model. Tap to select either the X axis, Y axis, Z axis, or specific area.
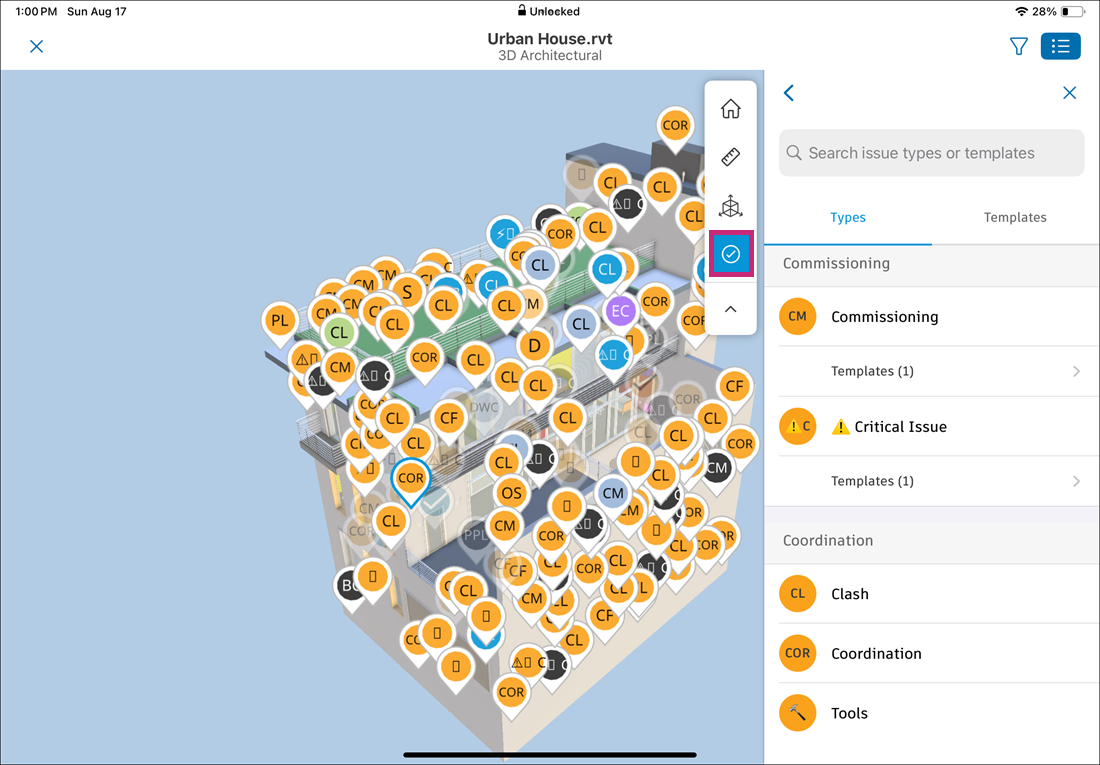
E: Issues: Tap to view the list of available issue types and templates.
F: Collapse: Tap to collapse the toolbar.
See Measure 3D Modes in the Viewer on Mobile for more information on measurement tools.
More viewing options in the model viewer:
Tap on any object in the model to access more viewing options.
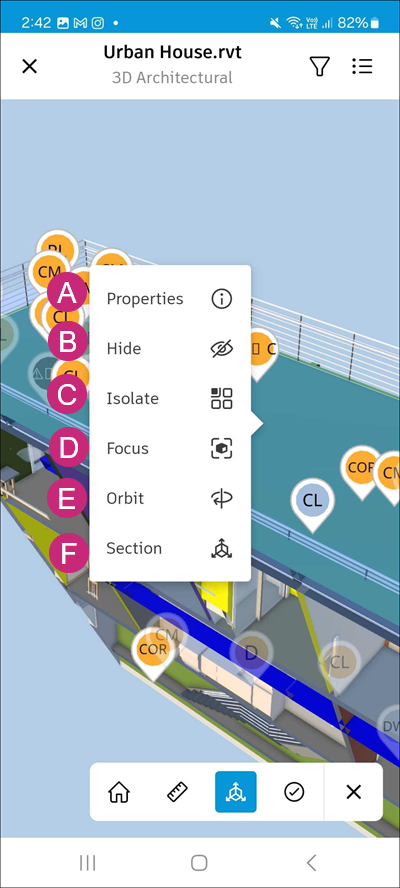
A: Properties: Tap to open the properties panel for the selected object, displaying its details such as name, type, dimensions, and other attributes.
B: Hide: Tap to hide the selected item from the view. This is useful for decluttering the model and focusing on specific elements.
C: Isolate: Tap to isolate the selected object, hiding all other elements in the model. This allows you to focus on the specific object without distractions.
D: Focus: Tap to bring the selected object into the center of your view.
E: Orbit: Tap to orbit around the selected object.
F: Section: Tap to create a section cut through the selected object. You can adjust the section plane by dragging it along the X, Y, or Z axis.
Other considerations:
Note the following when working with issues in the viewer on Android:
- Changing issue status is reflected in the change of color of the issue pin
- Changing issue type is reflected in the change of text displayed in the issue pin
- Deleting an issue removes a pin associated with this issue from the viewer.
Work with Markups in the Viewer on Android
You can create markups and use them with issues in the Android viewer.
Create and Manage Markups
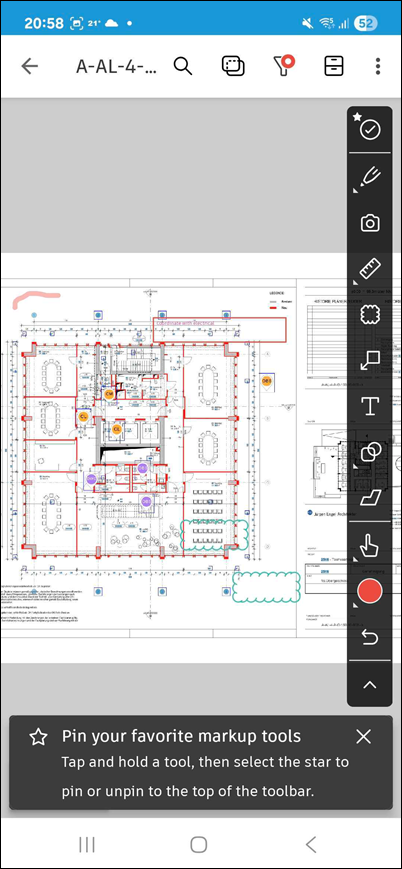
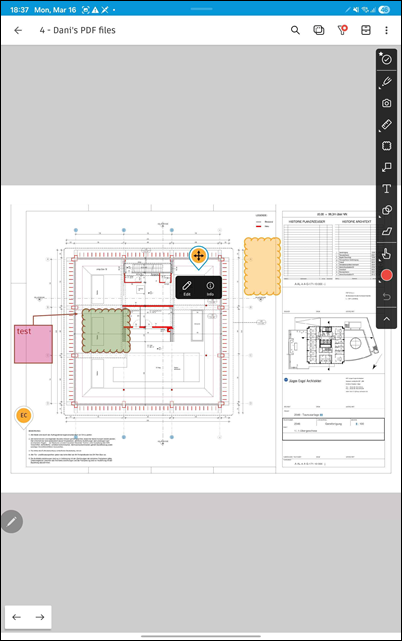
Open a 2D sheet or file in the viewer.
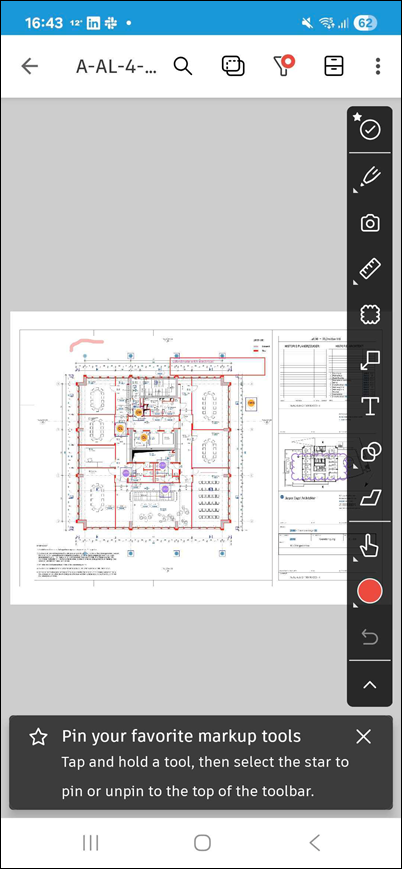
Tap the markup tools in the toolbar.
Select a markup type and draw the markup.
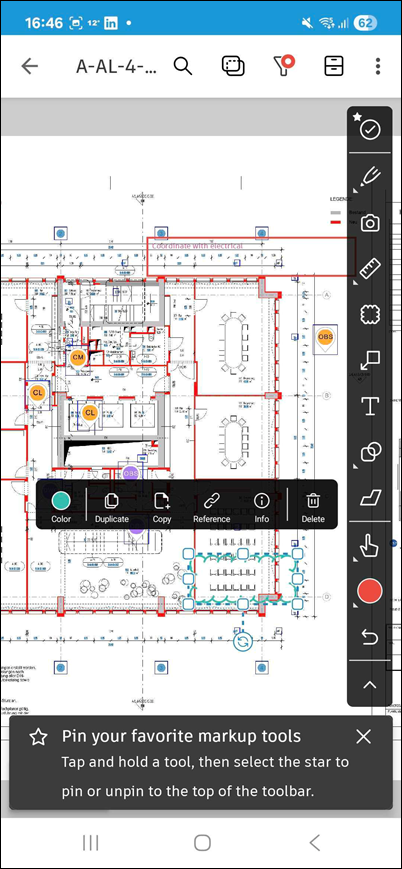
Tap the markup to open its contextual menu, where you can edit, copy, duplicate, or delete the markup.

Tap
 to filter by share status, markup type, markup reference type, or markup color.
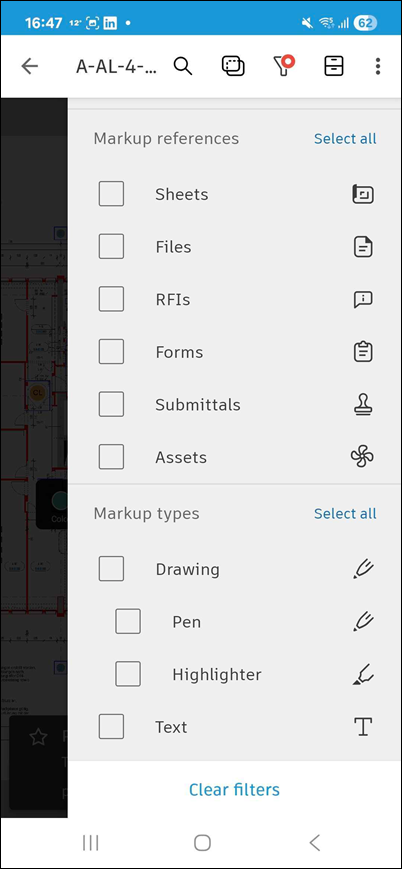
Copy and Duplicate Issues with Markups
You can copy and duplicate selected issues and markups in the same project.
Open a sheet, a 2D file, or a 2D view in a 3D file.
Select one or more issues, markups, or both.
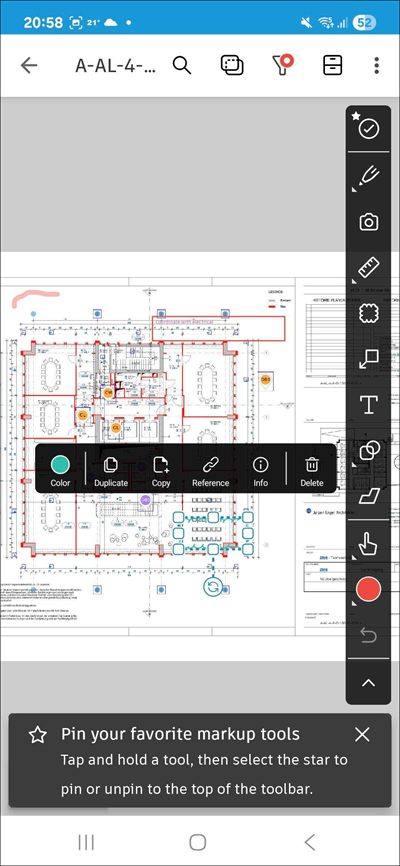
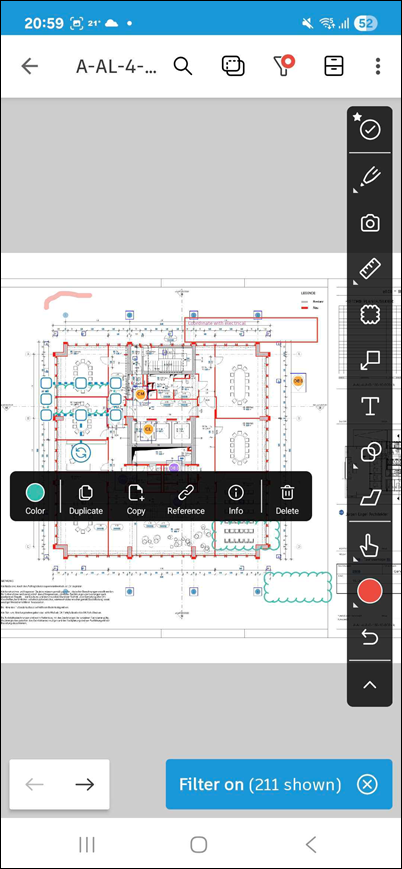
Long press to open the contextual menu.
Select Duplicate to create copies in the same sheet or file.
Select Copy to paste in the same sheet or file, or in another sheet or file in the same project.
Open the destination sheet or file, and press and hold to paste the copied selection.
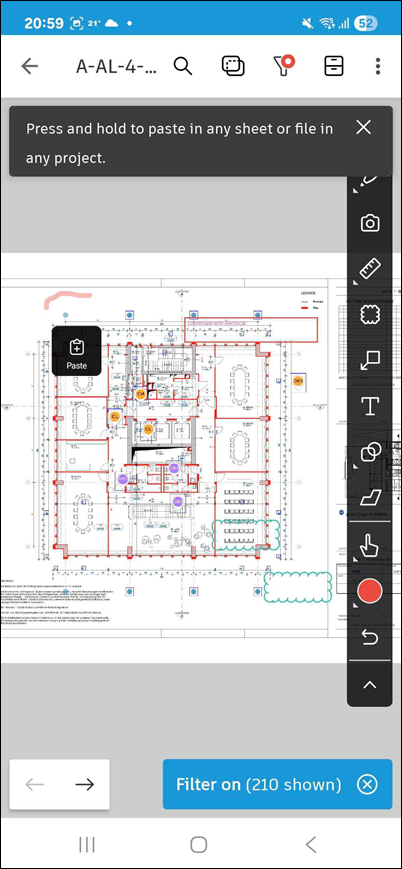
The markup is pasted with the contextual menu open.
Copy and Paste Considerations
Note the following when copying issues with markups:
The new issue keeps most source fields.
The new issue does not copy:
- Attachments
- References
- Comments
- Placement
- Location
- Activity log
- Thumbnail
- Created date
- Updated date
- Issue number
The new issue gets a new issue ID.
You can copy up to 200 issues in one session.
You can't copy issues between different projects.
Permissions and Results
Your current permissions apply to pasted issues.
If you can't assign copied values, the app clears those fields and shows a warning.
The app sends notifications for newly created issues.
The copy process uses all-or-nothing behavior when the user is online.
When offline, the system copies as many issues as possible. If some fields cannot be copied, those issues are skipped and a toast notification lists which fields were not copied.
If one issue fails, the app does not create any issues.
The new issue activity log records the source issue.
Work with Nested Markups in the Viewer on Android
In 2D workflows, you can create nested issue markups on web to provide additional context and details for your issues. Nested markups are linked to their parent issue, helping clarify information and minimize misunderstandings.
You can view nested markups on the Autodesk Forma mobile app for Android. On mobile, nested markups are view-only. To create, edit, or delete nested markups, use web.
Open the sheet or 2D file in the viewer where the issue with nested markups is placed.
Tap the issue pin to open the issue's contextual menu. Markups associated with the issue are displayed on the sheet or 2D file.
Review the nested markups shown with the selected issue to understand the issue context.
If you tap outside the issue pin, the pin remains selected and its associated markup remains visible on the sheet or file.
Note the following considerations when working with nested markups in the viewer on Android:
- Nested markups are visible only when their parent issue is selected.
- If an issue has no nested markups, none are shown in the viewer.
- When nested markups are updated on web, the latest nested markups and issue snapshot sync to mobile.