Sheets Collections
You may have construction projects with multiple buildings and need to use the same sheet numbers (for example, A101, A102) for two or more buildings. Collections enables you to organize their sheets into collections so they can be uploaded to the Sheets tool without versioning on top of each other.
Enable Sheets Collections in Your Project
Project administrators need to enable collections on web so they can be used on web and in the Autodesk Construction Cloud mobile app. Collections can be enabled in new projects with no sheets, or existing projects which already contain sheets.
A project administrator needs to:
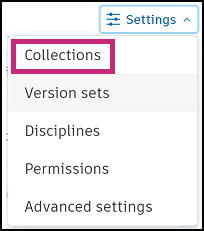
Click the Sheets tool.
Click the Settings drop-down.
Click Collections.

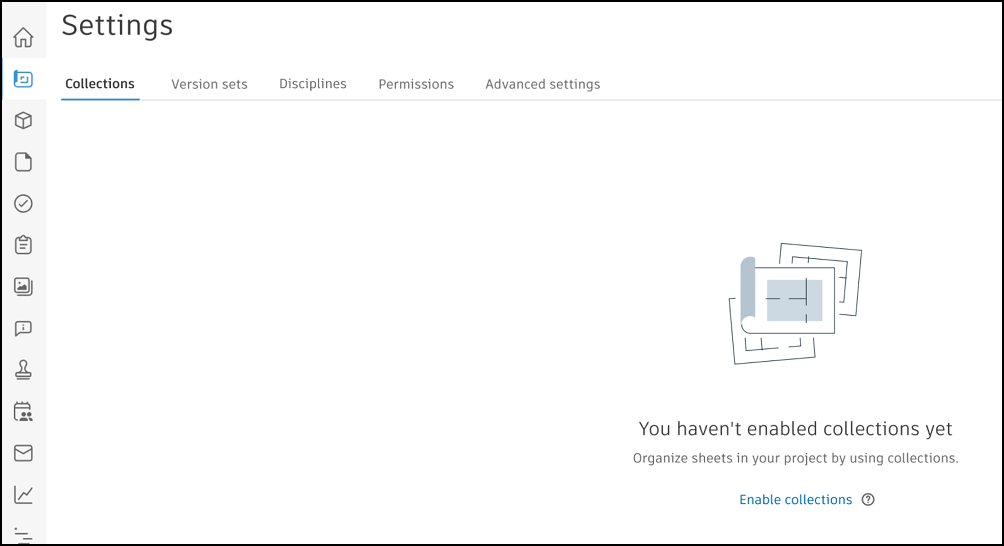
A message informs you that collections aren't enabled.

Click Enable collections.
A message informs you that collections can't be disabled.

Click Enable collections.
Enable collections in projects with no sheets
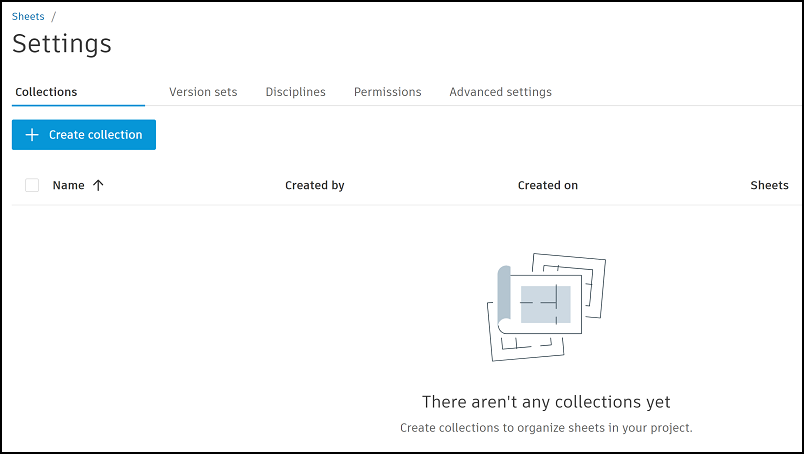
If your project doesn't contain any sheets, you'll be directed to the Collections tab where members with Create + Upload permission and above can create collections.

Collections need to be created before sheets can be published to collections enabled projects.
Enabled collections in projects with existing sheets
If your project already contains sheets, they will automatically move into the Ungrouped sheets area when collections is enabled.

Members with Create + Upload permission or above can now access the Settings > Collections page to create collections.
Once collections are created, members with Edit permission or above can move sheets from the Ungrouped area to specific collections, and publish new sheets to those collections.
Create Collections
Members with Create + Upload permission or above can create collections on web. This is required so members can publish sheets into a specific collection. Different collections can contain sheets with the same sheet numbers, and version sets with the same name.
Click the Create collection button.
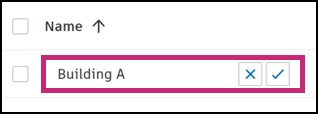
Enter a name for your collection. The name can't be the same as another collection.
Press enter or click the check mark.

Your collection will display in the Collections tab. There will be no sheets associated with the collection until sheets are published to the specific collection.
Delete a Collection
Members with Manage permissions and project administrators can delete collections which don't contain any sheets.
When a collection is deleted, the collection's version sets will also be deleted. However, the collection and versions sets can be created again if required.
Select the relevant collection for deletion. You can use the search box to search for a collection by name.
Note The Delete button is disabled if the collection contains sheets
Click Delete.
Note: Any automatic changes will no longer sync from other projects to the deleted collection.
Rename Collection
- Click the Sheets tool.
- Click Settings > Collections
- Hover on the collection name and click the pen icon.
- Edit the name.
- Press enter or click the check.