Manage Projects
- About Adding Projects
- Initial Project Selection
- Add or Remove Projects
- Project Syncing Errors
- Renaming Projects and Hubs
- Deleting Files and Folders: Recycle Bin and Cloud Workflows
About Adding Projects
The latest release of Desktop Connector enables you to select and add up to 80 projects to your Autodesk Forma or Autodesk Fusion connectors in File Explorer ![]() . By adding only the projects you need, you can better manage your local storage space.
. By adding only the projects you need, you can better manage your local storage space.
Project management is now unified across both Forma and Fusion connectors:
- The 80 project limit is shared across both connectors (total of 80 projects combined, not 80 for each connector)
- The same Select Projects dialog manages projects for both Forma and Fusion
Initial Project Selection
When you first Sign in to Desktop Connector, you will be asked to make your initial project selections.
All the projects you can access are listed in All projects.
Click a hub to view the relevant projects.
Select your projects (You can select up to 80 projects).
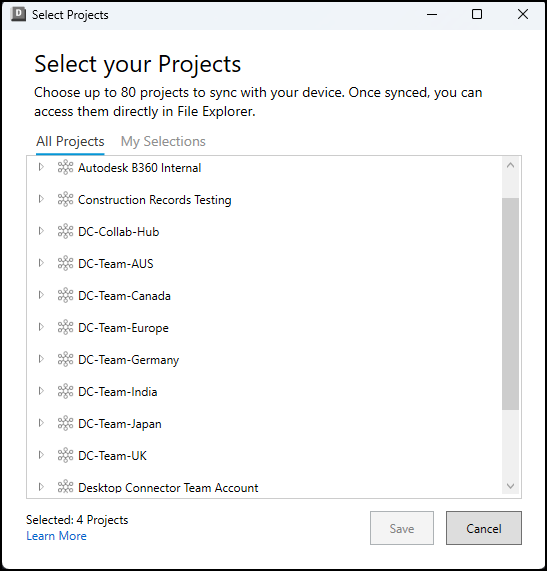
Click Save.
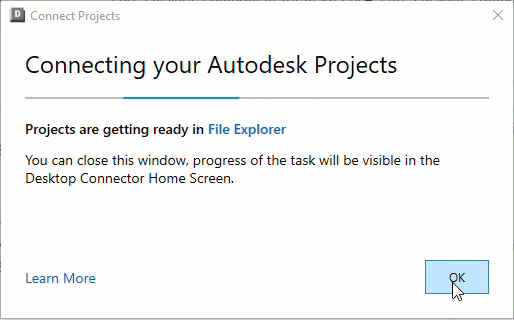
Your projects will begin adding to File Explorer.
Click OK to close the dialog box.
These activities will display on the home screen.
Add or Remove Projects
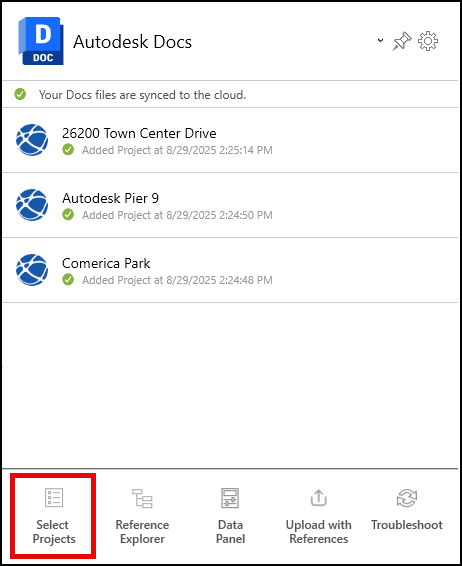
You can add or remove projects from your Forma or Fusion connector at any time by accessing the Select Projects menu option from the home screen.
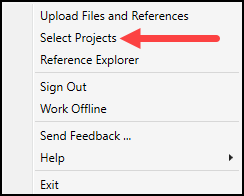
Right-click the Desktop Connector tray icon

Click Select Projects.
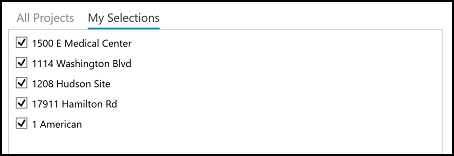
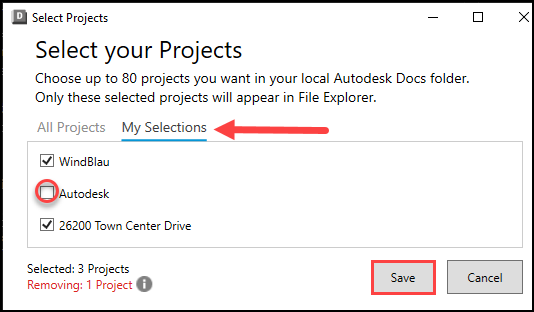
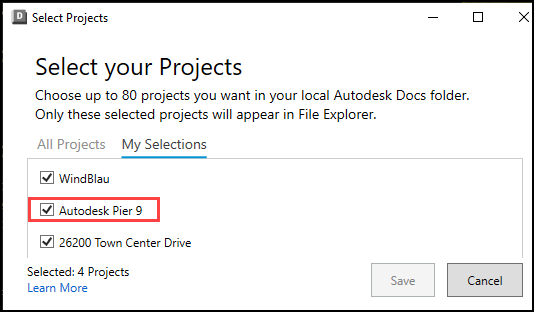
You'll see the same dialog box used for your initial project selections. You can view the following tabs:
- All Projects: Displays all the projects that you are a member of including the ones you selected.
- My Selections: Displays only the projects which are already added.
Select projects to add or deselect projects to remove them from their related Forma or Fusion connector.
Important: There are risks of deselecting a project and losing unsynced data. Refer to the section Collecting and Viewing Sync Data for additional information around deselecting projects.
If you deselect a project, the entire project including all folders and files will be removed from your local drive. However, all project data will remain in the cloud and can be selected to add to your connector at another time.Click Save.
You can view the progress of your projects, folders and files, and the menu options in the home screen.
Project Syncing Errors
Occasionally, a syncing error may occur when there is a failure to update a project's data between your connector and the cloud data source.
You will see a 'Couldn't sync project' message in the home screen.
To resolve this error:
- Right-click the tray icon and click Select Projects from the menu.
- Remove this project. See Add or Remove Projects for more information.
- When your project is removed, click Select Projects from the menu and add it again.
The remove and add activities will display in the home screen.
Renaming Projects and Hubs
Do not rename the hub or project through Windows File Explorer. Renaming of the hub or project should be done through the Forma or Fusion web interface. If the hub or project is renamed using File Explorer it can break Desktop Connector file syncing.
After renaming a hub or project, Desktop Connector will continue to function even while the local path reflects the old name. The following steps are required to visualize the new name locally in File Explorer ![]() .
.
After Renaming Hubs:
- Make sure local files are synced and/or backup any local unsynced changes
- Exit Desktop Connector
- Follow steps to Reset Desktop Connector
- Restart Desktop Connector and Select Projects
After Renaming Projects:
Make sure local files are synced and/or backup any local unsynced changes
Go to "Select Projects" in Desktop Connector from the home screen.
Go to the “My Selections" tab and unselect the projects from the hub that has been renamed.
Save and Close the dialog and monitor the Home Screen, wait for all projects to complete being removed.
Return to "Select Projects" and the dialog will now reflect the correct hub name.
Select the new hub name to add your projects.
Add the projects you want to sync, wait for them to complete and File Explorer will show the correct name.
Deleting Files and Folders: Recycle Bin and Cloud Workflows
When you remove files or folders in Desktop Connector, the way deletions are handled depends on whether the files are synced, cloud-only, or local-only. For a full explanation of deletion workflows and recovery options, see Recover Deletions.
Related Concepts: