To create a Character Generator character, start with a base character type and then modify it using presets.
The following procedure assumes you are signed in to your Autodesk account and Character Generator.
- On the
Character Designs page, click
New.

The Character Generator Builder page displays a preview of the default character preset on left and the Artistic Style and Character catalogs on the right.
Selected presets are highlighted with a blue outline.

- Choose an
Artistic Style as a starting point for your character:
There are three physiques to choose from:

- Standard, with regular body types
- Bulk, with exaggerated body types
- Gorn, with exotic or fantastical body types.
- Next, select a character from the
Character catalog.
The character representation updates to reflect your selection.

The "Kavir" preset chosen as a start state
- Click
Customize to go to the
Character Builder page, where you customize your character's facial features.
 Note: You can click
 to hide or show the ancestors' Face catalog.
- If you do not like the default characters displayed, drag an ancestor face from the Female or Male Face catalog onto the Blending area, and move the Master slider to blend the selected ancestors' faces.

Move the slider to mix the two faces in the Blending area
- As you drag the Master slider, the facial elements sliders update and the preview of the character on the left updates to reflect the changes.
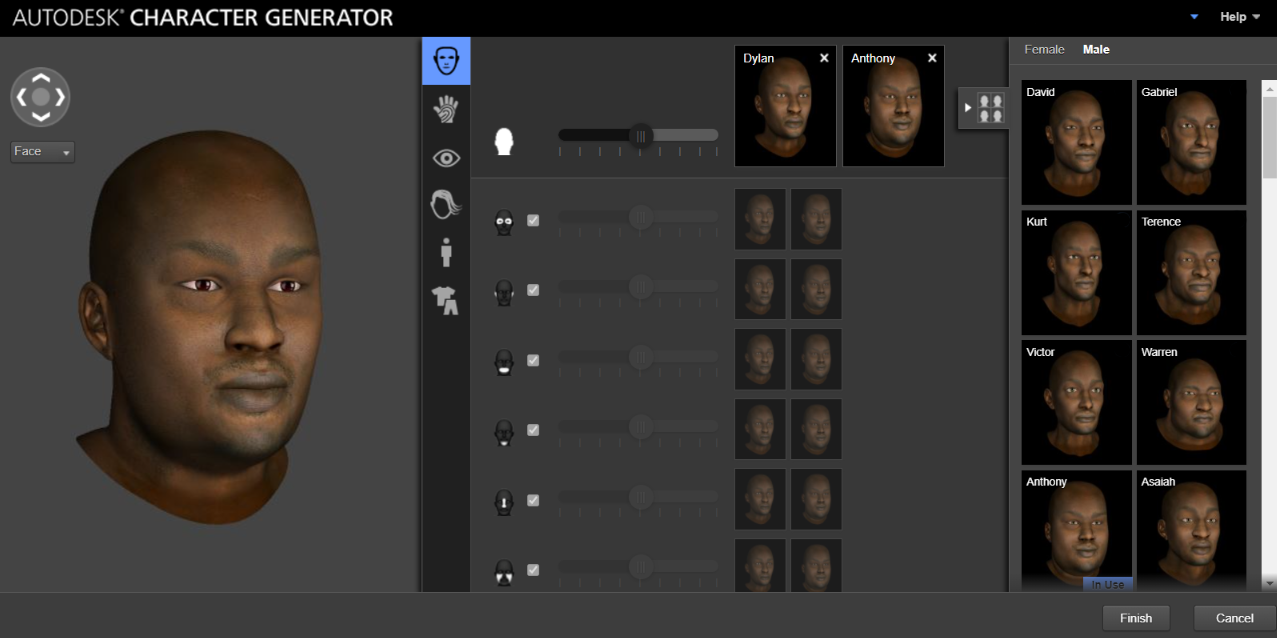
Customize your character's facial elements by assigning and blending ancestors' faces and facial elements to your character.
When the Master slider is moved, the sliders for each of the individual features also move
- To customize individual features, select a facial element, such as the eyes (
 ).
).

Blending between the "Dylan" and "Anthony" preset's eyes
- Continue blending facial elements by assigning and blending other facial characteristics.
Select for example, ears (
 ), mouth (
 ), chin (
 ), nose (
 ), or cheeks (
 ), and drop ancestors' faces from the Female or Male Face catalog on the blending area, then drag the slider to blend the facial elements.
- Selecting a facial element automatically unlocks the facial element from the Master face, letting you assign ancestors features and blend them independently from your character's face.
The checkbox next to the facial element is unchecked.
- Drop ancestors' faces from the Face catalog on the blending area, and drag the slider to blend the ancestors features.
- Selecting a facial element automatically unlocks the facial element from the Master face, letting you assign ancestors features and blend them independently from your character's face.
- Lock a facial element's attribute to the Face's attribute by clicking the checkbox next to the desired facial element.
The locked facial element displays a checkmark in the checkbox and the thumbnails update to reflect the ancestors' facial element and blending assigned to the Face.
- Customize your character's body and body parts by assigning and blending ancestors' bodies and body parts to your character.
Customizing the body and body parts is similar to customizing the face and facial elements.
- Click Body (
 ).
).

- To change the preview of your character's body displayed to the left, drop ancestors' bodies from the Female or Male Body catalog on the blending area, and drag the slider to blend the (selected ancestors') them.
The Preview updates to reflect the change.
As you drag this Master slider, all the sliders (of the body parts) update to reflect this change.
You can opt to blend your character's body parts independently from your character's body.
- Blend your character's body parts independently from their body.
For example, select a body part such as the arms (
 ), the chest (
 ), the bust (
 ), the stomach (
 ), the backside (
 ), or the legs (
 ), drop ancestors' bodies from the Female or Male Body catalog on the blending area, and drag the slider to blend the selected ancestors' body parts.
- Lock a body part to the body's attribute.
For example, click the desired body part and click the checkbox next to the body part.
The locked body part displays a checkmark in the checkbox and the thumbnails update to reflect the ancestors' body parts and blending assigned to the Body.
- Click Body (
- Click Skin (
 ) and choose a skin type from the Female or Male Skin catalog.
The thumbnail of the skin used by your custom character displays "In Use".
Note: The thumbnails of all facial elements, body parts, and clothes used in your customized character display "In Use".
The selected skin is assigned to your character.
- Click Eye Color (
 ) and choose an eye color from the catalog.

The selected eye color is assigned to your character.
- Click Hair (
 ) and choose a hair style from the Female or Male Hair catalog.
Some of the thumbnails include hair color variations.

For example, hover over a thumbnail that includes hair color variations, click the Show Variations tab, and select the desired hair color variation.

The selected hair is assigned to your character.
- Choose clothes for your character.
- Click Clothing (
 ).
).
The Top clothing catalog displays by default.

There is a Female and a Male catalog for the tops.
Similarly to the Hair catalog, some of the thumbnails include a selection of colors.
- Scroll through the catalog, hover over the thumbnails, click the Show Variations tab to see the color variations for the tops, and select the desired top.
The character's preview updates to reflect your selection.
- Click the Bottom clothes icon (
 ), select the
Female or
Male catalog, scroll through the catalog, hover over the thumbnails, click the Show Variations tab to see the color variations, and select the desired piece of clothing.
), select the
Female or
Male catalog, scroll through the catalog, hover over the thumbnails, click the Show Variations tab to see the color variations, and select the desired piece of clothing.
The character's preview updates to reflect your selection.
- Click the Shoes icon (
 ), select the
Female or
Male catalog, scroll through the catalog, hover over the thumbnails, click the Show Variations tab to see the color variations, and select the desired pair of shoes.
), select the
Female or
Male catalog, scroll through the catalog, hover over the thumbnails, click the Show Variations tab to see the color variations, and select the desired pair of shoes.
The character's preview updates to reflect your selection.
- Click Clothing (
- Click
Finish and save your customized character.
Your customized character is saved on the Character Designs page and is ready to be generated.

You can generate (
 ), edit (
 ), or delete (
 ) your saved customized character.
To proceed to the next task, see Generate your Customized Character.