Create and Manage Projects
The Projects tool in Account Administration contains a list of all projects in your organization's account. You can view information on each project that includes:
Name
Number
Type
 = Project created for use with Autodesk BIM Collaborate Pro, Autodesk Build, Autodesk Docs and Autodesk Takeoff.
 = Project created for use with Autodesk BIM 360.
Number of members
Number of companies
Status
- Active
- Pending (Only applies to BIM 360 projects)
- Suspended (Only applies to BIM 360 projects)
Project templates: If the project was created from a template, the name of the project template will show up as a link. It will show it has been archived if it is no longer active.
Start date
End date
Creation date
Click a project from the list to open that project.
Create Projects
Projects can be created in either the Projects tool in Account Administration or from the Project List. To create a project from Account Administration:
Click Projects from the left navigation to open the Projects tool.
Click Create Project
Enter the project details in the Create project dialog box:
- Project name
- Project number
- Account. The account represents your organization's account and not your individual Autodesk Account.
- Project type
- Template. Select a project template with predefined settings to use as a starting point for the new project. Templates can be set up at the account level, for easier project creation. See Project Templates for more information.
- Address. As you start typing the address, you can choose from a list of suggested addresses that match your text. If the address doesn't exist in the suggested list, click Enter address manually.
- Time zone. The time zone defaults to the time zone used by your browser. Not all tools use the project time zone.
- Start and End date. Choose project start and end dates using the date pickers. If your project uses Autodesk Build, these appear on the Project Progress feature in the Home tool. These dates don't impact subscription access to the product.
- Project value
Note: Required fields are marked with an asterisk.Click Create project.
At this point, the project opens in Project Administration. As the project creator, you'll be added as the first project administrator.
Archive Projects
When projects are not active, you can archive them to keep a clean project list.
- Click Projects from the left navigation to open the Projects tool.
- Select the More menu
 for the project that you'd like to archive.
 - Click Archive project.
Restore Archived Projects
If a project was archived due to a delay, you can restore archived projects to make them show up in the active projects list.
- Click Projects from the left navigation to open the Projects tool.
- Select the Archived tab.
- Select the More menu for the project that you'd like to restore.
- Click Restore project.
Published Project Templates
Account Admins can now publish project templates. Published templates make it easier for account admins to make project templates available to all project creators in their organization.
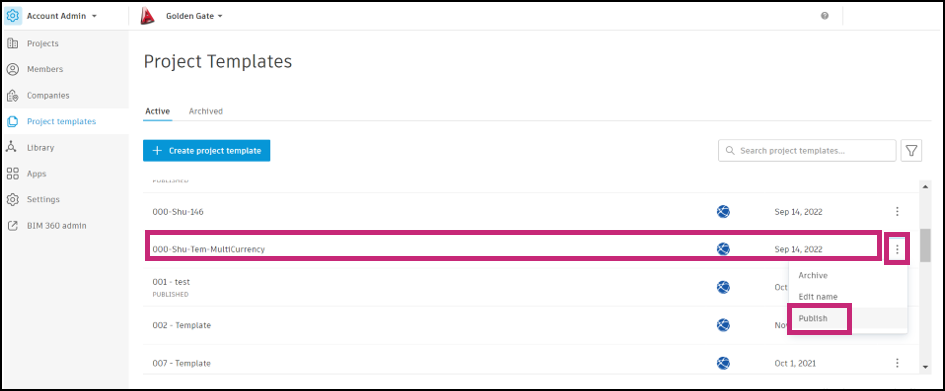
From the Project Templates List
To publish a project template, select the project template you want to publish.
Click the ellipsis in that project template row and choose Publish.
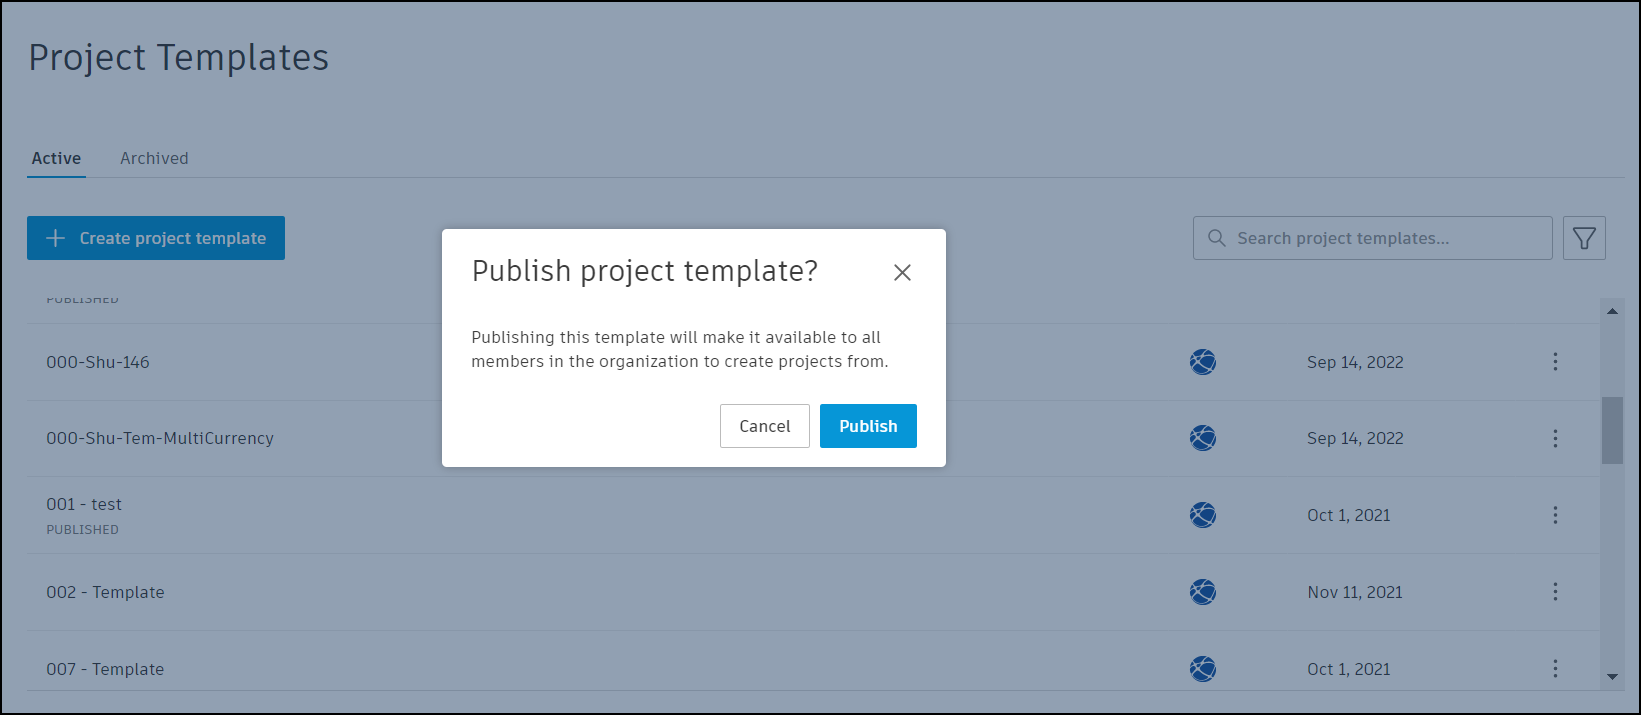
When the Publish project template? box appears, click the Publish button.
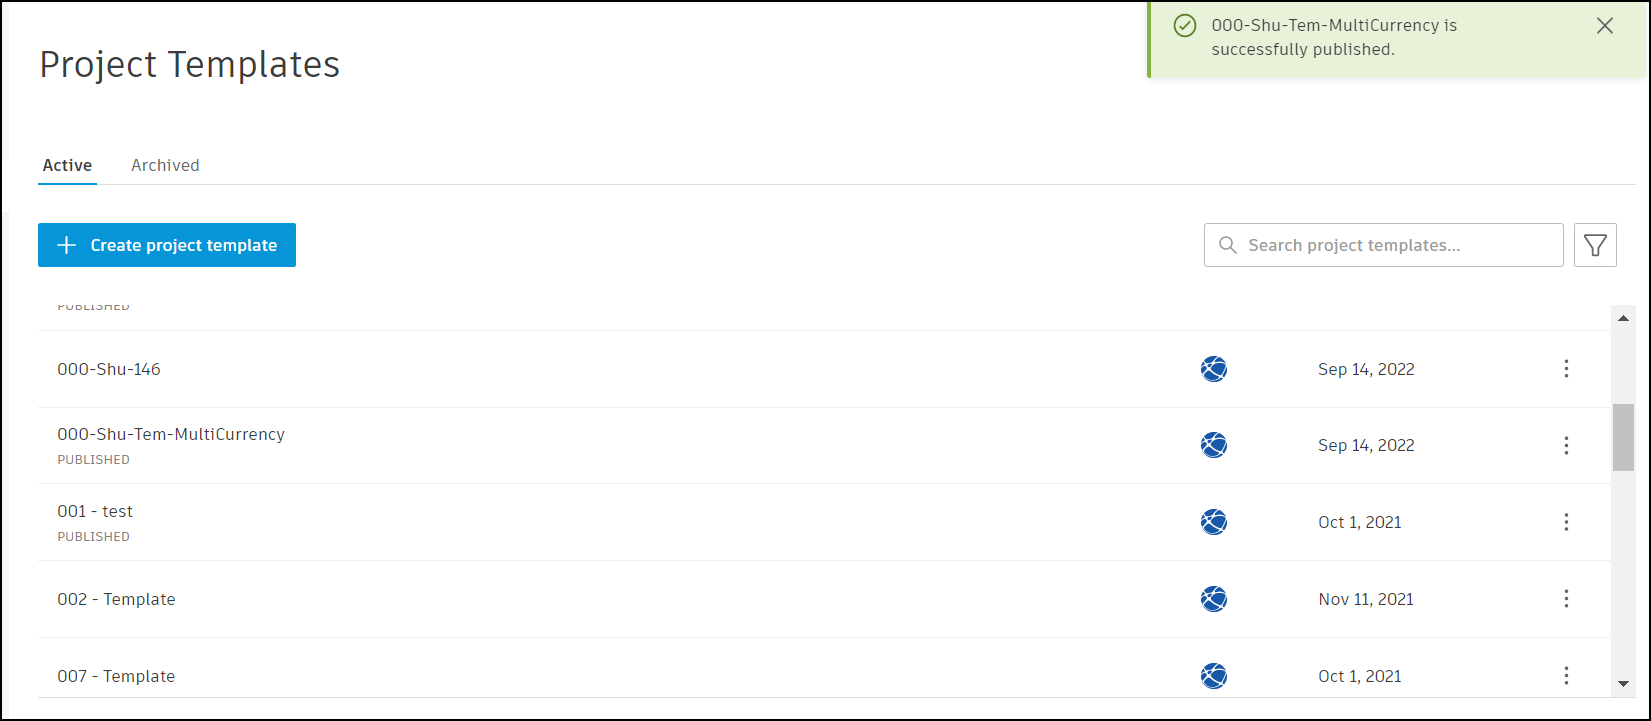
You will then see a message letting you know that your project template was successfully published.
From an Individual Project Template
Choose your project template.
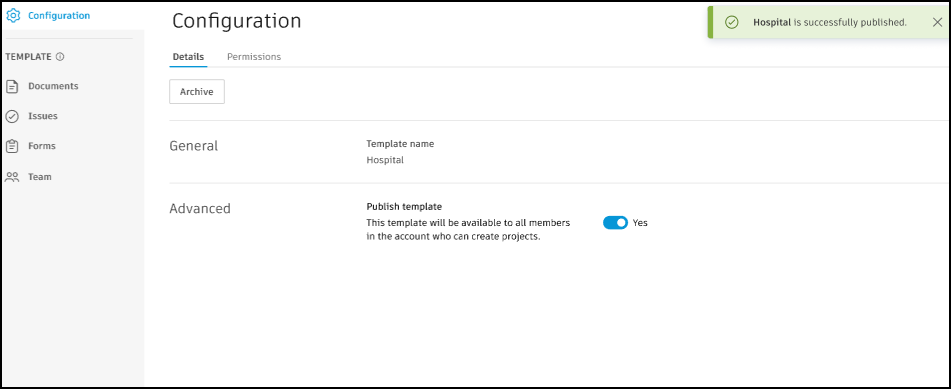
Under the Configuration menu, in the Advanced details dashboard, turn the switch on to Publish template.
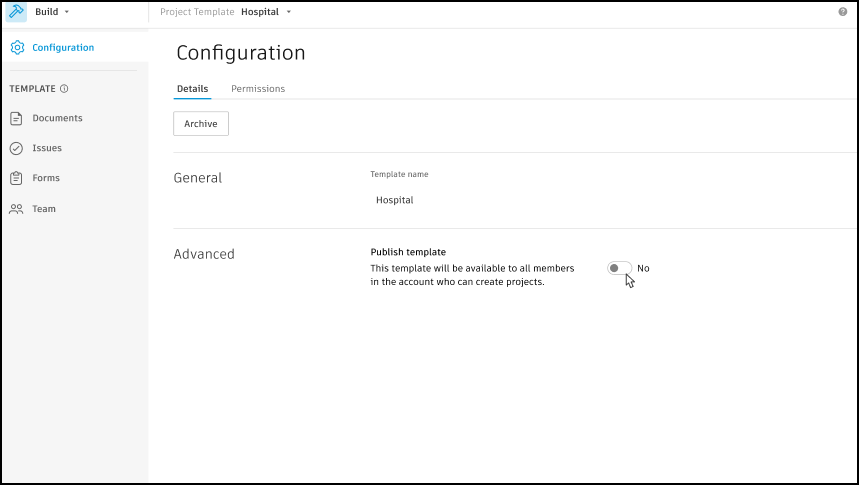
When the Publish project template? box appears, click the Publish button.
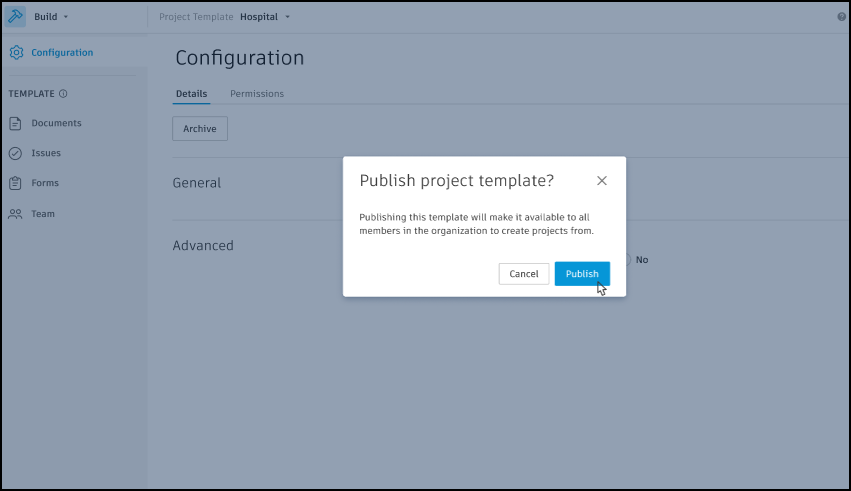
You will then see a message letting you know that your project template was successfully published.
Find Projects
You can use the Seaarch or filter at the top left of the projects table (Active or Archived_) to find projects. The search will look for matches in the project name, number, and address.
You can filter by:
- Status
- Project Type
- Job number
- Platform (BIM 360 or Autodesk Construction Cloud)