Cost Settings in Library
In Library, account administrators and standards administrators can create document templates in the cost settings builder at the account level. Once created, document templates as cost settings may be used in all Cost Management projects.
In this topic, you’ll learn how to:
- Open Cost Setting Builder
- Create a Document Template as a Cost Setting at the Account Level
- Edit a Cost Setting
- Add Cost Settings to Projects
- Import Custom Attributes, Custom Columns, and Saved Views
- Remove Cost Settings from Projects
- Archive and Restore Cost Settings in Library
Open Cost Setting Builder
To start working on cost settings:
In Account Admin, click Library in the left navigation.
Select the Cost Management card.
Click Create cost setting to open the cost setting builder.
Create a Document Template as a Cost Setting at the Account Level
Account administrators and standards administrators can create document templates for Cost Management to apply to multiple projects in Library. To do so:
Click Next in the cost setting builder.

Choose a setting title.

The settings builder opens and displays a listing of all Cost Management document templates. Scroll to the desired document templates section (for example, Budget Payment Application) and drag previously prepared document templates into the field or click Browse to select from your local repository.
If needed, download the sample template. See the Document Templates topic in the Cost Management help center to learn more about creating document templates.

You can also click Upload to select which document template section you want to upload to and choose from your local repository.
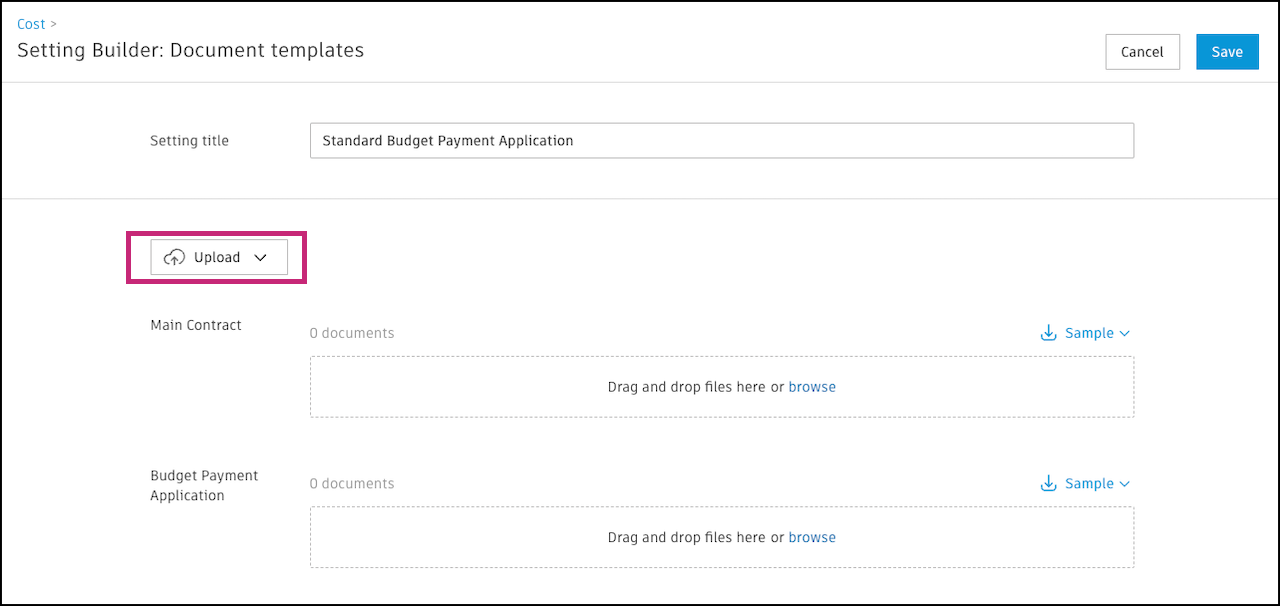
Once the document templates have finished uploading, click Save.
Your newly-created cost setting with document templates will be visible on the list. In the banner at the top, you can click Add to projects and templates to start using it right away. See Add Cost Settings to Projects in this topic to learn more.
Add Document Templates for E-Signature Workflows
When creating cost settings, you can now include document templates with e-signature capabilities. This feature allows you to:
- Streamline document approval processes
- Configure signature workflows at the account level
- Easily assign document templates across multiple projects
To learn how to add e-signature document templates, refer to the Add Document Templates for E-Signature Workflow section of the Configure and Use E-Signature Integration article.
Edit a Cost Setting
Account administrators and standard administrators can edit an existing cost setting in Library and publish the update to all projects currently using the cost setting.
 to delete the existing template.
To edit a cost setting:
In Account Admin, click Library in the left navigation.
Switch to Cost Management.
Click the desired cost setting in the list to open its details panel.
Click Edit to open the cost setting builder.
Change the title or upload any new document templates.
To download or delete a document template, click the More menu
and select accordingly from the drop-down menu. Click Save.
Note: If the cost setting being updated has already been added to projects, you'll be asked to save and update. Saving automatically updates this cost setting for all projects that it has been added to. This means that templates deleted from Library will automatically be removed from associated projects when saved. Click Save and update to confirm.
The cost setting is now updated in Library and in all projects where it appears.
Add Cost Settings to Projects
Account administrators and standards administrators can add a cost setting from Library to one or more projects in an account.
To do so:
In Account Admin, click Library in the left navigation.
Choose Cost Management.
Select the cost setting you want to add to one or more projects.
Click Add to.

This will take you to the Manage usage page and default to the Not Added to tab. This page shows a list of projects and project templates that the cost setting has not been added to. You can:
- Search by name or browse the list
- Use filters to only show projects or project templates
- Click the toggle in Archived to show or hide archived projects and project templates
- Click the toggle in Settings to narrow down the list to only the projects and project templates you've selected
Select each project that you want to add the cost setting to.
Click Add to… to add the cost setting to selected projects.

In the Add cost setting to? dialog, click Add to confirm the selection. You'll receive a notification that the cost setting was added successfully to the selected projects. Within Cost Management, an icon representing Library will appear next to document templates shared from Library.
Click Done in the upper-right corner to finish the process.
In the Library list, view the number of projects that the cost setting has been added to in the Added to column.

Import Custom Attributes, Custom Columns, and Saved Views
As an Account Admin, you can import custom attributes, custom columns, and saved views from an existing project into Library. You can also save these as library components, publish them to projects, and update existing library components before republishing.
Import Cost Settings from Another Project
Follow these steps to import cost settings from another project:
Navigate to the Account Admin page, and click Library option in the left navigation bar.
Select Cost Management.
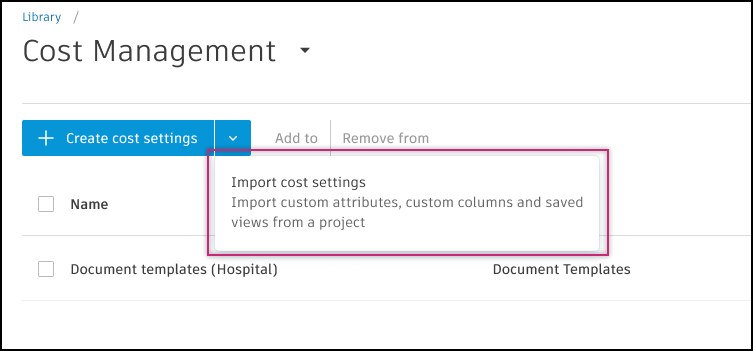
Click the downward-pointing arrow on the Create Cost Setting button and select Import Cost Setting from the drop-down menu.
Choose the project from which you want to import. Make sure the project that you select contains the cost settings that you want to import.
Click Next.
After selecting a project, you can preview the cost settings. Review and verify the cost settings before importing them into Library.
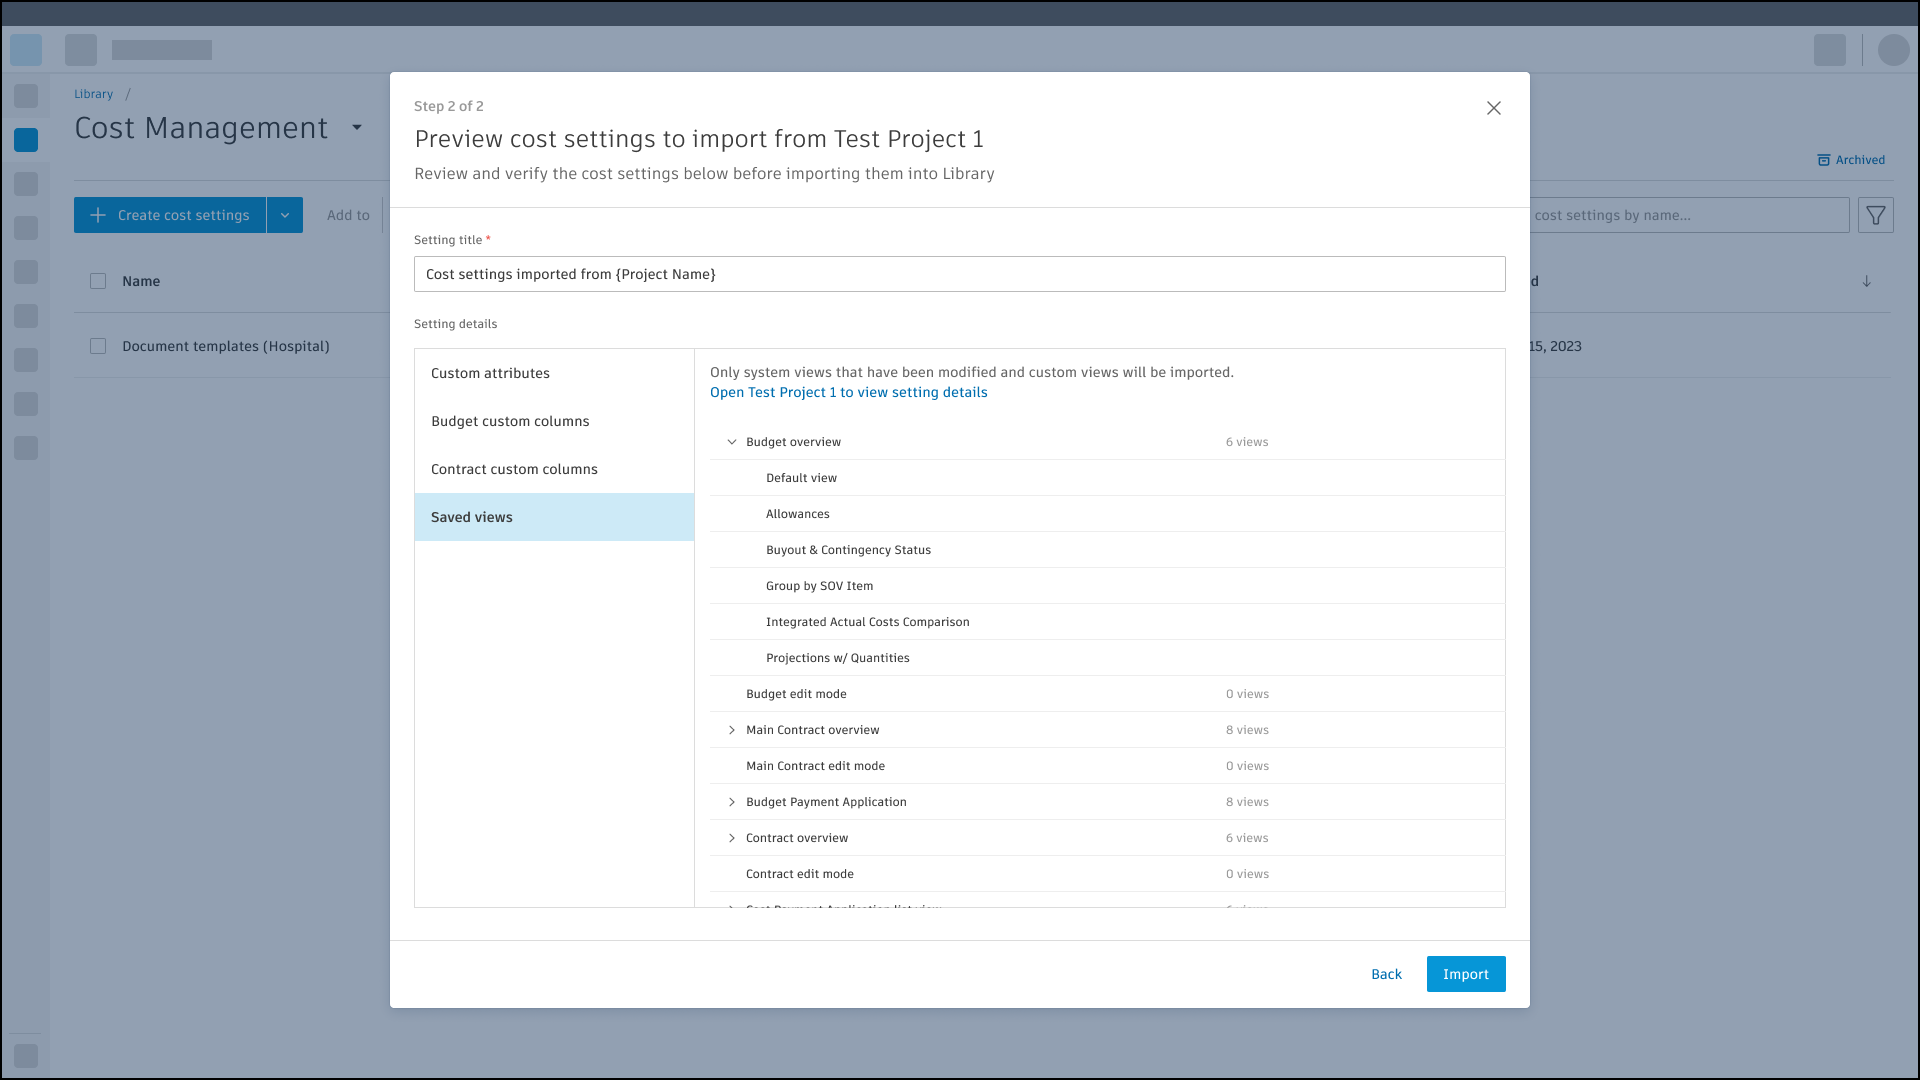
Click Import.
You can then add these settings to projects and templates. Learn how to do this in the Add Cost Settings to Projects section of this page.
Remove Cost Settings from Projects
In Library, you can remove a cost setting from multiple projects at once.
In Cost Management in Library, choose the cost setting you would like to remove.
Click Remove from.

This will take you to the Manage usage page and default to the Added to tab. Select the projects from which you want to remove the cost setting.
Click Remove from.

Archive and Restore Cost Settings in Library
To archive a cost setting in Library:
In Cost Management in Library, select the cost setting you would like to archive.
Click Archive.

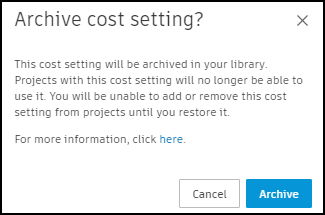
Select Archive to confirm. By archiving in Library, it will not be available in any projects it existed within, and you can't add or remove it from projects from now on.
Once a cost setting has been archived, you can restore it. Restoring will add the cost setting back to all projects that it was previously in.
Open Cost Management in Library.
Click Archived. The page with all archived cost settings shows up.
Find the cost setting you want to restore and click the restore arrow next to it.
Click Restore.

You will then see a pop-up box asking if you would like to restore the cost setting. Click Restore to confirm.

To bulk archive or restore settings:
- Select multiple templates in the respective table.
- To archive, click the More menu at the top of the table and select Archive
- To restore, click Restore.