Transition Data
This topic explains how to transition your project data to Autodesk Docs using the Data Transition Tool.
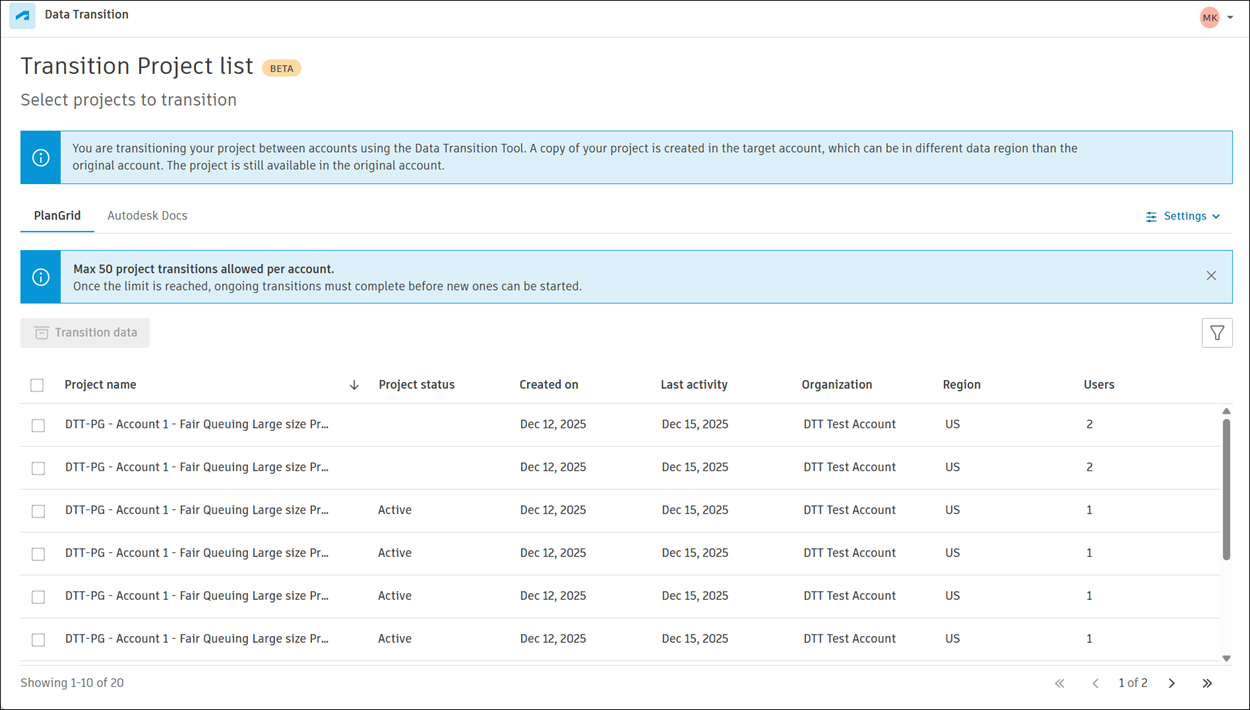
When you enter the Data Transition Tool, you'll see a list of projects available for data migration.
To transition your project data:
Select the projects you want to transition by checking the boxes next to the project name.
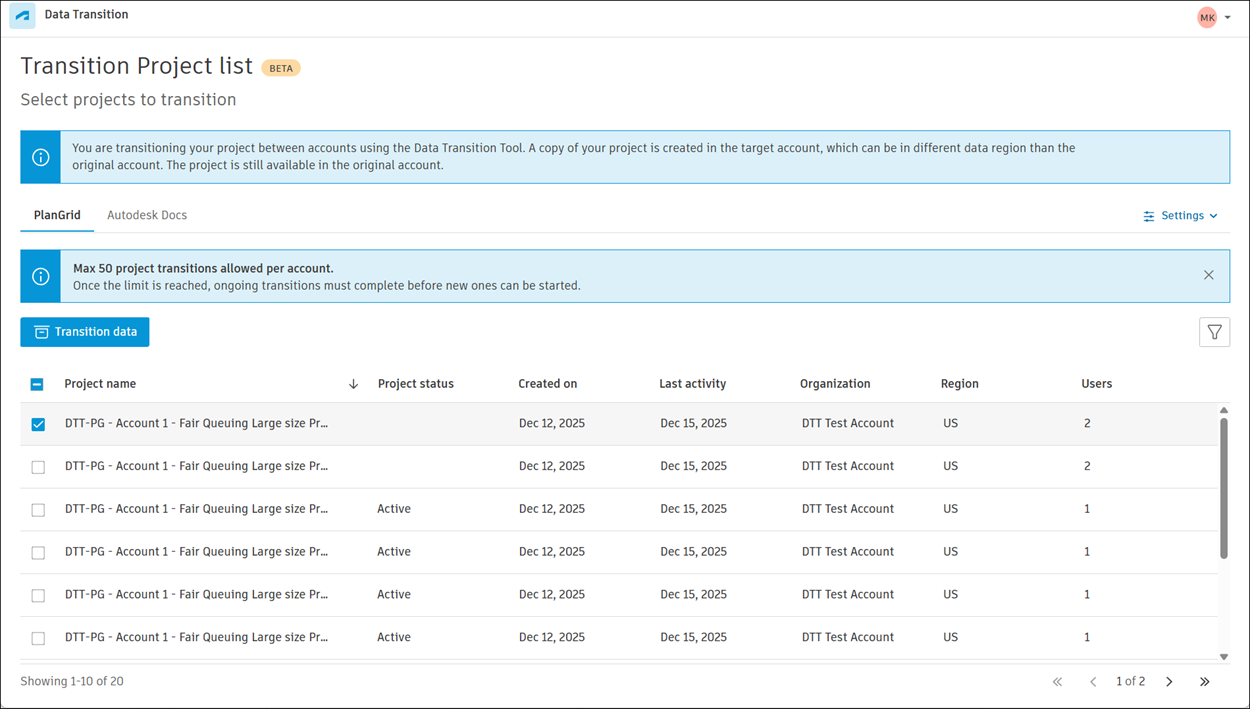
Click Transition data
 .
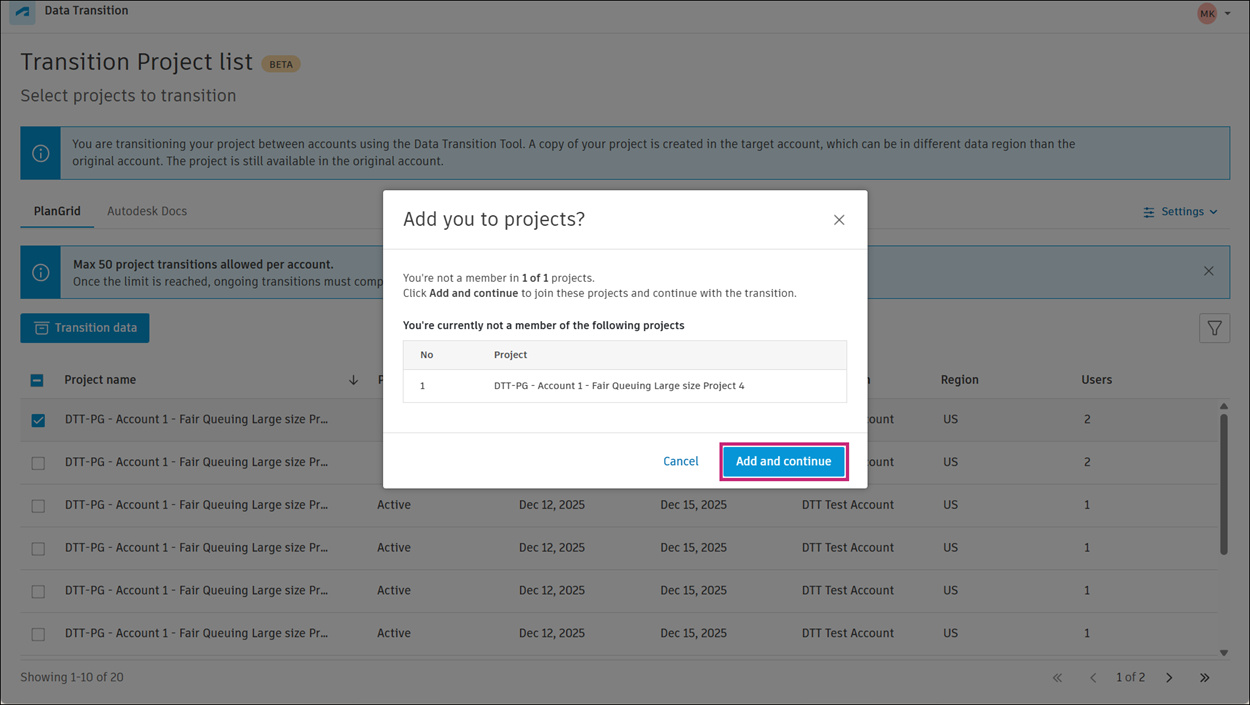
.In the modal that opens, click Add and continue.
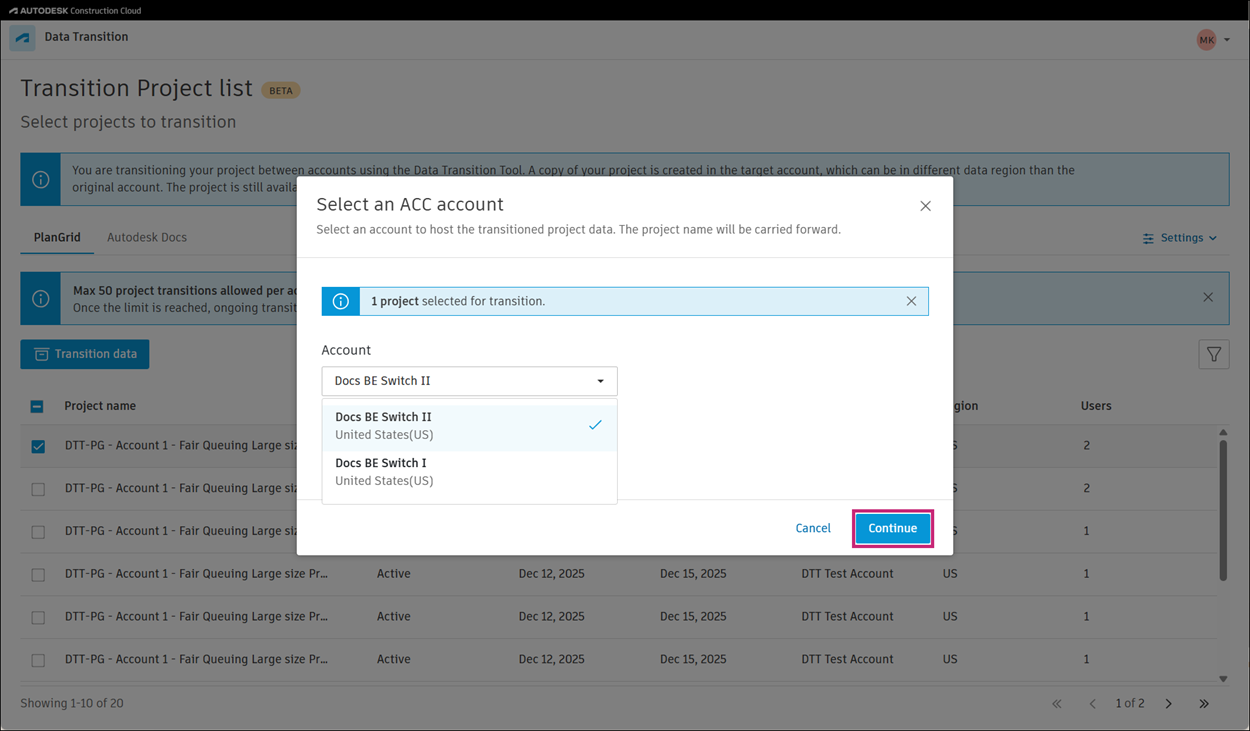
Select the Autodesk account to host the moved data from the drop-down menu, and click Continue.
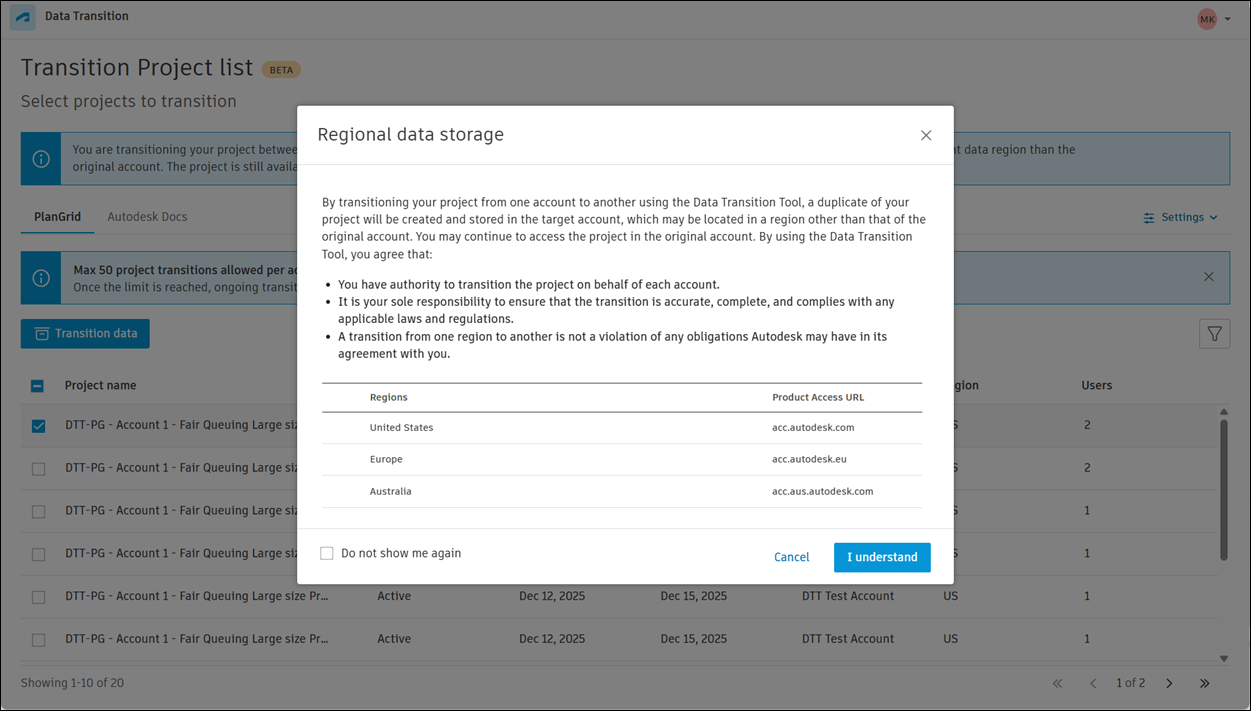
Review content in the Regional data storage modal, and click I understand or Cancel, depending on your decision.
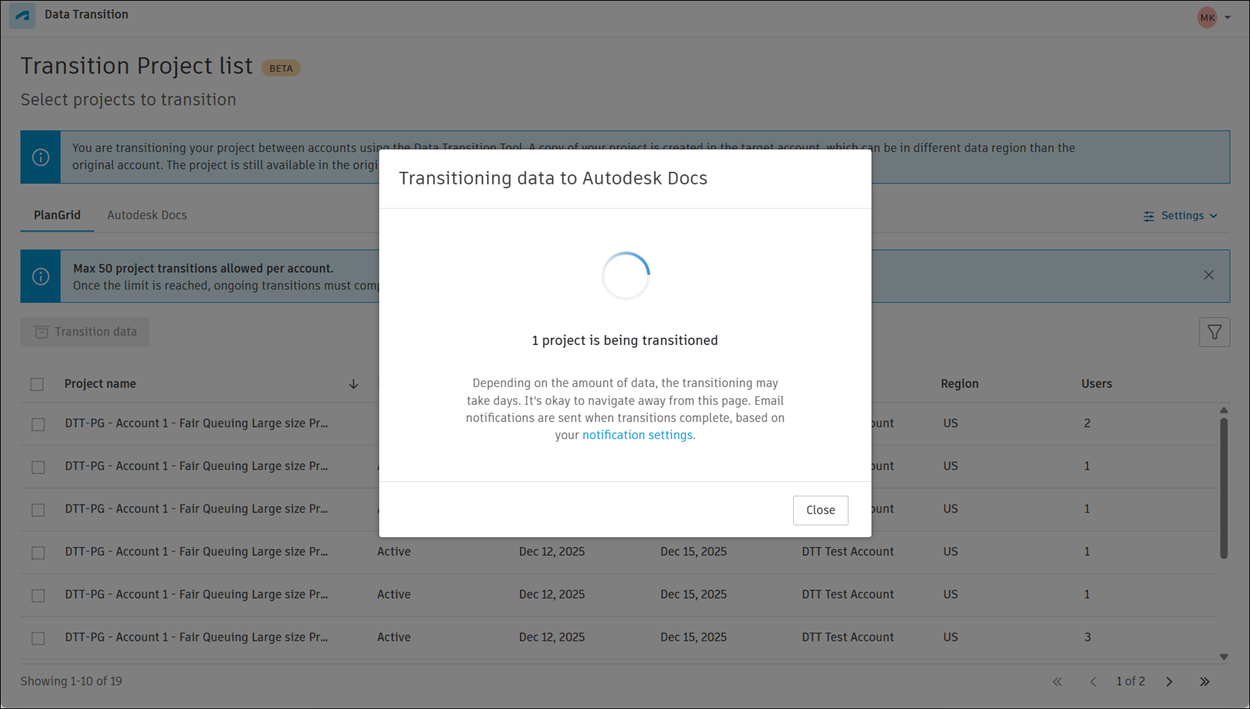
Depending on the size of the project, the data transition may take some time. You will receive a notification when the migration is complete.
 Tip: You can review the transition status for each transitioned project on the Autodesk Docs tab in Autodesk Construction Cloud.
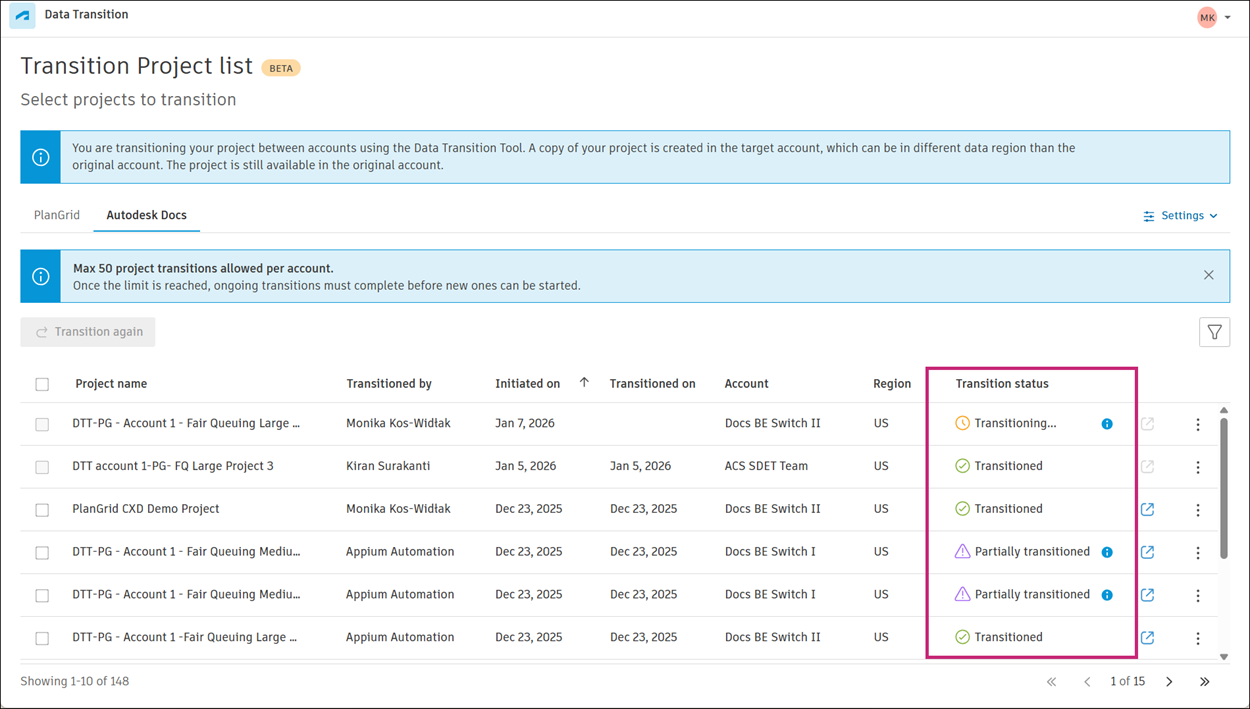
Canceling a Data Transition
If data transition has not been started yet, you can cancel it by going to the more menu ![]() next to the project name and selecting Cancel transition.
next to the project name and selecting Cancel transition.
![]()
Transition Again
If a project transition has failed or the source data has been updated, you can transition the project again. Transitioning a project again overwrites any previously transitioned data in the target account.
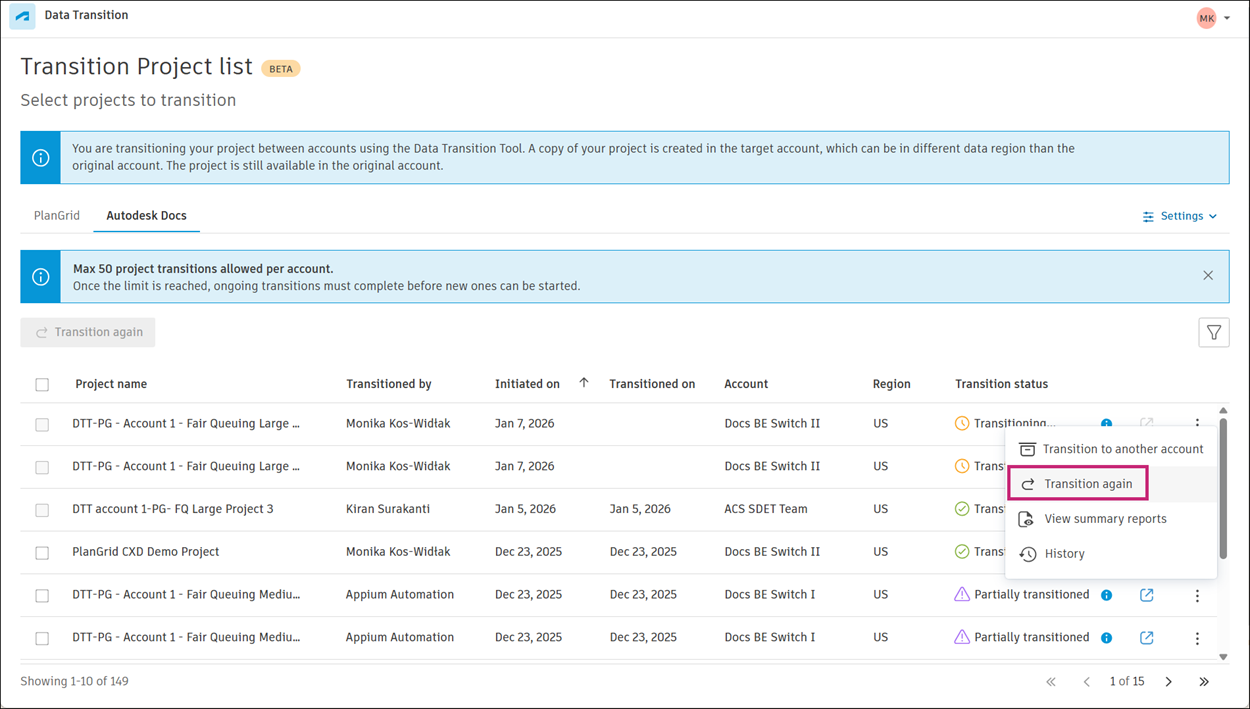
Click the More menu
 next to the project name.
Select Transition again.

Select the target account from the drop-down menu, and then click Add and continue.
Click Continue to start the transition.
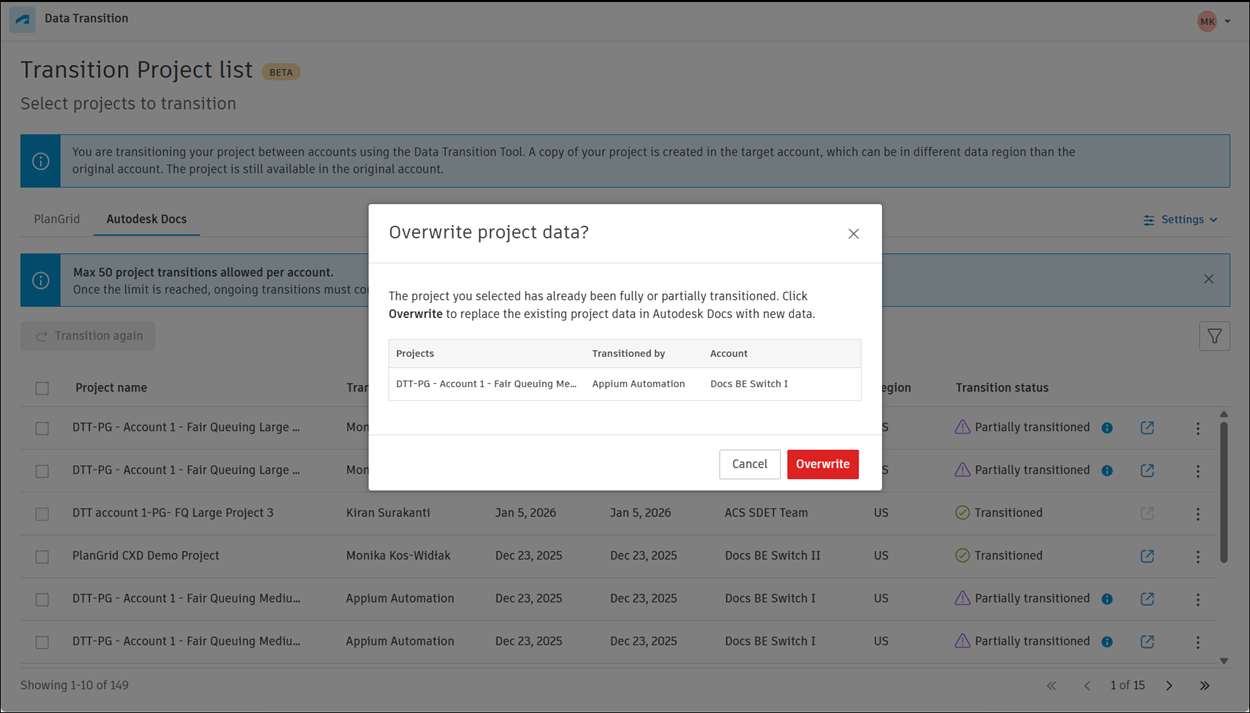
Note If the project was previously fully or partially transitioned to the same account, you will see a warning message. Click Overwrite to proceed with the transition.
Also note that depending on the project size, the transition process may take some time. You can navigate away from the page while the transition is in progress. You'll receive a notification when the transition is complete.
Transition Data to Another Account
Click the More menu
 next to the project name.
Select Transition to another account.
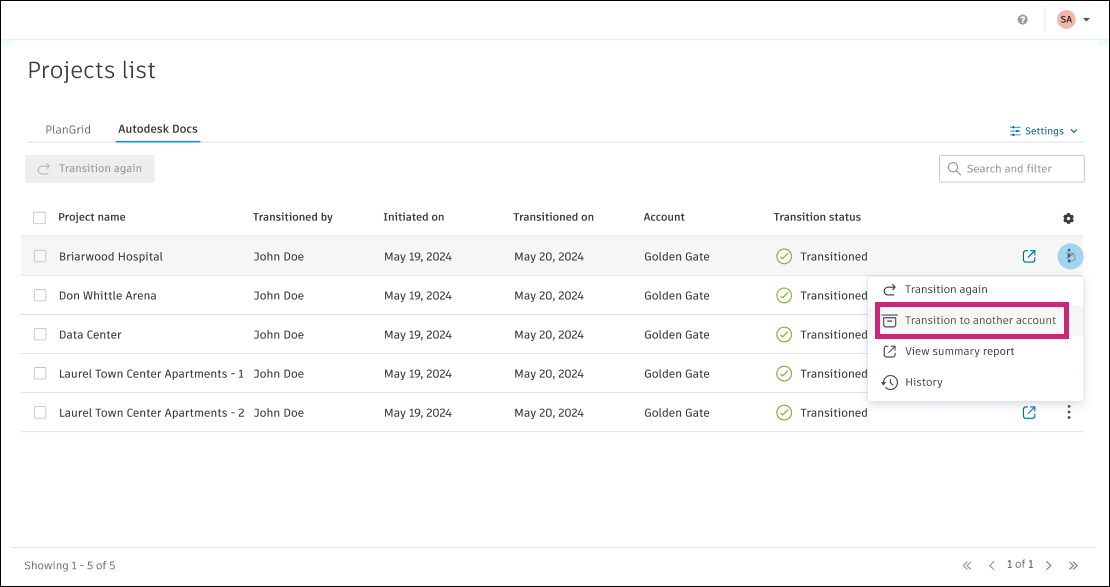
Select the target account from the drop-down menu.
Click Continue to start the transition.
Note: Depending on the project size, the transition process may take some time. You can navigate away from the page while the transition is in progress. You'll receive a notification when the transition is complete.
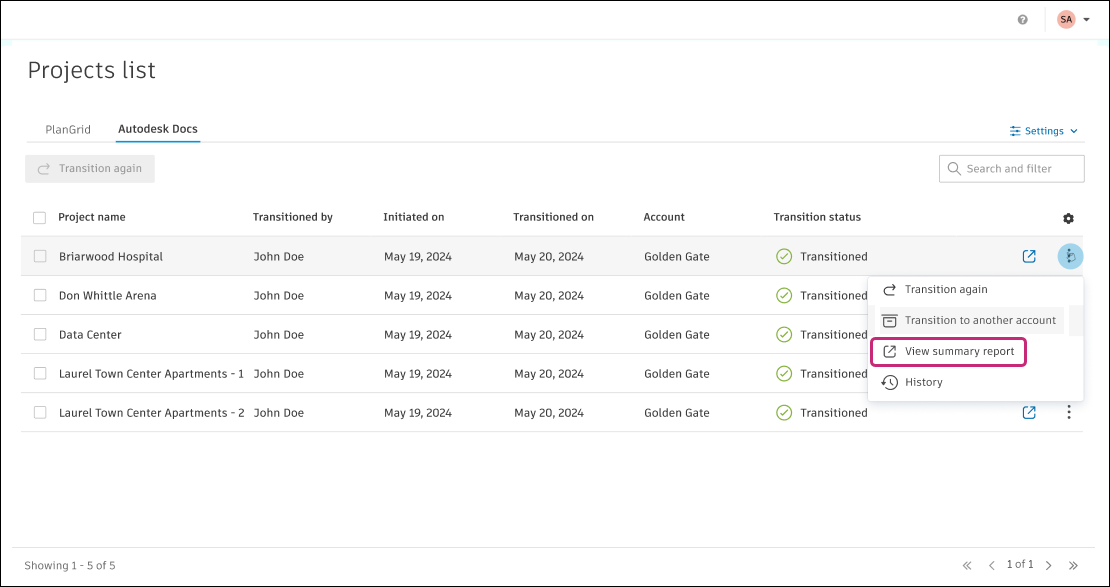
View Summary Reports
Click the More menu
next to the project name.Select View summary report.
View History
Click the More menu
next to the project name.Select History.
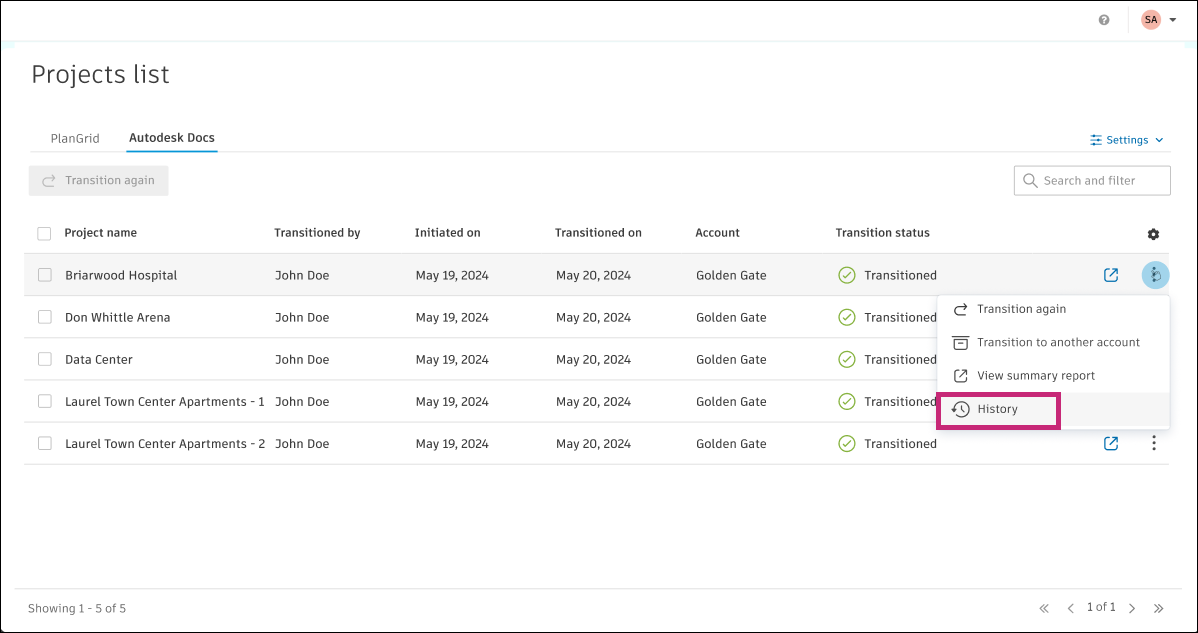
You can review the project transition history, including:
- Date and time of each transition
- User who initiated each transition
- Source account
- Transition accuracy percentage
- Total number of items transitioned
- Number of items successfully transitioned
- Number of items that failed to transition