Manage Project Members
Project administrators can manage all project members and their respective properties from the Members tool in Project Administration. Properties include the:
- Company
- Role
- Access level
- Product access
Member Statuses
There are three member statuses that can appear in the members tools:
- Active: Members that have been invited and have accessed a product.
- Invited: An invitation has been sent but they haven't accessed a product yet.
- Not invited: If a member appears as "Not invited", they have been added to the account but not invited to any projects. "Not invited" appears only in Account Admin.
Add Members
There are two ways to add members; the default way is more flexible and the legacy method can be slightly faster. Once you have entered emails, the default allows you to assign individuals different companies and roles.
Default Add Members
Click Members from the left navigation to open the Members tool. The Members tool exists in all products except Insight.
Click Add members.
Enter an email address for the members or paste in a list of email addresses separated by commas, tabs, spaces, or semicolons.

Click Enter to add the members to the member table.

Optionally, if name fields are empty, you can enter the member's first and last name. These will be suggested when they are creating their profile.
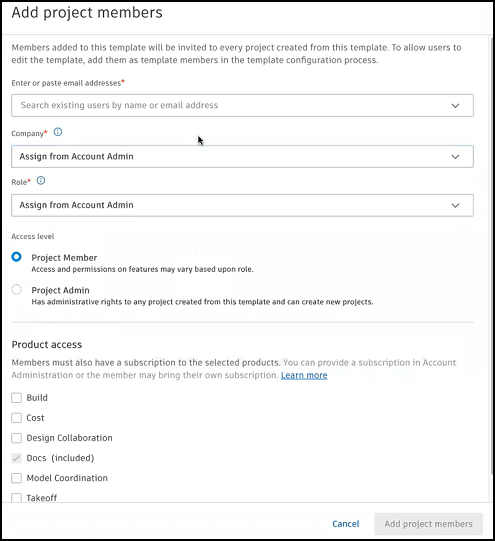
Select a Company and Role for each member. The company and role can be used to quickly apply permissions to members.
Note: Roles update the access level selection. You can manually change the access level after selecting a role.Choose the access level for the members.
- Project member: Members are added as project members with View access unless otherwise defined based on the role.
- Project administrator: Members are given administrative access to the project, enabling the creation and managing of projects.
Choose the Product access level for the members to control what products the members can use:
- Build
- Cost
- Design Collaboration
- Model Coordination
- Takeoff
- AutoSpecs
Note: Accesses to Docs and Insight are provided by default.Click Send invitations to send email invitations to the members.
Bulk changes adding members
If you are using the default invite workflow, you can make the same changes to multiple people.
Select the members you want to make changes to.

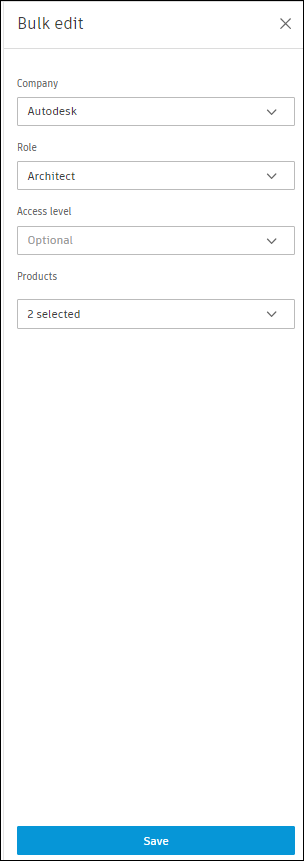
Click Edit. A panel appears on the right.
Use the drop-down lists in the panel to make changes to the members' company, role, access level, and product access.
Click Save.

Legacy Add Members
Click Members from the left navigation to open the Members tool in Project Admin.
Click the drop-down list
 .
.Click Legacy add members.
Enter an email address for the members or paste in a list of email addresses separated by commas, tabs, spaces, or semicolons.
Note: Only 200 members can be added at once.
Select a Company or Role for the members. The company and role can be used to quickly apply the same permissions to multiple members.
Note: If members have a company and role assigned to them in Account Admin, those are applied. You can set the company and role to be different from the member's Account Admin settings.Choose the access level for the members.
- Project member: Members are added as project members with View access unless otherwise defined based on the role.
- Project administrator: Members are given administrative access to the project, enabling the creation and managing of projects.
Choose the Product access level for the members to control what products the members can use:
- Build
- Cost
- Design Collaboration
- Model Coordination
- Takeoff
- Docs (by default)
- Insight (by default)
Click Invite to send an email invitation to the members.
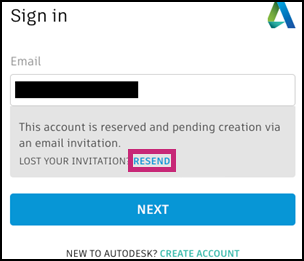
Invitations can expire after seven days.
- If members have already set up their account and logged into an ACC, there is no expiration.
- Administrators can resend the invitation from the More menu
 .
. - Members can request to Resend the invitation while signing in.

After the members are added, you can edit their company, role, access level, and product access:
From the Members tool, click the member's name in the list of members.
In the member profile on the right, define the member's Company and Role.
Select the member's Access level:
- Project member
- Project administrator
Turn on or off access to individual products to use on this project:
- Docs
- Build
- Cost
- Insight
- Design Collaboration
- Model Coordination
- Takeoff
Important: If you turn off access to Docs, the member will lose access to all products and will be removed from the project.Expand the menu on individual products to view the product-specific permission levels. Click the links to the individual tool permissions to make adjustments.
Remove Members
To remove a member:
From the Members tool, click the member's name in the list of members.
In the member profile on the right, click the More menu
 and choose Remove member
  .Tip: You can also hover your cursor over the member's name in the list of members, click the More menu
 and choose Remove member.
Export Project Members
From the members tool in any of the products in a project (not Account Admin), you can export your members list. Exporting your account members can make it easier to add the same members to another project.
- Select the members tool in your product.
- Click Export.
- Click Run report.
- Click Download report.