Link Sheets and Add Areas to Locations
Project administrators can link sheets to the locations created in a project's location hierarchy.
After a sheet is linked to a location, project administrators and location administrators can define a specific area on the sheet associated to that location. When you create and place an issue in the defined area, the issue location field will automatically populate.
Location Administrators
Locations can be accessed and edited differently depending on whether you are a project member, project administrator, or location administrator.
Project administrators have full permission to add and edit locations as well as access the location breakdown structure in the Settings locations tab.
Location administrators are members who have been granted enhanced permissions by project administrators. This enables them to:
- View and edit location areas directly on sheets when working in the field.
- Assign rooms using mobile QR codes for all project locations.
Project members without location administrator permissions can view but not edit the defined areas on a sheet.
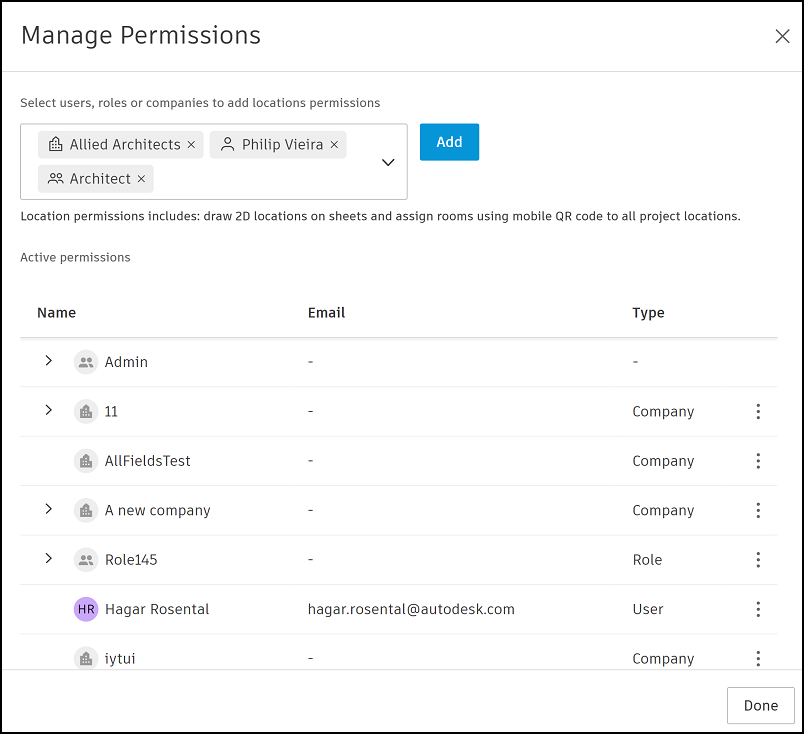
To grant location administrator permissions, project administrators need to:
Click the Settings tool.
Click the Locations tab.
Click Add permissions.
All users, roles, and companies with location administrator permissions are listed.
Add users, roles, or companies.
Click Add.
Click Done.
Link Sheets to Locations
Only project administrators can link sheets to locations. Start by linking a floorplan sheet to a floor. The rooms or other sub-locations can be mapped from that document.
Click Settings
Select the Locations tab
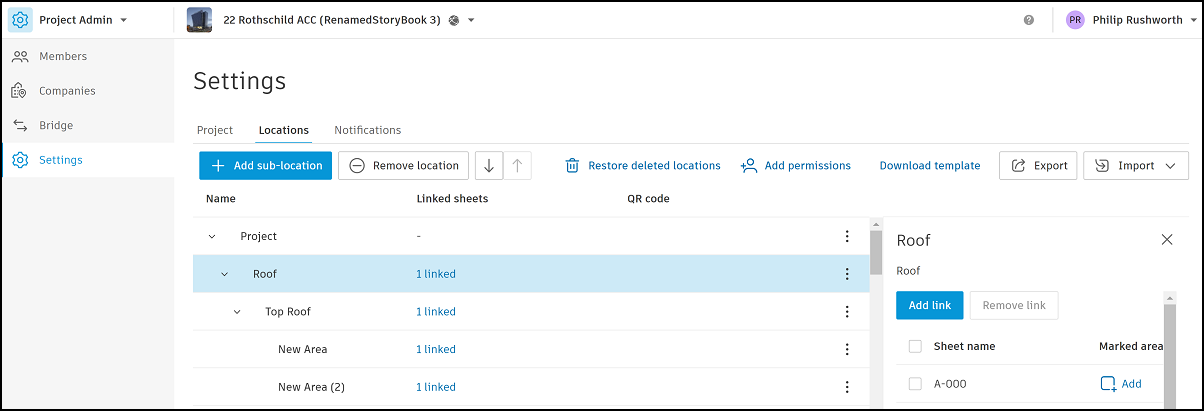
Select the relevant location
Click Add link in the right panel.
Select the relevant sheet or sheets to link to the location.
Note: Select the checkbox if you want to link the sheet to the sub-locations of the location.Click Add sheet.
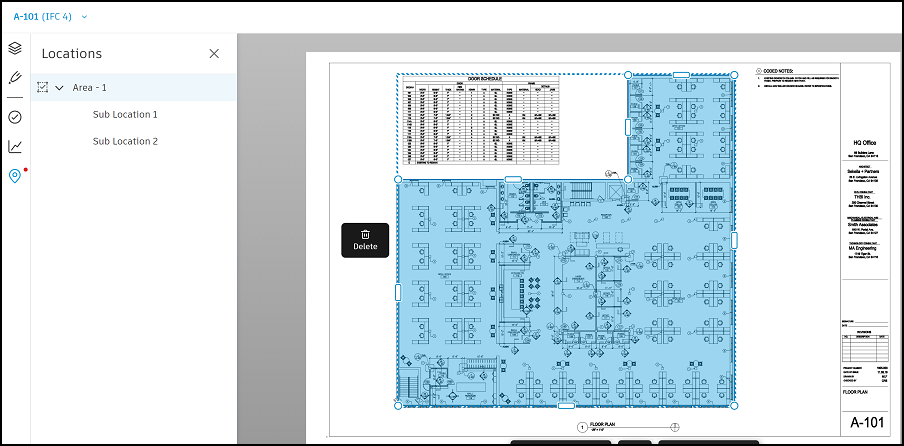
Define Location Area
Once a sheet is linked to a location, you can define the location area on that sheet.
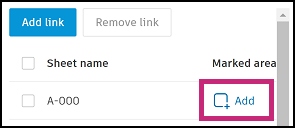
Project administrators can define the location area from the Settings tool > Locations tab by clicking Add next to the relevant sheet in the Marked area column.
The sheet will open in Polygon/Polyline mode with the Locations panel showing.
Project administrators and location administrators can also define the location area directly on a sheet in the Sheets tool.
Open the relevant sheet in the Sheets tool.
Select the floor name in the Locations panel.
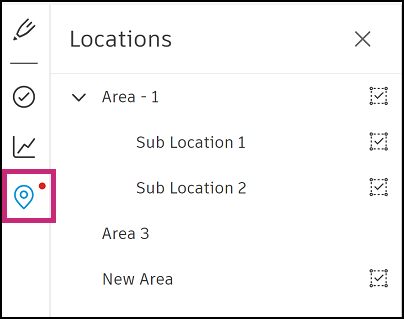
Select the polygon tool if it's not already selected.
Draw a shape around the floor area.
Select a sub-location name and define the area with the polygon tool.
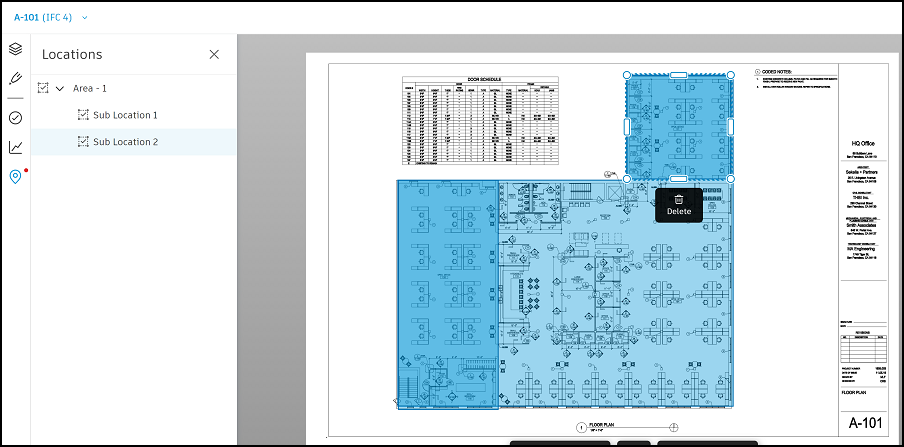 Note: You can delete the area by clicking the Delete trash bin icon.
Work through each location area in the sheet to ensure they have all been defined.
Changes are saved automatically after each edit.