Markup References
You can add references to a markup to create a two-way relationship between a markup and other project information. This allows your team to easily access any relevant information about a markup.
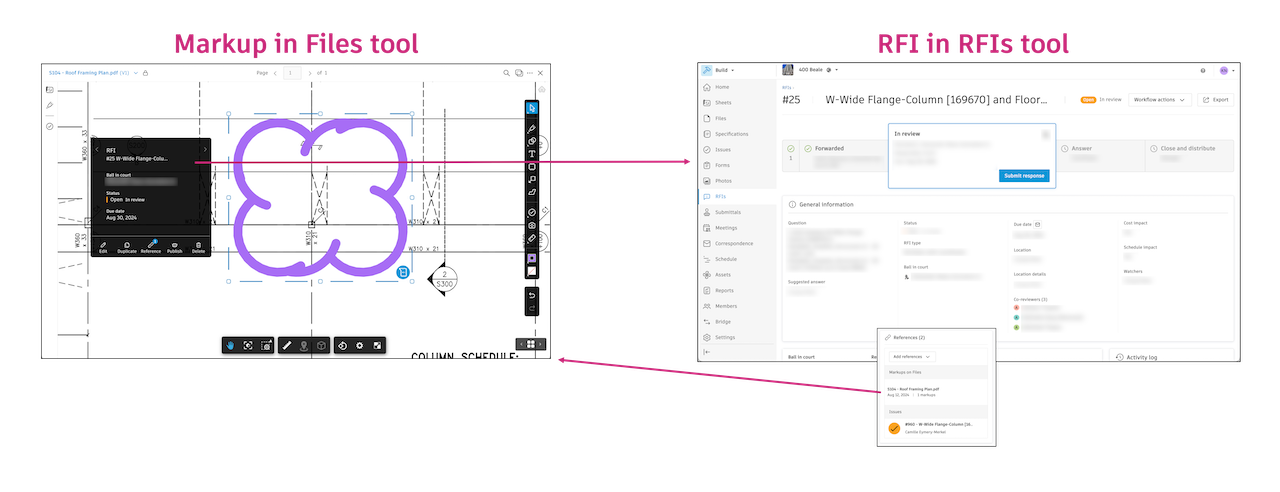
Here are some examples of what this relationship can look like:
You can add a reference to another file on a markup and click to open that file directly from a markup.
If you use Autodesk Build, you can add a reference to an RFI and then open that RFI in the RFIs tool. Then in the RFIs tool, you'll see the markup referenced to it and can click it to direct you back to the document where the markup is located.
In this topic, you'll learn how to:
Add References to Markups
Open a file in the Files tool.
Create a markup or select an existing markup.
Click
 in the menu the appears above the markup.
In the right panel, click the References tab.
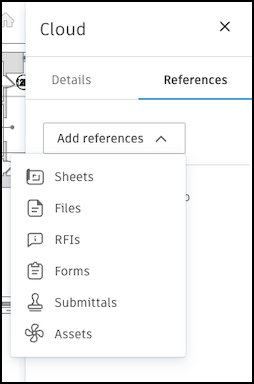
Click Add references and choose a reference type. Options include:
- Sheets
- Files
- RFIs
- Forms
- Submittals
- Assets
Add your chosen references.
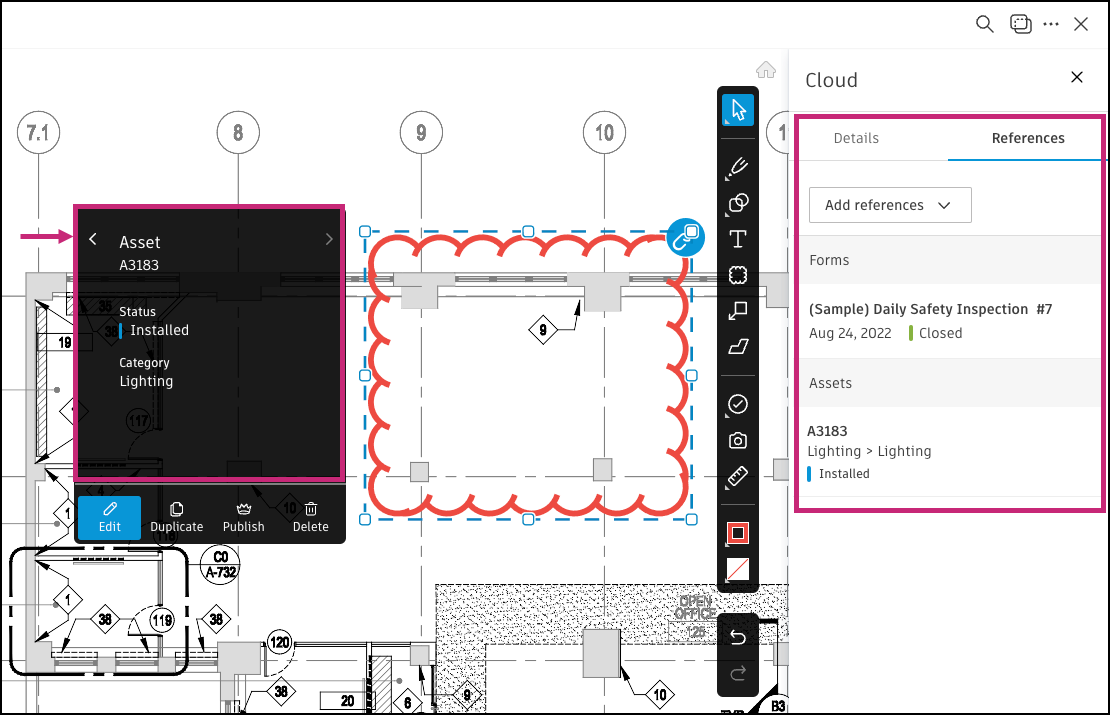
References will be listed in the References tab. Also when you click a markup, in the menu, you can quickly see the references and if applicable, use the arrows to navigate between multiple.
![]()
Move Reference Badges
With a markup selected, you can drag a reference badge to move it anywhere in the viewer. This won't affect anyone else's view of the badge and the move only lasts as long as your current file viewing session.
![]()
Hide Reference Badges
In the left navigation menu, click the markups icon
 .
.Click the badge icon.

Hiding reference badges won't affect anyone else's view and only lasts as long as your current file viewing session.
Remove References on Markups
- Open a file in the Files tool.
- Click a markup.
- Click .
- In the right panel, click the References tab.
- Hover over the reference and click
 to remove.
 - In the pop-up, click Remove.