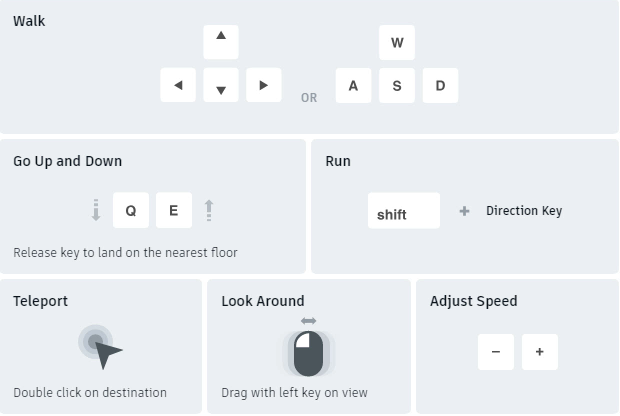
Mini-map
Mini-map is a small map that you can activate to show your location when you navigate a model.
Mini-map Settings
Open a model and select
 Settings in the bottom viewing toolbar.
Click the Navigation tab.
Scroll down to 3D Mini-Map and turn on Show 3D mini-map.
Click the Settings icon or the X in the upper right corner to close the Settings dialog.
Click the First Person icon
 in the viewing toolbar.
Review and close the first person navigation controls.
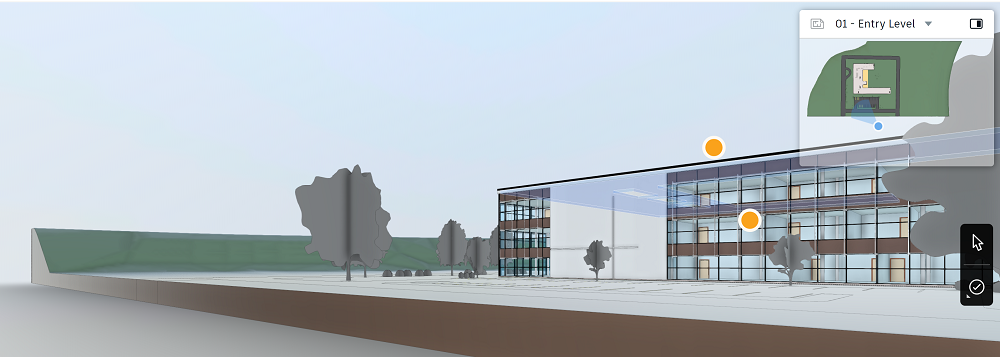
The mini-map displays in the top-right corner of the screen. As you navigate in first person mode, your location and viewing angle are indicated in the mini-map. This helps you identify your location as it relates to the entire model.
Mini-map Navigation
You can use the mini-map to navigate the model as well:
- Click and drag the icon in the mini-map to move to another location in the model.
- Click and drag the viewing angle indicator to adjust the view in the display.
A side-by-side mode is available as well. In this view, embedded sheets can be overlaid on the model. When you enter an area with an embedded sheet, the camera zooms and rotates into the sheet. You can see it as if you are looking at an individual sheet.
To open this view:
With the first person navigation enabled and the mini-map open, click
 on the top right of the mini-map.
As with the compact view, you can click and drag the icon to adjust the location within the model or drag the angle indicator to adjust the view.
If you have embedded sheets available, click Show Sheet
 . Continue to navigate the model.
As you enter an area encompassed by a sheet, the view will zoom and rotate. You can view it as if you are navigating an individual sheet.
Click Show Sheet again to hide the embedded sheets.