Work with Stamps
The Stamps markup tool allows you to place a stamp on your documents in Autodesk Construction Cloud. For example, if you want to leave your review of a document, you can place a stamp that shows your approval or rejection with your name and date.
In this topic, you'll learn how to:
Create Stamp Templates
To place stamps, you must first create stamp templates for you and your team to use.
To create templates and place stamps:
Click the Stamps icon
 in the markups toolbar.
 Click Create stamp template.
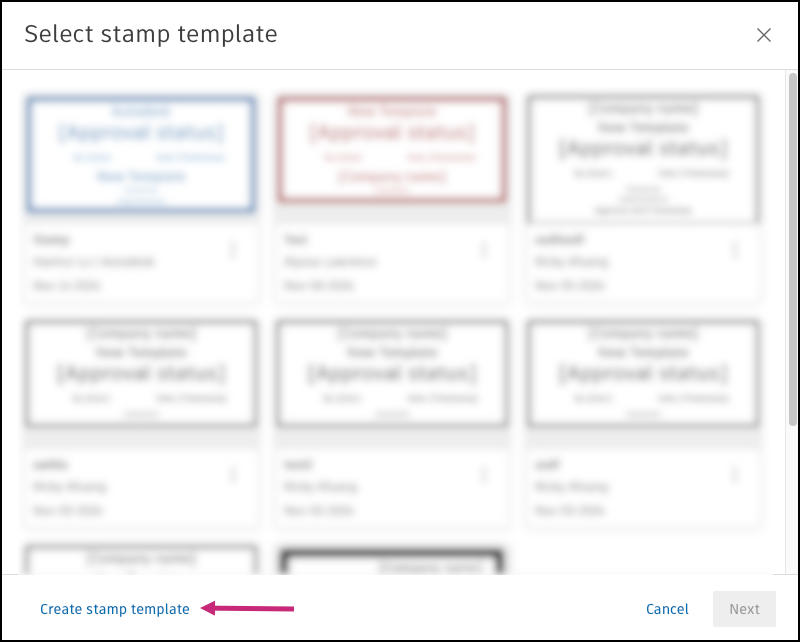
Enter a template name.
You can now customize how you want the stamp to look. A preview of the stamp is shown on the right side.
In the Elements tab, customize what fields will appear on stamps created from this template.
By default, the following elements will appear:
Company name: This will populate the name of the company of the person placing the stamp.
Stamp title: This field is required. It can convey the purpose of the stamp such as for a submittal review.
Approval status: Approved, Approved w/ Comments, Rejected.
- To edit any of the default statuses, hover over the status. Click the pen icon
 to change the text or click the trash icon
  to delete a status option.
 - Click Add another response to add more options.
- To edit any of the default statuses, hover over the status. Click the pen icon
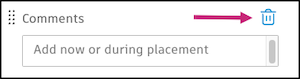
Comments: You can add comments that will appear on each stamp or leave this field blank to be filled later by anyone who uses this stamp. For example, use Comments to leave a space for an approver to provide context about the status they give.
To reorder the elements, hover over the element, hold the
 icon next to an element, and drag it into the order you want.
To delete an element, hover over the element and click the trash icon
. 
To add an element, click the plus icon next to Add new element.

The additional options include:
- Approver with Timestamp: This will place the name of the creator of the stamp and the date when the stamp was placed.
- Legal Disclosure: This will provide a field where you can add any legal disclosures related to the stamp. Text can be added to the template so every stamp will have the same disclosures or can be added later during placement.
Select the Styles tab to change the color, opacity, border thickness, corner style, and text alignment of the stamp.
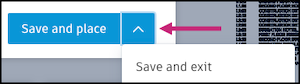
If you are ready to place a stamp using this template, click Save and place or if not, click the arrow and select Save and exit.
Place Stamps
Click the Stamps icon
in the markups toolbar. Select a stamp template.
Click Next.
In the Elements tab, fill out the fields of the stamp. You will see an active preview of your stamp on the right.
In the Styles tab, change the styles of the stamp like color, opacity, border thickness, corner style, and text alignment of the stamp.
Click Place.
Drag the stamp to the desired location and click the part of the document that you want to place the stamp on.
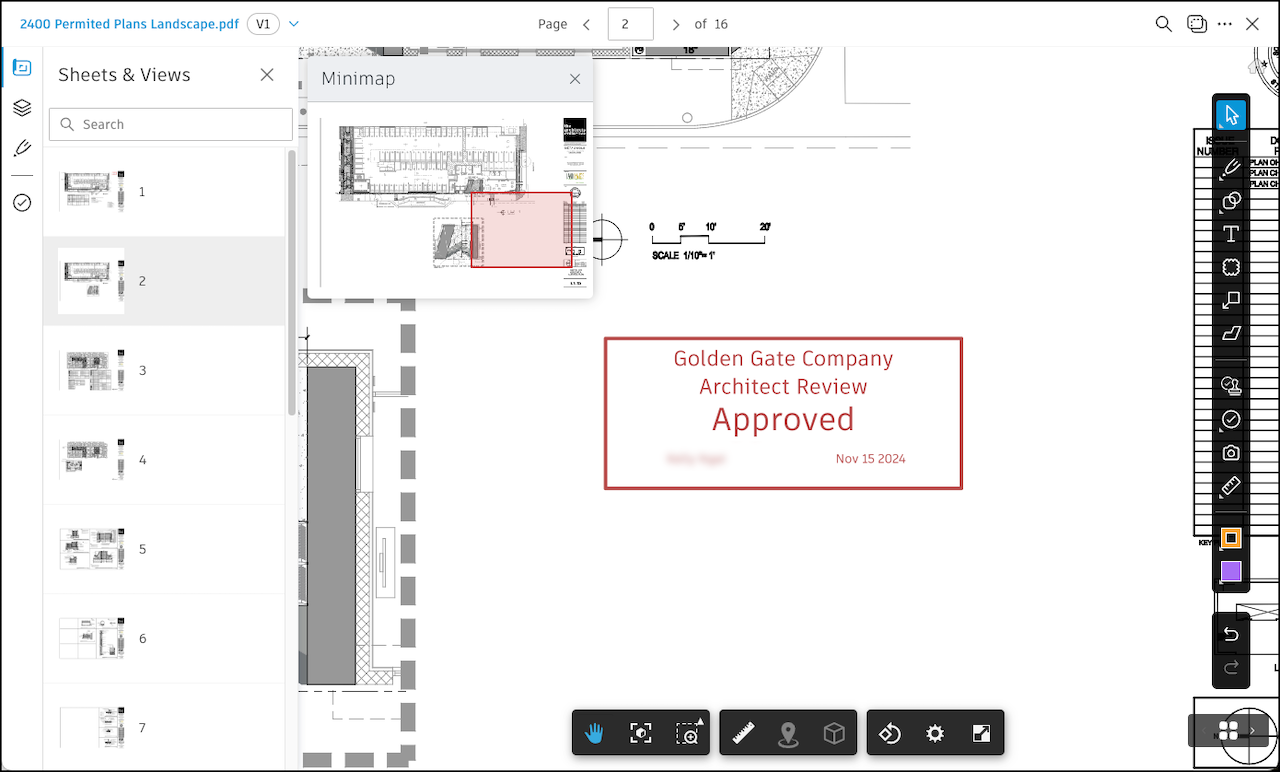
You can edit stamps just like any other markup. If you select it, a menu will appear with options to edit, duplicate, add a reference, and delete. You can also copy and paste a stamp from one page or sheet to another.
- Stamps are published by default.
- Once placed, the contents of a stamp can't be changed.
- Stamps do not promote to new versions.
- Stamps will sync to the Autodesk Construction Cloud mobile app. On mobile, stamps can only be viewed and selected to view their details.
Edit Stamp Templates
Only the template creator and administrators can edit stamp templates.
Click the Stamps icon
in the markups toolbar. Click the More menu icon
 .
. In this menu, you can:
- Rename: The stamp template name will become editable and you can edit the name right in the window.
- Edit: Edit the elements and styles of the stamp template.
- Delete: Permanently deletes the stamp template.