Review and Approve Files
Review or approve files sent to you as part of an approval workflow.
Access Your Reviews
When a review is initiated using an approval workflow for which you, your role, or company are designated as reviewers or approvers, your details are shown against the review in the Reviews tool. You may also receive an email notification.
If you received a notification email, click the View Review link at the bottom.
Alternatively, open the Reviews tool and click the review with your name, role, or company listed in the Next action by column:
 Tip: Click the column headers to sort the reviews, use the search box to search for a review by name or ID, or use the filter
 button to use filters including:
- Status
- Workflow
- Total steps
- Current step
- Initiated by
- Next action by
- Next action due
- Created on
- Finished on
Open and Manage a Review
Once you've found the review you're looking for, click the review to open it.

On the top row there is:
- Review number
- Review title: This is editable. See Edit Reviews for more details.
- Review status badge
There are also the following options:
- References: You can add references to a review to link related files, forms, and other reviews directly to a review.
- Void entire review: You can void a review subject to your permissions.
- Export report: You can export a report of the review. See Export Reviews Report help topic for more details.
Complete an Initial Review
Click Start review and confirm that you want the review to be assigned to you.
- If you are a reviewer, this will start the initial review(s).
- If you are an approver, this will start the final review.
Note: Only the specified reviewers and approvers, or a project administrator, can start an initial review and assign it to themselves.The review process differs depending on your role in the workflow (reviewer or approver) and the type of approval workflow template used. See the approval workflow and document review diagrams for an overview of the different templates and review processes.
You can now review the files.
Click a file to open it in the viewer.
Tip: Click the Name column header to sort the files alphabetically.Review the file. Depending on the type of file, you may be able to:
Compare
Click Compare
 to compare two versions of the same 2D or 3D file, or two different 2D files
Export, share, add to package, print, or download
Click the More menu
 to export, share, add to package, print the file, or download the source file.
Add markups
Add markups. Currently, members with View permission or above can add markups to files in a review. These markups are private by default which means that only the creator can view them. Members with Create permissions or above can publish their private markups to make them available to all project members to view. See Create and Style Markups help topic for more information.
Note: If the approval workflow includes files copying to a folder on completion, issue markups will not copy over with those files.Place stamps
Stamp the file to indicate the status, approval, or verification of the file. For example, a text stamp can be used to indicate that a PDF drawing is Approved, Draft, Rejected.
Click the Stamps icon
 on the markups toolbar to create and access templates, and place stamps.
 Create stamp templates: Members with Create permission or above can create multiple templates with different combinations of fields. The Approval status list contains default statuses to get you started.
-
- Select a stamp template.
- Complete the information under the Element tab.
- Adjust the style with the Style tab if necessary.
- Preview the look of the stamp before proceeding to place it.
Note:- Placed stamps are published by default.
- Once placed, the elements and styles of a stamp can't be changed.
- Stamps do not promote to new versions.
- Stamps will sync to the Autodesk Forma mobile app. On mobile, stamps can only be viewed and selected to view their details.
See Working with Stamps help topic for full details on how to create stamp templates and place stamps.
Close the viewer, and use the Comments column on the review page to add comments for each file as required. Comments can be added by the assigned reviewers or the administrators who initiated the review.
Tip: In a group approval workflow, where multiple members are assigned to each review step, all members who start or claim a step can view comments added by other reviewers before the review step is submitted.Repeat this for each file.
Tip: You can use the navigational arrows in the viewer to move between all files in the review, then click the X in the top-right corner of the viewer to return to the review page.As you carry out the review, details of the review progress are displayed in the Progress panel.
When you have reviewed each file, click Submit review and confirm that you want to end the initial review.
If reviewing as part of a group review, the number of reviews still required is displayed.
Note: The assignee and project administrators can click Delegate task to allow another reviewer to claim the review task. Project administrators, initiators, and members of single review steps can click Void entire review to end the whole review and mark it as void. Members of group review steps can't void reviews.Optionally, send an email notification to the next role in the workflow (reviewer, approver) and other project members to let them know the initial review is complete.
Complete the Final Review
Follow the steps in the Start a review section above to open the review.
On the review page, click a file to open it in the viewer.
Review the file, and:
- Compare different file versions as required.
- Click the More menu to export, share, add to package, print the file, or download the source file.
- Add markups
- Place Stamps
Close the viewer, and use the review page to:
- Add comments
- Choose a Review status
- Validate and rename any file names which don't conform to the naming standard if the files are copied to a naming standard enforced folder
- Add all attribute values which are required by the approval workflow
Repeat steps 3 and 4 for each file.
Click Submit review.
Note: If the review files are locked and they've been renamed or the custom attribute values are edited during the review, then the files can't be submitted at the final step with the relevant changes until the relevant member, or a member with Manage permission or above, has unlocked the files.If the approval workflow allows the approver to choose whether or not published markups on approved files copy to the target folder, you can decide at this stage by toggling Include all published markups on approved files.
If the approved files are new versions of existing files in the target folder, markups from the previous file versions and from the review will both appear on the approved files.

Click Submit.
The review is displayed in the Reviews tool and is marked as CLOSED. The total number of files included, approved, and rejected are displayed:
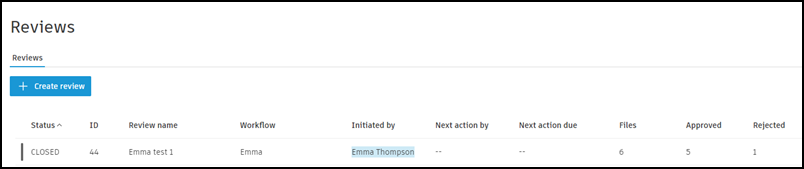 Tip: Click a closed review to open the Review detail page. Here you can see a record of the review progress and details of each file including, if applicable, the folder that each approved file was copied to. You can also click Export report to download an Excel spreadsheet containing the review details and any comments made during the review and approval steps.Note: If a custom attribute is edited during the final review step, the edited value will not be saved until the file is approved. If you append this attribute to the exported file name during this step, the final file name will reflect the original, not the edited value. See Export PDF Files for more information on exporting PDF files and selecting custom attribute values to append to the name of the exported file.
If files are copied as part of a review process and you then exported the file, the source file is exported.