Workflow
A routine as a whole can execute complicated logic, but it consists of a serial chain of simple Actions. The interactive Action Diagram on the Routines page allows users to add new actions to a routine, edit or delete existing ones, or drag and drop actions into new positions. A blank routine appears on this diagram as follows:

The highlighted "Add Action" button brings up a panel to add a new action to the bottom of the existing logic chain. However, if the user clicks on any of the arrows between actions (or, in the case of a blank routine, the arrow between the start and end points of the routine), a "Insert" button appears next to the link, which also brings up the "New Action" panel. Once the user has created an action, he or she can click on the action to reveal buttons to edit or delete that action. Additionally, by clicking and holding on an action, the user can then drag that action onto another link to move it. A user must be careful, however, to
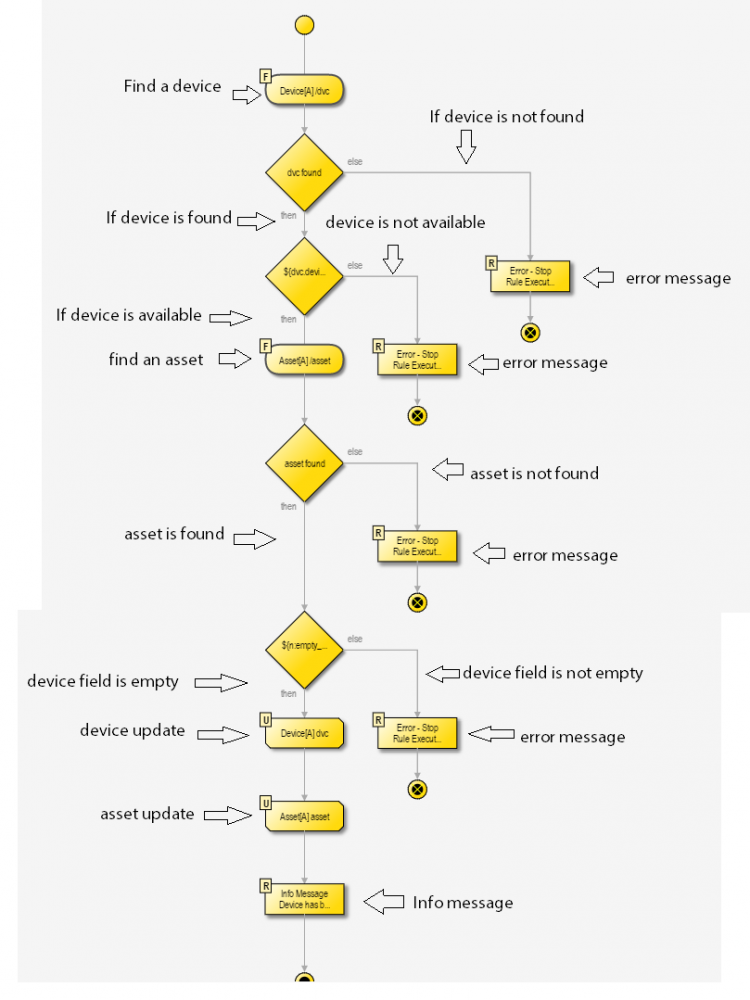
The screenshot below shows an example of a fully-formed routine. In this example, two resource types, "Device" and "Asset" can contain references to one another, and a form exists where a user can select a device and an asset that he or she wishes to link together. When the user submits the form, the system executes the following routine: it searches for a Device resource using an identifier provided by the user, and if found, it checks whether the Device is marked as "available", meaning it has not yet been linked to an Asset. If so, the system searches for an Asset with the identifier the user provided on the form, and checks whether it already has a link in its "device" field. If the system passes all of these checks, it updates the found resources to include links to one another, and displays an info message to the user: "Device has been successfully installed". If the system fails any of these checks, it stops the execution of the routine and displays an error message to the user instead, informing him or her of the specific cause of failure.
