When nesting on grained material, such as stainless steel, it is often a requirement to keep the grain running in the same direction through each development of a part. This can be achieved by use of the Graining Angle setting. The Graining Angle can be set up on any part, whether a pattern or CAD part. However, if it is to be used by default on a pattern, it must be set up as a catalog part. If the Graining Angle is set up in a catalog part that is still in the item folders, then the option will be active each time the part is selected. Alternatively, if a pattern or CAD part that has not had its graining angle set has been added to the Job Contents screen, it can be set there.
To set Graining Angle:
-
Right-click on the catalog part or CAD part within Item Folders, or on the added pattern or CAD part within Job Contents.
-
From the menu that displays, click Properties and then click the Developments tab.
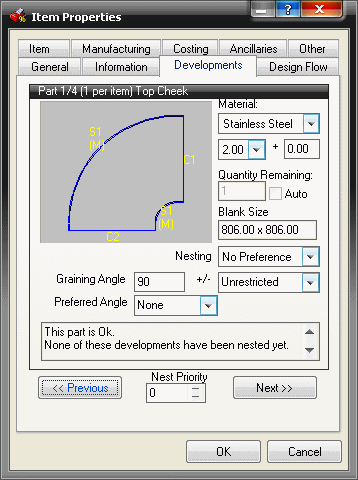
The Graining Angle has three separate fields that control how the part is rotated as it is placed on the sheet.
-
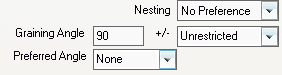
Nesting: In the Nesting field, from the drop-down menu select the preferred nesting method.
-
Graining Angle: The value inserted into the Graining Angle field represents how many degrees the part will need to be rotated before the grain will run correctly through it. If we assume that the grain is always running down the length of the sheet, this means any part must have its development rotated to match this grain and once set can only be rotated by 180 degrees.
-
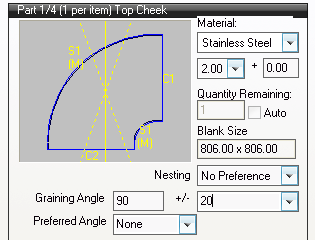
+/-: This field represents the degree of rotation the part will have from the angle that has been assigned. The image below has a +/- field setting of 20. There is now two dotted lines visible. These represent the graining angle and the +/- variables. When nested the part will re-orientated so the yellow line runs along the length of the sheet.
-
Preferred Angle: The Preferred Angle field has no effect if a graining angle is specified, but if no graining angle has been set up, the preferred angle will define the default nesting angle of the development.
Note: If the preferred angle is used, the user still has the ability to rotate the part through any angle.
-
- If a catalog part has more than one development, it is possible to scroll to each of these by using the
 and
and
 buttons.
- When all of the graining angles have been set, click OK.
When these parts are either automatically or manually nested, they will only be rotated within the parameters set here.