CAMduct can import data from software packages that specialise in drawing structural steel buildings, such as XSteel, StruCAD, AutoCAD-Bolt-On's. By-products of the design process are lists of steel parts that contain data for automatic processing. These can then be imported directly into CAMduct.
For example, this data can include information on the following, which can be used in the fabrication process:
- Girders: Material, Size, Lengths, Hole positions
- Fastening: Plates: thickness, Hole sizes and positions.
- Brackets: Material, Size, Position
Various file formats are used to output the data, for example DSTV, DXF, and ASCII text files can be used. Special filters can automatically process the fastening plates in any of these formats. The example shown here includes parts produced by XSteel in the DSTV format.
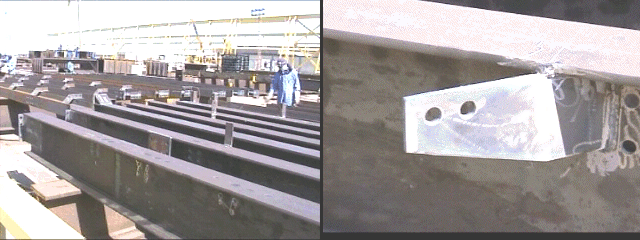
Fastening Plates
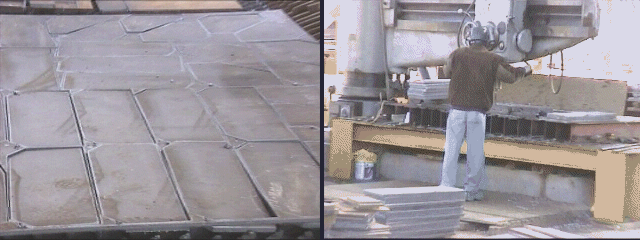
These are used to join together various configurations of steel girders. The plates are constructed from steel in the range 2-25mm thick. The thinner, rectangular plates can be sheared from flat stock sheets and then the bolt holes are punched or drilled. The thicker plates are often cut on a profiling machine using laser, oxy-fuel or plasma. The hole positions can be cut or center marked dependent on the accuracy and tools available on the profiling machine.
Main Features
Below is a list of some of the main CAMduct features that can be used with structural steel import:
- Import over 500 fastening plates automatically
- Sort the parts in material, thickness, quantity, profile cut/shear
- Auto-nest all the plates to be profile cut using multi-torch or single torch nesting
- Produce the NC data for most types of profiling machine-controller-tool combinations
- Download the NC files to the machine controller
- Produce shear cutting lists
- Drill-punch reports
- Material usage reports and other management information
How to Create an Installed Filter
The DSTV format includes part geometry, hole sizes and positions, part numbers, material, thickness and quantity.
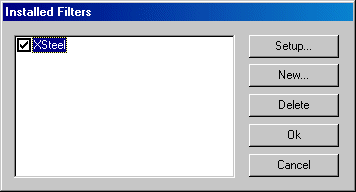
- Click File
 Setup
Installed Filters, then click New.
Setup
Installed Filters, then click New.
The Filter dialog displays.
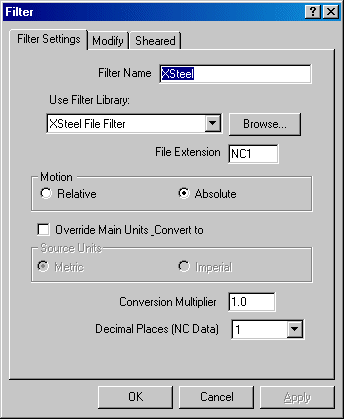
- In the Filter Name field, enter the name of the filter; in this case, XSteel.
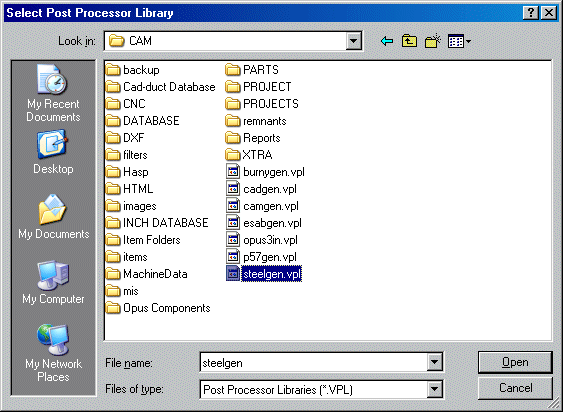
- To select the filter that is displayed in the Use Filter Library field, click Browse.
The default installation folder displays.
- Select the steelgen.vpl file and click Open.
The File Extension field will now be shown as NC1. This is the file extension created by the XSteel software.
- Click OK.
The filter will then be available. It is also possible to configure the filter to shear certain materials and thicknesses.
- Click File
Setup
Installed Filters and the following dialog displays.
- Highlight the appropriate filter, click Setup, and then click the Sheared tab.
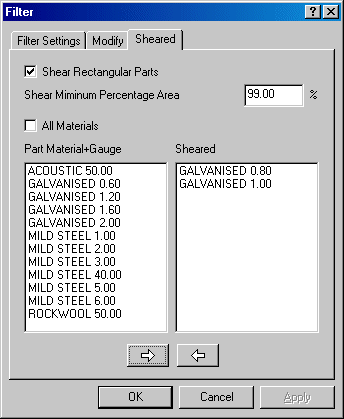
This lets you select which material will be sheared rather than profiled.
- From the material list in the left (Part Material+Gauge) window, click on the relevant material and click on the right arrow.
This places the selected material in the right hand pane. All of the materials that appear in this window will be sheared.
- Click Ok when all of the materials to be sheared have been selected.
Note: Only parts that are rectangular will be sheared.
- Optionally, you may click the Alignment tab to pre-align the parts imported by the filter for nesting.
When the Align Parts option is enabled, the length and width of the imported part are compared. The Graining Angle of the part is then set so that the part will be constrained to be nested with its longer side in the desired orientation (horizontal or vertical). When Align Parts is disabled, which is the default, the part may be rotated freely when nested. This may be useful for structural parts where the graining of the material has a marked effect on the strength of the part in its installed orientation.
Next, in the database, it is also necessary to ensure the Auto-Increment Item Numbers option is disabled. This will allow the imported parts to come in with heir own item numbers.
- Click File
Setup
Main Database
Takeoff
Item Entry, and ensure that the Auto-Increment Item Numbers option is disabled.
Importing DSTV Files (Fastening Plates)
Once the filter has been set up it is then possible to import the relevant files.
- Click File
Import
Items.
- In the of Type field, from the drop-down menu select XSteel filter (*.NC1).
- Use the Look In field to find the required folder of *.NC1 Files (Fastening Plates) produced from an approved XSteel drawing.
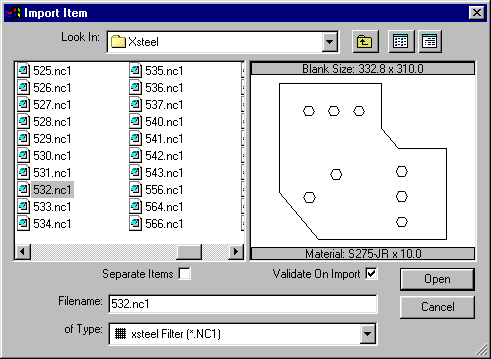
- Select the relevant file to be imported and click Open.
Alternatively use Ctrl+A to select all, and then click Open. The following dialog is displayed. This allows the user to change the material for each of the imported items.
- Click Apply to accept the material and gauge that has been set in the part itself.
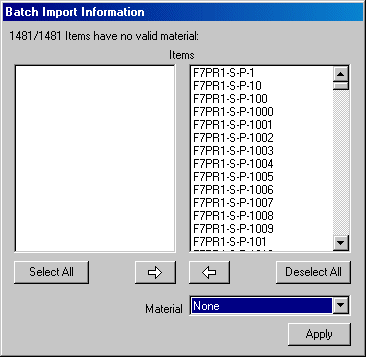
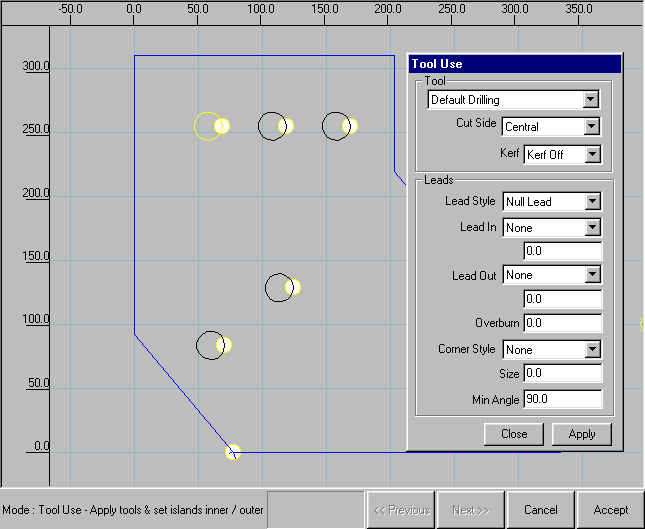
- If a single part has been imported, the part will be taken into Profiler, where it is possible to check the parts for errors, tool use etc.
- If multiple parts have been imported, it is possible to change the material and quantities for each part.

- Each part now has its own tab in the dialog. This lets the user configure each part accordingly. When the changes are made, click OK.
- All of the imported items will then appear in the Job Contents dialog. Depending on the parameters set during the setup of the filter some of the parts will be sheared and some machine cut.
The example job below contains over 800 parts weighing three tonnes. The total time to process the parts ready for printing the reports and cutting the parts is less than 5 minutes.
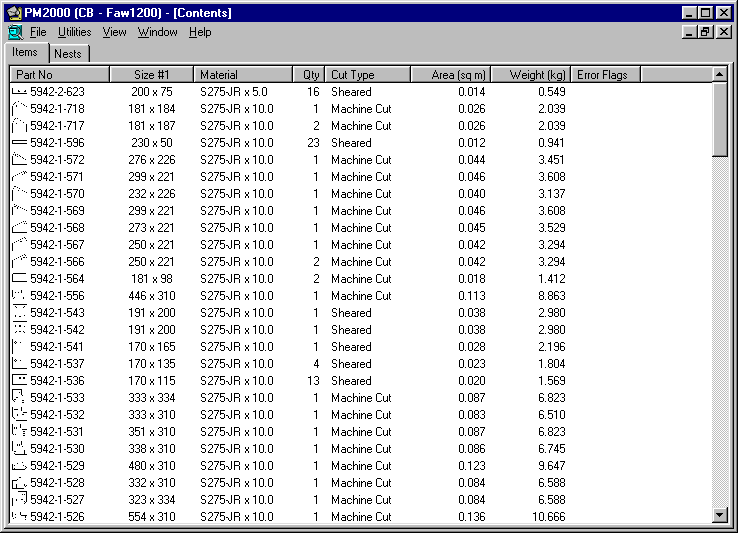
Once the parts have been imported into the Job Contents dialog, it is possible to edit and nest them in the normal way.