You can create a Product List for a sub assembly so that when the sub assembly is inserted into a model, you can select from a list of pre-defined sizes of the sub assembly.
The procedure below describes how to create a Product List for a Valve Set sub assembly.
- Once the Valve Set sub assembly has been created and tested, locate the Valve Set sub assembly within the Item Folders view.
- Right-click on the Valve Set sub assembly and select Create Product List.
The Takeoff dialog for the sub assembly displays.
-
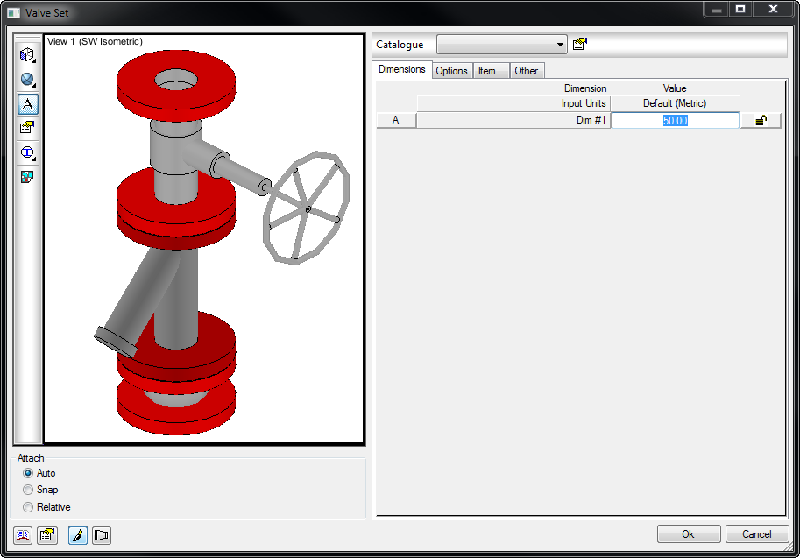
- Click the Edit Product List button
 to display the Edit Product List dialog.
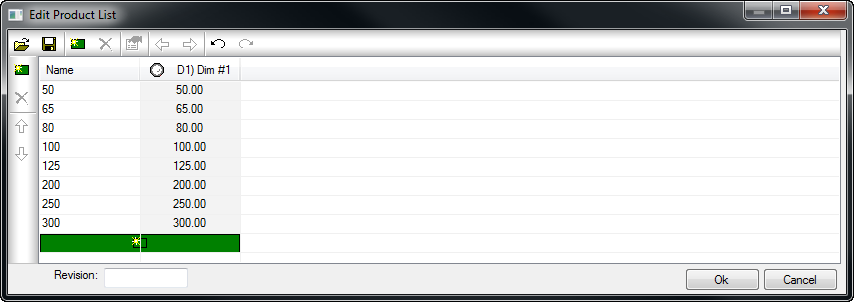
- Select the cell within the Name column.
- To apply a dimension to drive the various sizes of the Valve Set sub assembly, click the Add Column
 button.
- Use the Add Column dialog to add various dimensions to the Product List for this sub assembly.

For example, you can add Area, Weight, Order No, ID No.
- Type the following for the Name: 50, D1) Dim #1 : 50
Enter the Initial value of 50 for Dim#1.
- Repeat this step for all required sizes, ranging from 65, 80, 100, 125, 200, 250, 300.
- Click OK on the Edit Product List dialog to finalise the Product List.
- Click OK on the item Takeoff dialog.
- On the file Save As dialog, specify a name and location for this newly updated Valve Set sub assembly.
- Apply this updated Valve Set sub assembly accordingly to the appropriate service or service template.